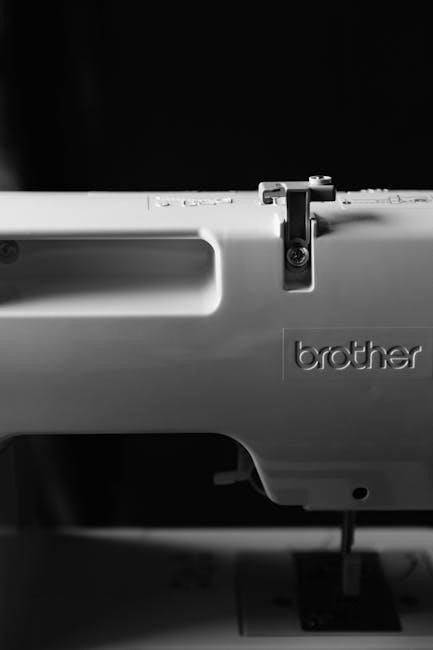
the idiot dostoevsky pdf

The Idiot by Dostoevsky: A Comprehensive Guide to Finding and Utilizing PDF Versions (as of 04/14/2026)

Discover readily available PDF versions of Dostoevsky’s “The Idiot,” including the Eva Martin translation, optimized for eReaders with detailed tables of contents.

Fyodor Dostoevsky’s “The Idiot,” a profound exploration of human psychology and morality, continues to captivate readers today. Finding accessible digital versions, particularly PDFs, has become increasingly easy. This guide, current as of April 14, 2026, details where to locate these files.

Numerous online platforms offer “The Idiot” in PDF format, ranging from free options like Project Gutenberg to purchasable versions from booksellers. Discord communities also facilitate sharing and discussion of these digital texts, enhancing the reading experience.

Why Seek a PDF Version of “The Idiot”?

PDFs offer unparalleled portability and convenience for reading Dostoevsky’s complex novel. They are compatible with a wide range of devices – from eReaders like Kindle and Kobo to smartphones and computers – allowing access anytime, anywhere.

Furthermore, PDFs facilitate annotation and searching, crucial for in-depth study and analysis. Digital versions are often more affordable than physical copies, and readily available for immediate download, making “The Idiot” instantly accessible.

Understanding Different PDF Versions

Explore various PDF translations, like Eva Martin’s popular rendition and the Pevear and Volokhonsky version, alongside free and paid options, each with unique features.

Eva Martin Translation: A Popular Choice

The Eva Martin translation of “The Idiot” is widely favored for its readability and accessibility, making it an excellent entry point for new readers. This carefully formatted ebook boasts a functional, detailed table of contents, enhancing the digital reading experience. Many PDF versions available online are based on this translation, offering a convenient and cost-effective way to engage with Dostoevsky’s masterpiece. Its clarity and faithfulness to the original text contribute to its enduring popularity among scholars and enthusiasts alike, ensuring a rewarding literary journey.

Pevear and Volokhonsky Translation: Another Option

For readers seeking a translation prioritizing stylistic nuance and a closer adherence to Dostoevsky’s original Russian prose, the Pevear and Volokhonsky version is a compelling choice. While potentially demanding for newcomers, it offers a richer, more textured reading experience. PDF versions of this translation are available for purchase through online booksellers, though free options are less common. This translation aims to preserve the author’s unique voice and complexities, appealing to seasoned Dostoevsky readers.

Free vs. Paid PDF Versions: What’s the Difference?

Generally, free PDF versions, often found on platforms like Project Gutenberg, may have formatting inconsistencies or lack supplementary materials. Paid versions, purchased from booksellers, typically offer superior formatting, complete texts, and potentially include introductions or annotations. While free options provide access, paid PDFs ensure a polished reading experience. Consider your priorities – accessibility versus quality – when choosing. Beware of unofficial sources offering free PDFs, as they may contain malware or incomplete texts.

Where to Find “The Idiot” PDF Online

Explore options like Project Gutenberg, Internet Archive, and online booksellers (Amazon, Google Books) to locate and download PDF copies of Dostoevsky’s novel.

Project Gutenberg: A Source for Free eBooks

Project Gutenberg offers a valuable, legal avenue for accessing “The Idiot” in PDF format, providing free eBooks of classic literature. While availability can fluctuate due to copyright restrictions and digitization efforts, it’s a reliable starting point. Users should verify the translation and completeness of the text before committing to a lengthy read.

The platform relies on volunteer contributions, meaning formatting may vary. It’s a fantastic resource for budget-conscious readers seeking access to Dostoevsky’s masterpiece without cost, but quality control isn’t always guaranteed.

Internet Archive: Accessing Digitized Copies

The Internet Archive is a digital library offering access to numerous digitized copies of “The Idiot,” often including older translations and editions in PDF format. It functions as a “wayback machine” for books, providing a diverse range of versions. Users can often “borrow” these PDFs for a limited time.

However, quality can vary significantly, and some scans may be imperfect. It’s crucial to check the source and scan quality before downloading, ensuring readability and completeness for a satisfying reading experience.

Online Booksellers (Amazon, Google Books): Purchasing PDFs

Major online booksellers like Amazon and Google Books frequently offer “The Idiot” in PDF format for purchase. These versions generally provide high-quality formatting and reliable text, often including features like adjustable fonts and searchable text.

Purchasing ensures a legitimate copy and supports the publishers and translators. While costing money, this method guarantees a clean, complete, and legally obtained digital edition of Dostoevsky’s masterpiece.

Potential Risks of Downloading from Unofficial Sources

Downloading PDFs from unofficial websites carries significant risks. These sources may host corrupted files, containing malware or viruses that can compromise your device. Furthermore, such downloads often violate copyright law, potentially leading to legal repercussions.

The quality of text can be poor, with formatting errors or incomplete content. Prioritize legitimate sources to ensure a safe and legally sound reading experience of Dostoevsky’s “The Idiot.”

Evaluating the Quality of a PDF

Assess PDF quality by checking text formatting, completeness (abridged vs. unabridged), functional table of contents, and the presence of helpful annotations.

Text Formatting and Readability

Crucially, evaluate the PDF’s text formatting for a comfortable reading experience. Look for proper hyphenation, consistent font choices, and adequate margins. Poor formatting can significantly hinder comprehension of Dostoevsky’s complex prose. A well-formatted PDF will maintain paragraph structure and utilize appropriate spacing, enhancing readability on various devices. Ensure the font size is adjustable for personalized comfort, and that there are no noticeable distortions or rendering issues affecting the text’s clarity.

Completeness of the Text (Unabridged vs. Abridged)

Verify whether the PDF offers the complete, unabridged version of “The Idiot.” Abridged editions omit significant plotlines and character development, diminishing the novel’s impact. Dostoevsky’s intricate narrative requires the full scope of his writing. Confirm the PDF’s page count aligns with standard unabridged versions. Beware of suspiciously short PDFs, as they likely represent an abridged adaptation, sacrificing the richness and depth of the original masterpiece.

Table of Contents Functionality

Essential for navigating “The Idiot’s” lengthy narrative, a functional table of contents is crucial in a PDF version. Look for clickable links that directly transport you to specific parts or chapters. A well-formatted table of contents enhances the reading experience, allowing quick access to desired sections. PDFs lacking this feature require manual scrolling, hindering efficient study or revisiting key passages. Prioritize PDFs explicitly stating a “detailed and functional” table of contents.

Valuable additions to any “The Idiot” PDF are insightful annotations or critical introductions. These can provide historical context, character analyses, or explanations of complex themes. Such features enrich understanding and deepen appreciation for Dostoevsky’s masterpiece. While not always present, PDFs offering scholarly introductions or helpful notes represent a superior choice for serious students or those new to the novel.

Utilizing the PDF Effectively

Maximize your reading experience by leveraging PDF annotation tools, searching for key passages, and ensuring compatibility with your preferred eReader device.

eReader Compatibility (Kindle, Kobo, etc.)

Ensure a seamless reading experience by verifying PDF compatibility with your eReader. While most devices support PDFs, formatting can vary. Some eReaders, like Kobo, handle reflowable text better than others. Kindle may require conversion.

Consider that complex formatting within the PDF – such as intricate layouts or images – might not translate perfectly. Testing a sample chapter beforehand is advisable. Optimized PDFs, designed for eReaders, generally provide the best results, enhancing readability and navigation.

PDF Annotation Tools for Study

Enhance your study of “The Idiot” using PDF annotation tools. Software like Adobe Acrobat Reader, or dedicated PDF editors, allows highlighting key passages, adding notes, and underlining important themes.

Utilize these features to actively engage with Dostoevsky’s complex narrative. Digital annotations are searchable and easily organized, facilitating deeper analysis and recall. Many tools also support exporting annotations for essays or discussions, streamlining your academic workflow.

Searching Within the PDF for Specific Passages

Leverage the search function within your “The Idiot” PDF to quickly locate specific passages, character mentions, or thematic elements. This is invaluable given the novel’s length and intricate details.

Employ keywords related to Prince Myshkin, Nastasya Filippovna, or recurring motifs to efficiently navigate the text. A robust search function saves time and allows for focused study, aiding in comprehension and analysis of Dostoevsky’s masterpiece.

Printing Considerations

Before printing your “The Idiot” PDF, carefully review page margins and font sizes to ensure readability. Large file sizes may necessitate printing in sections to conserve paper and ink.

Consider a grayscale print option for cost-effectiveness, as the novel’s aesthetic doesn’t rely on color. Preview the print job to confirm formatting accuracy before committing to a full print run, optimizing the physical reading experience.

“The Idiot” and Online Communities

Engage with fellow readers on Discord servers dedicated to Dostoevsky, utilizing bots for insightful discussions about “The Idiot” and shared reading experiences.

Discord Servers Dedicated to Dostoevsky

Numerous Discord servers cater specifically to discussions surrounding Fyodor Dostoevsky’s works, including a vibrant community focused on “The Idiot.” These servers provide a space for enthusiasts to analyze characters, themes, and symbolism within the novel.

Discord Me highlights finding engaging communities, making it easier to locate servers dedicated to literature. Users share insights, interpretations, and even organize shared reading schedules, enhancing the overall experience of engaging with Dostoevsky’s masterpiece. These platforms foster a collaborative learning environment.

Discord Bots for Literature Discussion

Several Discord bots enhance literary discussions, offering features beneficial for analyzing “The Idiot.” While specific bots dedicated solely to Dostoevsky are rare, general-purpose bots facilitate quote sharing, poll creation for character analysis, and even automated discussion prompts.

These bots can schedule reading reminders and integrate with other platforms; Discord’s customizable nature allows server administrators to tailor bot functionality to suit the community’s needs, fostering deeper engagement with the novel’s complex themes and characters.

Finding Communities for Shared Reading

Locating Discord servers dedicated to Dostoevsky or 19th-century Russian literature is key to shared reading experiences of “The Idiot.” Platforms like Discord Me catalog public servers, allowing users to search for relevant communities.

These groups often organize scheduled reading sessions, chapter-by-chapter discussions, and character analyses. Participating in these communities enhances understanding and provides diverse perspectives on the novel’s intricate plot and philosophical themes, enriching the reading journey.

Discord as a Platform for Literary Discussion

Discord excels as a hub for discussing “The Idiot,” offering voice, video, and text channels for engaging with fellow readers and sharing insights.

Benefits of Discussing “The Idiot” on Discord

Engaging with “The Idiot” on Discord fosters a deeper understanding of Dostoevsky’s complex narrative. Real-time discussions allow for immediate exploration of themes, character motivations, and symbolic elements.

Discord’s versatile platform supports varied discussion formats – text-based analysis, voice chats for spontaneous debates, and even shared PDF annotation links.

Furthermore, the community aspect provides diverse perspectives, enriching your reading experience and revealing nuances you might miss independently. It’s a space to build connections with fellow literature enthusiasts!

Finding Relevant Discord Servers

Locating active “The Idiot” or Dostoevsky-focused Discord servers is achievable through platforms like Discord Me and Discordzik, dedicated to listing public servers. Search using keywords like “Dostoevsky,” “Russian Literature,” or specifically “The Idiot.”

Explore server descriptions to gauge activity levels and discussion focus. Consider joining multiple servers to find a community aligning with your preferred style of engagement.

Don’t hesitate to ask server moderators about specific channels dedicated to discussing the novel and sharing PDF resources.

Discord Features Useful for Book Clubs

Discord’s text channels facilitate asynchronous discussion of “The Idiot,” allowing members to share insights and analyses at their own pace. Voice channels enable real-time book club meetings, fostering a sense of community.

Utilize Discord’s threading feature to organize discussions around specific chapters or themes. Share PDF excerpts or links directly within channels.

Employ roles to designate moderators and members, and leverage bots for scheduling meetings and managing resources.

Technical Aspects of Discord

Discord operates across Windows, macOS, Android, iOS, Linux, and web browsers, boasting roughly 150 million monthly active users and 19 million weekly servers.

Discord Availability on Multiple Platforms

Discord’s widespread accessibility is a key strength for discussing literature like Dostoevsky’s “The Idiot.” It functions seamlessly on Windows, macOS, and Linux operating systems, ensuring broad desktop compatibility. Mobile users can engage via dedicated Android and iOS applications, plus iPadOS support.

Furthermore, a web browser version eliminates the need for installation, allowing access from virtually any device with an internet connection. This multi-platform approach fosters inclusive literary communities, regardless of technological preferences.

Discord User Statistics (2024 Data)

As of 2024, Discord boasts approximately 150 million monthly active users, demonstrating its immense popularity as a communication platform. Around 19 million servers are active weekly, showcasing a vibrant and diverse community landscape. These numbers indicate a substantial potential audience for discussing complex novels like Dostoevsky’s “The Idiot.”

The platform’s scale facilitates finding niche groups dedicated to literature, fostering engaging conversations and shared reading experiences amongst a large user base.

Discord’s Core Functionality: Voice, Video, and Text

Discord’s versatility stems from its core features: voice channels for real-time discussion, video conferencing for virtual book clubs, and robust text channels for asynchronous analysis of “The Idiot.” This multifaceted approach allows for diverse engagement.

Users can share insights, quotes, and interpretations through text, while voice and video enhance collaborative exploration of Dostoevsky’s complex themes and characters.

Legal Considerations Regarding PDFs

Understand copyright law concerning eBook distribution; ensure PDFs are accessed legally, supporting authors and publishers while respecting fair use for educational purposes.

Copyright Law and eBook Distribution

Navigating copyright is crucial when accessing “The Idiot” PDFs. Dostoevsky’s work, while in the public domain in some regions, often has new translations protected by copyright. Distributing unauthorized copies of copyrighted translations is illegal.

Free PDFs from sources like Project Gutenberg generally offer versions where copyright has expired. Purchasing from legitimate booksellers ensures compliance and supports the publishers and translators who bring these works to new audiences. Always verify the source’s legitimacy to avoid legal issues.

Fair Use and Educational Purposes

Limited use of copyrighted “The Idiot” PDF excerpts may fall under “fair use” for educational purposes, like academic study or literary criticism. However, distributing entire PDFs to a class without permission infringes copyright.

Fair use is context-dependent; transformative use – adding new analysis – strengthens the claim. Always cite sources properly. For broader classroom access, seek licensing or utilize public domain translations, respecting intellectual property rights while fostering literary exploration.

Supporting Authors and Publishers

While free “The Idiot” PDFs exist, consider purchasing a legitimate eBook or physical copy to support Dostoevsky’s estate and publishers. This ensures continued literary production and fair compensation for creative work.

Purchasing also guarantees a high-quality, properly formatted reading experience. Supporting the ecosystem of literature allows for future translations and preservation of classic texts like “The Idiot,” benefiting readers for generations to come.

Troubleshooting PDF Issues

Resolve common problems like corrupted files, viewing errors, or large download sizes when accessing “The Idiot” PDFs, ensuring a smooth reading experience.

Corrupted PDF Files

Encountering a corrupted PDF of “The Idiot” can be frustrating. This often manifests as garbled text, missing pages, or the inability to open the file at all. Try downloading the PDF again from a different source, verifying the download completed fully.

Utilize a PDF repair tool – several free options are available online. Ensure your PDF viewer is updated to the latest version, as older versions may struggle with newer PDF formats. If issues persist, consider a different translation or source for a reliable copy.

PDF Viewing Errors

Experiencing errors while viewing “The Idiot” PDF? Common issues include blank pages, distorted formatting, or slow rendering. First, update your PDF reader (Adobe Acrobat Reader, Foxit Reader, etc.) to the newest version. Clear the cache within your PDF viewer; temporary files can cause conflicts.

Try opening the PDF in a different reader to isolate the problem. Ensure your graphics drivers are up-to-date, as they impact rendering. If problems continue, the PDF itself might be flawed.

Large File Sizes and Download Problems

Downloading “The Idiot” PDF can be challenging due to its size, especially unabridged versions. Slow connections or unstable internet access frequently cause interruptions. Utilize a download manager to resume incomplete downloads. Check your available disk space; ensure sufficient room exists.

Consider using a wired connection instead of Wi-Fi for greater stability. If the file remains problematic, the source may have corrupted the PDF during upload.

Alternatives to PDF: eBooks and Online Reading

Explore ePub, a popular eBook standard, or subscription reading platforms for “The Idiot.” Audiobook options also provide an immersive literary experience.

ePub Format: A Popular eBook Standard

ePub is a widely supported eBook format offering several advantages over PDFs for reading “The Idiot.” Unlike fixed-layout PDFs, ePub utilizes reflowable text, adapting to different screen sizes and fonts for optimal readability on various devices. This dynamic formatting enhances the reading experience, particularly on eReaders like Kobo or Nook.

ePub files are generally smaller than PDFs, saving storage space. They also often allow for more extensive customization options, such as adjustable margins and line spacing. Many online bookstores offer “The Idiot” in ePub format, providing a convenient alternative to PDF downloads.

Online Reading Platforms (Subscription Services)

Several subscription services provide access to “The Idiot” without requiring a direct PDF download. Platforms like Scribd or Kindle Unlimited offer extensive eBook libraries, potentially including Dostoevsky’s masterpiece. These services operate on a monthly fee, granting readers unlimited access to a vast catalog of titles.

This can be a cost-effective option for avid readers, eliminating the need to purchase individual eBooks or PDFs. However, availability may vary, and access is contingent upon continued subscription payments.

Audiobook Options for “The Idiot”

For those preferring to listen rather than read, audiobook versions of “The Idiot” are widely available. Platforms like Audible, Google Play Books, and Kobo offer professional narrations, providing an immersive experience. While not a PDF, audiobooks present an alternative way to engage with Dostoevsky’s complex novel.

Audiobooks are ideal for commutes or multitasking, allowing readers to enjoy the story without needing a physical book or digital screen. Purchasing an audiobook can complement a PDF version for a richer understanding.

Accessing and Enjoying Dostoevsky’s Masterpiece

Ultimately, accessing “The Idiot” in PDF format, or through alternative methods like ePub or audiobooks, is remarkably straightforward in 2026. Numerous resources, from Project Gutenberg to online booksellers, provide options for every reader.

Whether you choose a free or paid version, remember to prioritize quality and legality. Engaging with online communities, like those on Discord, can further enhance your appreciation of Dostoevsky’s profound work, fostering a deeper understanding of this literary gem.

mitsubishi outlander owners manual pdf

Mitsubishi Outlander Owners Manual PDF: A Comprehensive Guide

Accessing your Mitsubishi Outlander’s manual in PDF format provides a convenient and readily available resource for vehicle information‚
spanning models from 2016 to 2025.
This digital guide offers comprehensive details‚ ensuring owners have crucial insights at their fingertips‚ anytime and anywhere.

The Mitsubishi Outlander Owners Manual serves as an essential companion for all drivers and passengers‚ offering a detailed understanding of your vehicle’s features‚ operation‚ and maintenance requirements. This manual isn’t merely a collection of instructions; it’s a comprehensive guide designed to enhance your driving experience and ensure the longevity of your Outlander.

Whether you’re a first-time owner or a seasoned Mitsubishi enthusiast‚ the manual provides crucial information regarding safety precautions‚ driving techniques specific to the Outlander‚ and explanations of the various systems within the vehicle. It covers everything from basic controls to advanced technologies‚ including the specifics of the PHEV models.

Downloading the PDF version allows for easy access on smartphones‚ tablets‚ or computers‚ eliminating the need to carry a physical copy. This digital format ensures you always have the information you need‚ whether you’re on the road or preparing for scheduled maintenance. Understanding your vehicle is the first step towards safe and enjoyable driving.

Why You Need the PDF Version

Opting for the Mitsubishi Outlander Owners Manual in PDF format delivers unparalleled convenience and accessibility. Unlike a traditional printed manual‚ the digital version is readily available on your smartphone‚ tablet‚ or computer‚ meaning vital information is always at your fingertips – whether at home‚ on the road‚ or during maintenance.

The PDF format enables quick searches for specific topics‚ saving you valuable time when troubleshooting or understanding a particular feature. Furthermore‚ it eliminates the risk of losing or damaging a physical manual. Downloading the manual is free of charge for models spanning 2016-2025‚ providing cost-effective access to crucial vehicle details.

Having a digital copy also allows for easy printing of specific sections if needed‚ offering a flexible solution tailored to your preferences. Embrace the efficiency and practicality of the PDF version for a superior ownership experience.

Locating the Official Mitsubishi Outlander Manual

Finding the official Mitsubishi Outlander Owners Manual PDF is straightforward‚ ensuring you access accurate and reliable information. Numerous online resources offer free downloads for models ranging from 2008 to 2024‚ including the popular 2016-2025 range. A quick internet search using terms like “Mitsubishi Outlander owners manual PDF” will yield several results.

Dedicated Mitsubishi online communities and forums‚ such as the MOTOR Mitsubishi forum (covering ASX‚ Eclipse Cross‚ Outlander‚ and Pajero)‚ often host direct download links or provide guidance on locating the correct manual for your specific model year.

Always prioritize official sources to avoid inaccurate or outdated information. Downloading from reputable websites guarantees you receive the comprehensive guide designed by Mitsubishi to support your vehicle ownership experience. Verify the model year matches your Outlander for optimal compatibility.

Understanding Your Outlander: Key Sections

The Outlander manual systematically covers vehicle identification‚ safety precautions‚ driving operations‚ and detailed system overviews‚
providing a structured approach to understanding your vehicle’s features.

Vehicle Identification & Specifications

This crucial section of the Mitsubishi Outlander owner’s manual details how to locate and interpret your vehicle’s unique identification numbers‚ including the Vehicle Identification Number (VIN). Understanding the VIN is paramount for tracking vehicle history‚ warranty claims‚ and potential recalls. The manual thoroughly explains the VIN’s composition and decoding process.

Furthermore‚ it provides a comprehensive listing of vehicle specifications. This encompasses engine details (type‚ displacement‚ horsepower)‚ transmission information‚ dimensions (length‚ width‚ height)‚ weight capacities (gross vehicle weight rating‚ payload capacity)‚ and tire specifications. Detailed information regarding standard and optional equipment is also included‚ allowing owners to accurately identify the features equipped on their specific Outlander model. This section serves as a vital reference point for maintenance‚ repairs‚ and understanding your vehicle’s capabilities.

Safety Precautions & Warnings

The Mitsubishi Outlander owner’s manual dedicates a significant portion to safety‚ emphasizing precautions and warnings to minimize risk while operating the vehicle. This section covers critical information regarding the proper use of seatbelts‚ child restraint systems‚ and airbags‚ detailing installation guidelines and safety recommendations.

It also outlines essential warnings concerning driving conditions‚ such as inclement weather‚ and potential hazards like distracted driving. Detailed explanations of the vehicle’s safety systems – including anti-lock brakes‚ stability control‚ and traction control – are provided‚ alongside instructions on their limitations. Owners will find guidance on safe loading practices‚ preventing cargo shifting‚ and understanding the vehicle’s rollover risk. Adhering to these precautions is paramount for ensuring the safety of occupants and other road users.

Driving Operation

The Mitsubishi Outlander owner’s manual provides a detailed explanation of the vehicle’s driving operation‚ covering everything from basic controls to advanced features. It begins with a comprehensive overview of the instrument panel‚ clarifying the meaning of all indicators and warning lights. Instructions on starting and stopping the engine‚ shifting gears (for both automatic and manual transmissions)‚ and utilizing the parking brake are clearly outlined;

Further sections detail the operation of essential systems like steering‚ braking‚ and acceleration. The manual also explains specific driving techniques for various conditions‚ such as hill starts and emergency maneuvers. Information on cruise control‚ lane departure warning‚ and other driver-assistance systems is included‚ alongside guidance on their proper use and limitations. Understanding these operational details is crucial for a safe and enjoyable driving experience.

Features & Functions Explained

The Outlander’s manual meticulously details all features‚ including climate control‚ audio‚ and navigation systems.
Owners gain a thorough understanding of each function’s operation and customization options.

Climate Control System

The Mitsubishi Outlander’s climate control system is comprehensively explained within the owner’s manual PDF. It details operation of both manual and automatic climate control modes‚ allowing drivers to optimize cabin comfort.
The manual illustrates how to adjust temperature settings‚ fan speed‚ and airflow direction for personalized cooling or heating.

Specific instructions cover the use of features like the quick defrost function‚ ensuring clear visibility in cold weather.
Information on air recirculation mode is also provided‚ explaining its benefits for air quality and efficiency.
The manual clarifies how to maintain the system‚ including filter replacement procedures‚ contributing to optimal performance and longevity.
Understanding these features‚ as outlined in the PDF‚ enhances the overall driving experience.

Audio & Infotainment System

The Mitsubishi Outlander’s audio and infotainment system is thoroughly documented in the owner’s manual PDF. It provides detailed guidance on operating the radio‚ CD player (if equipped)‚ and various media input options like USB and Bluetooth.
The manual explains how to pair devices‚ stream audio‚ and manage playlists for a personalized entertainment experience.

Furthermore‚ it covers the touchscreen interface‚ detailing navigation through menus‚ adjusting sound settings‚ and utilizing smartphone integration features like Apple CarPlay and Android Auto.
Troubleshooting tips are included for common issues‚ such as connectivity problems or sound distortion.
The PDF also outlines system updates and maintenance‚ ensuring optimal performance and access to the latest features. Understanding these functions‚ as detailed in the manual‚ maximizes enjoyment.

Navigation System (If Equipped)

For Mitsubishi Outlander models featuring a navigation system‚ the owner’s manual PDF offers extensive instructions. It details map display options‚ destination input methods (address‚ points of interest‚ coordinates)‚ and route calculation settings. Users will find guidance on utilizing voice command functionality for hands-free operation‚ enhancing safety while driving.

The manual explains how to manage saved locations‚ customize route preferences (avoiding tolls or highways)‚ and interpret on-screen guidance prompts. It also covers map update procedures‚ crucial for maintaining accurate and up-to-date navigation data. Troubleshooting sections address common issues like GPS signal loss or incorrect route calculations.
Detailed explanations ensure owners can fully leverage the navigation system’s capabilities for confident and efficient travel.

Maintenance & Care

The Mitsubishi Outlander’s manual PDF details essential upkeep‚ including scheduled maintenance‚ fluid checks‚ and tire care.
Following these guidelines ensures optimal vehicle performance and longevity.

Scheduled Maintenance Intervals

Your Mitsubishi Outlander’s owner manual PDF meticulously outlines a structured schedule for maintaining peak performance and reliability. These intervals‚ typically expressed in mileage or time (whichever comes first)‚ cover a range of crucial services. Expect recommendations for oil and filter changes‚ essential for engine lubrication and longevity. The manual also details inspections of vital components like belts‚ hoses‚ and fluids – coolant‚ brake fluid‚ power steering fluid‚ and transmission fluid – to proactively identify and address potential issues before they escalate.

Furthermore‚ the PDF will specify when to replace air filters (engine and cabin)‚ spark plugs‚ and perform more extensive services like timing belt replacement (if applicable). Adhering to these scheduled intervals‚ as detailed in the manual‚ is paramount for preserving your Outlander’s warranty‚ maximizing its lifespan‚ and ensuring a safe and enjoyable driving experience. Ignoring these recommendations can lead to costly repairs down the road.

Fluid Checks & Replacements

The Mitsubishi Outlander owner’s manual PDF provides detailed guidance on regularly checking and replenishing essential vehicle fluids. Maintaining correct fluid levels is critical for optimal performance and preventing damage to vital systems. The manual specifies how to check engine oil‚ coolant‚ brake fluid‚ power steering fluid‚ and windshield washer fluid – outlining proper procedures and recommended fluid types.

It also details the intervals for complete fluid replacements. Brake fluid‚ for example‚ absorbs moisture over time‚ reducing its effectiveness and potentially causing corrosion. Coolant degrades and loses its protective properties‚ while transmission fluid requires periodic changes to ensure smooth shifting. Following the manual’s recommendations for fluid checks and replacements is essential for maintaining your Outlander’s reliability and avoiding costly repairs. Ignoring these tasks can lead to component failure and compromised safety.

Tire Information & Maintenance

Your Mitsubishi Outlander’s owner’s manual PDF contains vital information regarding tire specifications‚ proper inflation pressures‚ and recommended maintenance procedures. Understanding your tires is crucial for safety‚ fuel efficiency‚ and maximizing tire lifespan. The manual details the correct tire size for your specific Outlander model and year‚ as well as the recommended cold tire pressure for both standard and maximum load conditions.

It also provides guidance on tire rotation‚ which helps ensure even wear and extends tire life. The manual explains how to visually inspect tires for damage‚ such as cuts‚ bulges‚ or uneven wear patterns. Furthermore‚ it outlines the importance of proper wheel alignment and balancing to prevent premature tire wear and maintain optimal handling. Adhering to these guidelines‚ as detailed in the PDF manual‚ will contribute to a safer and more enjoyable driving experience.

Troubleshooting Common Issues

The Mitsubishi Outlander’s PDF manual offers guidance on diagnosing and resolving frequent problems‚ including warning light interpretations‚ starting difficulties‚ and electrical concerns.

Warning Light Meanings

Understanding the dashboard warning lights in your Mitsubishi Outlander is crucial for preventative maintenance and safe operation. The comprehensive PDF owner’s manual dedicates a significant section to deciphering these indicators. It details the difference between critical alerts requiring immediate attention – such as the check engine light‚ oil pressure warning‚ or brake system malfunction – and less urgent notifications.

Each light is explained with clear descriptions of the potential underlying issues‚ helping owners assess the severity of the problem. The manual often suggests initial troubleshooting steps‚ like checking fluid levels‚ before recommending a visit to a qualified Mitsubishi service center. Furthermore‚ the PDF format allows for easy searching‚ enabling quick access to information about a specific warning light encountered while driving. Ignoring warning lights can lead to more extensive and costly repairs‚ so referencing the manual is highly recommended.

Starting Problems

Encountering difficulty starting your Mitsubishi Outlander can be frustrating‚ but the owner’s manual PDF provides a systematic troubleshooting guide. It begins with basic checks – ensuring sufficient fuel‚ a fully charged battery‚ and proper key operation. The manual details procedures for jump-starting the vehicle safely‚ including correct cable connection sequences to avoid electrical damage.

It also addresses potential issues with the starter motor‚ ignition system‚ and immobilizer. Specific sections cover scenarios like a clicking sound upon attempting to start‚ a slow cranking engine‚ or a complete lack of response. The PDF format allows owners to easily reference diagrams and illustrations for component locations. If basic troubleshooting fails‚ the manual advises seeking professional diagnosis and repair‚ emphasizing the importance of qualified technicians for complex electrical or mechanical issues.

Electrical System Issues

The Mitsubishi Outlander’s owner manual PDF dedicates significant attention to diagnosing and addressing electrical system concerns. It outlines the location and function of key components like the battery‚ alternator‚ fuses‚ and wiring harnesses. Detailed fuse box diagrams are included‚ specifying which fuses protect various electrical systems – lights‚ audio‚ power windows‚ and more.

The manual provides guidance on identifying blown fuses and replacing them correctly‚ emphasizing the use of the correct amperage rating. It also covers troubleshooting common issues like malfunctioning lights‚ power accessory failures‚ and warning light illumination. For more complex problems‚ such as intermittent electrical faults or issues with the vehicle’s computer systems‚ the PDF recommends consulting a qualified Mitsubishi technician for professional diagnosis and repair‚ ensuring safety and preventing further damage.

Detailed System Overviews

The Mitsubishi Outlander’s PDF manual provides in-depth explanations of core vehicle systems‚ including braking‚ steering‚ and suspension.
These sections offer diagrams and functional descriptions for comprehensive understanding.

Braking System

The Mitsubishi Outlander’s braking system is thoroughly detailed within the owner’s manual PDF. It explains the components‚ including the brake pedal‚ master cylinder‚ brake lines‚ and calipers‚ alongside the rotors and pads.
The manual clarifies the functionality of Anti-lock Braking Systems (ABS)‚ Electronic Brakeforce Distribution (EBD)‚ and Brake Assist systems‚ detailing how they enhance safety and control during braking maneuvers.

Owners will find information on brake fluid specifications‚ recommended replacement intervals‚ and proper bleeding procedures.
Diagrams illustrate the system’s layout‚ aiding in understanding its operation.
Troubleshooting guidance is provided for common braking issues‚ such as spongy pedal feel or unusual noises‚ helping owners identify potential problems and seek appropriate service.
The manual emphasizes the importance of regular brake inspections and maintenance for optimal performance and safety.

Steering System

The Mitsubishi Outlander owner’s manual PDF provides a detailed overview of the vehicle’s steering system. It covers the components‚ including the steering wheel‚ steering column‚ power steering pump (if equipped)‚ steering rack‚ and tie rods‚ explaining their individual functions and how they work together. The manual clarifies the operation of features like speed-sensitive steering‚ if present‚ and its impact on driving dynamics.

Owners can find information regarding power steering fluid specifications‚ recommended inspection intervals‚ and potential warning signs of system issues‚ such as unusual noises or difficulty steering.
Diagrams illustrate the steering system’s layout for better comprehension.
Troubleshooting tips are included for common problems‚ assisting owners in identifying potential concerns and seeking professional assistance when needed. Regular steering system checks are emphasized for safe and reliable operation.

Suspension System

The Mitsubishi Outlander’s owner manual PDF offers a comprehensive explanation of the vehicle’s suspension system. It details the components – including shock absorbers‚ struts‚ springs‚ control arms‚ and stabilizer bars – and their roles in providing a comfortable ride and maintaining vehicle stability. The manual clarifies the function of independent suspension systems‚ if equipped‚ and their benefits for handling and control.

Owners will find information on recommended inspection intervals for suspension components‚ along with guidance on identifying signs of wear or damage‚ such as unusual bouncing or noises.
The manual specifies the correct tire pressures for optimal suspension performance.
Diagrams illustrate the suspension system’s layout‚ aiding in understanding. Troubleshooting tips are provided for common issues‚ and the importance of professional inspection and repair is highlighted for maintaining safety and ride quality.

Specific Model Year Manuals (2016-2025)

Downloadable PDF versions of the Mitsubishi Outlander owner’s manuals are available for model years 2016 through 2025‚ offering tailored information for each specific vehicle year.

2016-2019 Outlander Manuals

Owners of Mitsubishi Outlander models from 2016 to 2019 can readily access their vehicle’s owner’s manual in a convenient PDF format. These manuals provide detailed guidance on operating your specific Outlander‚ covering everything from basic functions to more advanced features.

You’ll find comprehensive sections dedicated to safety precautions‚ driving operation‚ and routine maintenance schedules. Troubleshooting guides assist with common issues‚ while detailed system overviews explain the intricacies of the braking‚ steering‚ and suspension systems.

Downloading the PDF allows for easy storage on your computer or mobile device‚ ensuring you always have access to vital information‚ even without an internet connection. These manuals are invaluable resources for both new and experienced Outlander drivers‚ promoting safe and informed vehicle ownership.

2020-2022 Outlander Manuals

Mitsubishi Outlander owners from the 2020-2022 model years benefit from easily downloadable PDF owner’s manuals‚ offering a wealth of information at your fingertips. These digital guides are specifically tailored to the features and specifications of these Outlander generations‚ ensuring accurate and relevant guidance.

Within these manuals‚ you’ll discover detailed explanations of the vehicle’s systems‚ including climate control‚ audio‚ and navigation (if equipped). Safety information‚ maintenance schedules‚ and troubleshooting tips are also prominently featured‚ empowering owners to maintain their vehicles effectively.

The PDF format provides portability and accessibility‚ allowing you to view the manual on any device. Whether you’re performing routine maintenance or addressing a specific concern‚ these manuals are an essential resource for maximizing your Outlander ownership experience.

2023-2025 Outlander Manuals

For Mitsubishi Outlander owners of the 2023-2025 model years‚ comprehensive PDF owner’s manuals are readily available for free download. These manuals represent the latest iteration of vehicle documentation‚ reflecting updates and enhancements made to these newer Outlander generations. Accessing these guides digitally provides unparalleled convenience and portability.

These detailed resources cover everything from basic vehicle operation and safety precautions to in-depth explanations of advanced features. Owners will find valuable information regarding maintenance schedules‚ fluid checks‚ tire care‚ and troubleshooting common issues.

The PDF format ensures compatibility across various devices‚ allowing you to easily view and print sections as needed. These manuals are an invaluable tool for understanding and maintaining your Outlander‚ maximizing its performance and longevity.

Outlander PHEV Specifics (If Applicable)

Owners of Mitsubishi Outlander PHEV models will find dedicated sections within the PDF manual detailing the plug-in hybrid system‚ charging procedures‚ and battery maintenance.

PHEV System Operation

The Mitsubishi Outlander PHEV’s operation is thoroughly explained within the owner’s manual PDF‚ detailing the interplay between the gasoline engine and electric motors.
Understanding the various drive modes – Auto‚ Save‚ and Electric – is crucial for optimizing fuel efficiency and minimizing emissions.

The manual clarifies how the system automatically switches between power sources‚ prioritizing electric power whenever possible. It also outlines the regenerative braking system‚ which captures energy during deceleration to recharge the battery‚ extending the electric range.
Owners will find detailed diagrams illustrating the power flow in each drive mode‚ alongside explanations of the hybrid system’s components and their functions.
Furthermore‚ the manual provides guidance on maximizing the use of the electric motor for daily commutes and shorter trips‚ reducing reliance on the gasoline engine.

Charging Procedures

The Mitsubishi Outlander PHEV owner’s manual PDF provides comprehensive instructions on various charging methods‚ covering standard household outlets (Level 1) and dedicated charging stations (Level 2). It details the charging times for each method‚ allowing owners to plan accordingly.

The manual clearly illustrates the location of the charging port on the vehicle and explains how to connect and disconnect the charging cable safely. It also addresses the use of public charging networks‚ including information on accessing charging stations and payment options.
Furthermore‚ the guide outlines best practices for battery health‚ such as avoiding extreme temperatures during charging and utilizing scheduled charging features.
Owners will find troubleshooting tips for common charging issues‚ ensuring a smooth and efficient charging experience.

Battery Maintenance

The Mitsubishi Outlander PHEV’s owner manual PDF dedicates a section to crucial battery maintenance procedures‚ emphasizing the importance of preserving the high-voltage battery’s lifespan and performance. It details recommended charging habits‚ advising against consistently fully charging or depleting the battery to maximize longevity.

The manual explains the battery’s thermal management system and its role in maintaining optimal operating temperatures. It also outlines procedures for long-term storage‚ should the vehicle be left unused for extended periods‚ to prevent battery degradation. Owners will find information on monitoring the battery’s health through the vehicle’s onboard systems. The guide stresses the importance of professional servicing for battery inspections and potential replacements‚ ensuring safety and compliance with warranty requirements.

npt pipe thread chart pdf

NPT Pipe Thread Chart PDF: A Comprehensive Guide

Navigating NPT pipe thread charts in PDF format is crucial for plumbers and engineers. These charts detail essential dimensions,
like threads per inch (TPI), for accurate fittings.

Understanding NPT Threads

National Pipe Thread (NPT) threads are a ubiquitous tapered thread standard used in North America for joining pipe sections, creating a pressure-tight seal. Understanding their characteristics is vital for successful plumbing and mechanical installations. NPT threads aren’t parallel; they taper, meaning the diameter decreases along the length of the thread.

This taper is standardized at a rate of 1:16, meaning the diameter reduces by one-sixteenth of an inch for every inch of length. This taper, combined with the use of thread sealant, creates a wedge-like action when tightened, forming a leak-proof joint. Crucially, NPT is not intended for use with parallel threads, and mixing them can lead to failures.

Charts detailing NPT thread dimensions, readily available in PDF format, are essential tools. They specify the threads per inch (TPI) for various pipe sizes, ensuring compatibility between fittings. Proper identification of NPT threads – male (MPT) or female (FPT) – is also key to correct assembly.

What is NPT? (National Pipe Thread)

NPT, or National Pipe Thread, is the standard tapered thread type utilized for sealing pipe connections in North America. Defined by standards like ANSI B1.20.1, it’s primarily employed for water, gas, and oil conveyance. Unlike parallel threads, NPT features a gradual taper – approximately 1/16th of an inch drop per inch of length – which, when combined with a sealant, creates a mechanically tight and leak-resistant joint.

It’s important to note that NPT thread size doesn’t directly correlate to the pipe’s physical diameter. A 1/2″ NPT fitting, for example, doesn’t mean the pipe has a 1/2″ internal diameter. PDF charts are vital for deciphering these nuances, providing precise outside diameters (OD) for male threads and inside diameters (ID) for female threads.

Understanding NPT is fundamental for anyone working with threaded pipe systems. Accurate identification and proper application, guided by reliable NPT pipe thread charts, are crucial for safe and effective installations.

NPT vs. NPS (National Pipe Straight)

Distinguishing between NPT (National Pipe Thread) and NPS (National Pipe Straight) is critical to avoid improper connections. While both are used in pipe systems, they are fundamentally different. NPT, as previously discussed, is tapered, creating a sealing interference fit when tightened. NPS, conversely, features parallel, straight threads and requires a separate sealing method – such as gaskets or O-rings – to prevent leaks.

PDF charts often highlight this distinction, clearly labeling whether a thread is NPT or NPS. Attempting to join an NPT fitting to an NPS fitting will result in a non-sealable connection. NPS threads are commonly used for mechanical connections where disassembly is frequent, while NPT excels in pressure-tight sealing.

Always verify the thread type before assembly. Misidentification can lead to costly repairs and potential safety hazards. Consulting a comprehensive NPT pipe thread chart PDF ensures correct component selection and a secure, leak-free system.

Common NPT Thread Sizes

Frequently encountered NPT thread sizes are prominently featured in any reliable pipe thread chart PDF. The most common sizes include 1/8″, 1/4″, 3/8″, 1/2″, 3/4″, and 1″ NPT. These sizes represent nominal pipe diameters, not actual outer diameters. A 1/2″ NPT fitting, for example, won’t measure precisely half an inch across.

PDF charts detail the corresponding threads per inch (TPI) for each size, crucial for ensuring compatibility between fittings. Larger sizes generally have fewer threads per inch. Understanding these standard sizes is fundamental for anyone working with threaded pipe systems.

Less common, but still important, sizes include 1 1/4″, 1 1/2″, and 2″ NPT. A comprehensive NPT pipe thread chart PDF will list these, alongside their respective TPI values. Accurate size identification prevents cross-threading and ensures a secure, leak-proof connection.

NPT Thread Dimensions: Key Measurements

Essential for proper fitting selection, NPT thread dimensions are clearly outlined in a detailed pipe thread chart PDF. Key measurements include the Outside Diameter (OD) for male threads and the Inside Diameter (ID) for female threads. These aren’t uniform across all sizes; they vary based on the nominal pipe size and TPI.

A reliable chart will specify these diameters in inches, often to three or four decimal places for precision. Understanding the difference between OD and ID is critical – male threads fit inside female threads; The taper rate, consistently 1/16th of an inch per foot, is also a vital dimension.

PDF charts often include dash numbers alongside size and pitch, providing an alternative identification method. Accurate dimensional data, readily available in these charts, ensures compatibility and prevents costly errors during assembly.

Outside Diameter (OD) for Male Threads

The Outside Diameter (OD) of male NPT threads is a crucial measurement found within a comprehensive pipe thread chart PDF; Unlike nominal pipe size, the OD remains consistent across various NPT thread sizes. For instance, a 1/8″, 1/4″, 3/8″, and 1/2″ NPT male thread all share a common OD of 0.540 inches.

However, larger sizes deviate. A 3/4″ NPT male thread has an OD of 0.840 inches, while a 1″ NPT thread increases to 1.050 inches. These values are vital for ensuring compatibility with corresponding female fittings.

PDF charts clearly display these OD values, often alongside the thread size and TPI. Accurate OD measurement is essential when selecting the correct adapters or couplings. Always refer to a reliable chart to avoid miscalculations and ensure a leak-proof connection.

Inside Diameter (ID) for Female Threads

Determining the Inside Diameter (ID) of female NPT threads is essential when consulting an NPT pipe thread chart PDF. Unlike male threads with a standardized OD, the ID varies significantly with pipe size. This variation is critical for proper sealing and avoiding cross-threading.

For example, a 1/8″ NPT female thread has an ID of approximately 0.280 inches, while a 1/2″ NPT female thread expands to around 0.625 inches. Larger sizes, like 3/4″ and 1″, have IDs of 0.875 and 1.125 inches, respectively.

Reliable PDF charts provide these precise ID measurements, often alongside OD and TPI data. Accurate ID knowledge is crucial for selecting compatible fittings and ensuring a secure, leak-free joint. Always double-check the chart before assembly to prevent costly errors.

Threads Per Inch (TPI) Chart

A comprehensive NPT pipe thread chart PDF invariably includes a Threads Per Inch (TPI) chart. TPI dictates the fineness or coarseness of the thread, directly impacting compatibility. Different pipe sizes utilize distinct TPI values, making this information paramount for proper fitting selection.

Commonly, 1/8″ NPT threads feature 27 TPI, while 1/4″ NPT utilizes 18 TPI. As pipe size increases, TPI generally decreases; 3/8″ and 1/2″ NPT both employ 18 TPI, while 3/4″ and 1″ NPT utilize 14 and 11.5 TPI, respectively.

PDF charts often present this data in a tabular format for easy reference. Misinterpreting TPI can lead to mismatched threads, resulting in leaks or damaged components. Therefore, consulting a reliable chart before any assembly is crucial for a successful outcome.

1/8″ NPT to 1″ NPT: Detailed TPI Breakdown

Examining the range from 1/8″ to 1″ NPT reveals a clear correlation between pipe size and threads per inch (TPI). A 1/8″ NPT fitting consistently exhibits 27 TPI, representing the finest thread within this common spectrum.

Moving up to 1/4″ NPT, the TPI decreases to 18, and this value remains constant for both 3/8″ and 1/2″ NPT fittings. This consistency simplifies selection within these intermediate sizes. However, larger diameters necessitate further reduction.

A 3/4″ NPT pipe thread utilizes 14 TPI, while the largest commonly encountered size, 1″ NPT, employs 11.5 TPI. Reliable NPT pipe thread chart PDFs clearly delineate these values, preventing costly errors. Understanding this progression is vital for ensuring proper sealing and preventing cross-threading during assembly.

Reading an NPT Pipe Thread Chart PDF

Effective utilization of an NPT pipe thread chart PDF requires understanding its key components. Typically, charts organize information by nominal pipe size, listing corresponding outside diameters (OD) for male threads and inside diameters (ID) for female threads.

Crucially, the chart will specify threads per inch (TPI) for each size, a vital parameter for compatibility. Pay close attention to units – inches are standard. Some charts also include “Dash” sizes, a numerical representation of the pipe size, offering an alternative identification method.

High-quality PDFs often feature clear labeling and may include notes regarding taper rate (typically 1/16 inch per foot for NPT). Always verify the chart’s source and date to ensure accuracy. Careful interpretation prevents mismatched fittings and potential leaks, ensuring a secure and reliable connection.

How to Measure NPT Threads

Accurate measurement of NPT threads is paramount for selecting the correct fittings. For male threads, use a precise measuring tool – ideally calipers – to determine the outside diameter (OD) at the first full thread near the fitting’s end. Avoid including the rounded end in your measurement.

Female threads require measuring the inside diameter (ID) using specialized internal calipers or a thread ring gauge. Again, focus on the first full thread. Determining threads per inch (TPI) can be done with a thread pitch gauge, comparing the gauge teeth to the thread’s profile.

Remember, NPT threads are tapered, so measurements should be taken consistently. Double-check your readings and consult an NPT pipe thread chart PDF to confirm compatibility before assembly. Incorrect measurements lead to leaks and potential system failures.

Measuring Male NPT Threads

To accurately measure male NPT threads, utilize a reliable pair of calipers. Focus on obtaining the outside diameter (OD) measurement at the initial full thread, situated closest to the end of the fitting. It’s crucial to exclude the rounded or chamfered end of the thread from your measurement, as this will yield an inaccurate reading.

Ensure the calipers are properly zeroed and applied perpendicularly to the thread. Record the OD in inches. Simultaneously, determine the threads per inch (TPI) using a thread pitch gauge, carefully matching the gauge’s teeth to the thread’s profile.

Cross-reference your OD and TPI measurements with a comprehensive NPT pipe thread chart PDF to verify the thread size and ensure compatibility with intended fittings. Precise measurement prevents leaks and ensures a secure connection.

Measuring Female NPT Threads

Accurately measuring female NPT threads requires a precise internal caliper or a specialized thread ring gauge. Focus on the inside diameter (ID) at the first full thread near the fitting’s open end, avoiding any tapered or chamfered sections. Ensure the caliper’s jaws or the thread ring gauge fully engage with the thread’s internal form.

Record the ID measurement in inches. Concurrently, determine the threads per inch (TPI) using a thread pitch gauge, carefully aligning the gauge’s teeth with the internal thread’s profile; A precise TPI reading is vital for correct fitting selection.

Compare your ID and TPI measurements against a detailed NPT pipe thread chart PDF to confirm the thread size and guarantee compatibility with male fittings. Accurate measurement is paramount for leak-proof connections.

NPT Thread Designation: MPT, FPT, MNPT, FNPT

Understanding NPT thread designations is crucial for proper component selection and assembly. MPT signifies Male Pipe Thread, denoting external threads on a fitting. Conversely, FPT represents Female Pipe Thread, indicating internal threads designed to receive a male fitting.

MNPT, or Male National Pipe Thread, is often used interchangeably with MPT, providing clarity regarding the thread standard. Similarly, FNPT, or Female National Pipe Thread, is synonymous with FPT, explicitly stating the NPT standard.

These designations are vital when referencing NPT pipe thread chart PDFs or ordering fittings. Correctly identifying whether a thread is male or female, and confirming it adheres to the NPT standard, ensures compatibility and prevents costly errors. Always verify designations before assembly.

Taper Rate and Angle of NPT Threads

NPT threads are characterized by a consistent taper, crucial for creating a pressure-tight seal. The standard taper rate for all NPT threads is 1:16, meaning the diameter decreases by one unit for every 16 units of length. This standardized taper ensures compatibility across various fittings.

Furthermore, the angle between the thread flanks in NPT threads is consistently 60 degrees. This specific angle, combined with the taper, facilitates a wedge-like seal when fittings are tightened. Understanding these geometric properties is essential when interpreting NPT pipe thread chart PDFs.

The consistent taper and angle are fundamental to the functionality of NPT connections, enabling them to withstand significant pressure. Deviations from these standards can compromise the seal and lead to leaks.

Applications of NPT Threads

NPT threads are ubiquitous across numerous industries due to their reliability and standardized nature. They are extensively used in plumbing systems for connecting pipes, fittings, and valves, ensuring leak-proof fluid transfer. The oil and gas industry relies heavily on NPT for pipelines and wellhead equipment, demanding robust and secure connections.

Furthermore, NPT fittings are common in pneumatic systems, hydraulic machinery, and automotive applications. Their ability to withstand high pressures and temperatures makes them suitable for demanding environments. Referencing an NPT pipe thread chart PDF is vital for selecting the correct fittings for each application.

Even in specialized fields like chemical processing and manufacturing, NPT threads provide a dependable solution for fluid and gas conveyance. Their widespread adoption underscores their versatility and effectiveness.

Where to Find Reliable NPT Pipe Thread Charts in PDF Format

Locating trustworthy NPT pipe thread charts in PDF format is essential for accurate work. Many manufacturers of pipe fittings, such as Dixon and Parker, offer downloadable charts directly on their websites. These charts often include detailed dimensions and specifications for various NPT sizes.

Engineering resource websites like EngineeringToolBox and various industrial supply companies also provide accessible PDF charts. Government standards organizations, such as ANSI, may offer official documentation, though often at a cost. Always verify the source’s credibility and ensure the chart adheres to current standards.

Beware of outdated or inaccurate charts found on less reputable websites. Prioritize PDFs from established manufacturers or recognized standards bodies to guarantee reliable information for your projects.

trauma workbook for adults pdf

Understanding Trauma Workbooks for Adults

Trauma Workbooks for Adults, often available as PDF downloads, provide structured exercises to process and manage traumatic experiences, fostering recovery and resilience.

These resources, like those from SocialWorkersToolbox.com, utilize evidence-based principles for effective self-guided healing and therapeutic support.

What is a Trauma Workbook?

A Trauma Workbook for Adults, frequently accessed as a PDF, is a self-help tool designed to guide individuals through the process of understanding and healing from traumatic experiences. These workbooks aren’t replacements for therapy, but valuable companions, offering structured exercises and techniques.

Resources like the Trauma Worksheets Bundle from SocialWorkersToolbox.com exemplify this, providing a thoughtfully designed collection of tools. They typically incorporate elements of Cognitive Behavioral Therapy (CBT), Dialectical Behavior Therapy (DBT), and mindfulness practices.

Workbooks aim to help individuals process difficult emotions, challenge negative thought patterns, and develop coping mechanisms. They offer a safe space for exploration, promoting self-awareness and empowering individuals on their journey to recovery, all within a readily accessible format.

Why Use a Workbook for Trauma Recovery?

Utilizing a Trauma Workbook for Adults, often in PDF format, offers several benefits for recovery. They provide a cost-effective and accessible means of self-exploration, supplementing traditional therapy or serving as a starting point for those hesitant to seek professional help.

Resources like those found on SocialWorkersToolbox.com offer a structured approach, guiding individuals through processing trauma at their own pace. Workbooks empower individuals to actively participate in their healing journey, fostering a sense of control.

They deliver consistent exercises and techniques, reinforcing positive coping strategies. The self-directed nature allows for repeated practice and integration of skills, ultimately promoting long-term resilience and emotional well-being.

Types of Trauma Addressed in Workbooks

Trauma Workbooks for Adults (PDF formats available) address diverse experiences – PTSD, C-PTSD, childhood trauma, and specific events like accidents or disasters.

Workbooks for PTSD

Workbooks for PTSD, frequently found as downloadable PDF resources, are specifically designed to help individuals navigate the symptoms of Post-Traumatic Stress Disorder. These resources often incorporate Cognitive Behavioral Therapy (CBT) techniques, a cornerstone in PTSD treatment, guiding users through identifying and challenging negative thought patterns linked to the trauma.

Exercises within these workbooks commonly focus on processing traumatic memories in a safe and controlled manner, reducing intrusive thoughts, and managing hyperarousal. They may also include tools for exposure therapy, helping individuals gradually confront trauma-related stimuli. Many PDF workbooks emphasize psychoeducation, providing a deeper understanding of PTSD and its effects.

Furthermore, these resources often integrate grounding techniques to promote present-moment awareness and emotional regulation skills to cope with overwhelming feelings, ultimately aiming to restore a sense of control and well-being.

Workbooks for Complex Trauma (C-PTSD)

Workbooks for Complex PTSD (C-PTSD), often accessible as PDF downloads, address the unique challenges stemming from prolonged or repeated trauma, such as childhood abuse or domestic violence. Unlike standard PTSD workbooks, these resources focus on the impact of trauma on self-identity, emotional regulation, and interpersonal relationships.

They typically incorporate techniques like Internal Family Systems (IFS) or Schema Therapy to help individuals understand and heal fragmented parts of themselves. Exercises often involve exploring attachment patterns, building self-compassion, and establishing healthy boundaries.

PDF formats frequently offer flexibility for self-paced work. These workbooks emphasize developing a secure sense of self and fostering healthier coping mechanisms to navigate the lasting effects of complex trauma, promoting lasting healing and improved quality of life.

Workbooks for Childhood Trauma

Workbooks addressing childhood trauma, frequently found as PDF resources, are specifically designed to help adults process adverse experiences from their formative years. These experiences, such as abuse, neglect, or witnessing domestic violence, can have lasting impacts on emotional and psychological well-being.

These workbooks often guide individuals through exploring early attachment patterns, identifying core beliefs formed in childhood, and understanding how these beliefs influence current behaviors and relationships.

PDF accessibility allows for private and self-directed healing; They commonly incorporate exercises focused on reparenting the inner child, developing self-compassion, and establishing healthy boundaries. The goal is to dismantle harmful patterns and cultivate a sense of safety and wholeness.

Workbooks for Specific Traumatic Events (e.g., Accidents, Natural Disasters)

PDF trauma workbooks tailored to specific events – like accidents, natural disasters, or sudden losses – offer focused support for processing unique challenges. These resources acknowledge the distinct emotional and psychological responses triggered by these experiences, moving beyond generalized trauma approaches.

They often include exercises addressing survivor’s guilt, grief, fear of re-occurrence, and the disruption of one’s sense of safety and control. Workbooks may guide users through creating narratives of the event, identifying coping mechanisms, and rebuilding a sense of normalcy.

Accessibility via PDF format allows individuals to work through their trauma privately and at their own pace, supplementing professional therapy or serving as a standalone resource.

Key Components of Effective Trauma Workbooks

PDF trauma workbooks effectively integrate grounding techniques, emotional regulation skills, cognitive processing, and self-compassion practices for holistic healing and recovery.

Grounding Techniques & Exercises

Trauma workbooks for adults, frequently offered as PDF resources, heavily emphasize grounding techniques as a foundational element of recovery. These exercises aim to reconnect individuals with the present moment, counteracting the dissociative effects of trauma.

Commonly included are sensory awareness practices – focusing on sights, sounds, smells, tastes, and textures – to anchor oneself in the ‘now’. PDF workbooks often provide guided imagery scripts, encouraging visualization of safe and calming environments.

Physical grounding exercises, like deep breathing or progressive muscle relaxation, are also prevalent. The goal is to regulate the nervous system, reducing hyperarousal and promoting a sense of safety and control, ultimately aiding in processing traumatic memories.

Emotional Regulation Skills

Trauma workbooks for adults, often accessible as PDF downloads, dedicate significant space to developing emotional regulation skills. These skills are crucial for managing the intense and fluctuating emotions frequently experienced in the aftermath of trauma.

Workbooks typically introduce techniques like identifying and labeling emotions, recognizing emotional triggers, and challenging unhelpful thought patterns. PDF resources often include exercises focused on distress tolerance – strategies for coping with overwhelming feelings without resorting to harmful behaviors.

Skills such as mindfulness, self-soothing techniques, and creating emotional safety plans are commonly featured, empowering individuals to navigate emotional challenges with greater resilience and self-awareness.

Cognitive Processing & Reframing

Trauma workbooks for adults, frequently found as PDF resources, emphasize cognitive processing and reframing as vital components of healing. These workbooks guide individuals in examining the thoughts and beliefs surrounding their traumatic experiences.

Exercises often focus on identifying negative thought patterns, challenging cognitive distortions (like self-blame or catastrophizing), and developing more balanced and realistic perspectives. PDF formats allow for repeated practice and personalized note-taking.

The goal is to shift from unhelpful, trauma-related beliefs to more adaptive ones, reducing the emotional distress associated with the event and fostering a sense of empowerment and control.

Self-Compassion Practices

Trauma workbooks for adults, often accessible as PDF downloads, increasingly integrate self-compassion exercises as a core element of recovery. Recognizing the profound self-criticism often accompanying trauma, these resources guide individuals toward treating themselves with kindness and understanding.

Workbooks typically include prompts for self-soothing, mindful self-compassion breaks, and exercises to challenge self-blame. PDF format enables private and repeated engagement with these sensitive practices.

Cultivating self-compassion helps to counteract feelings of shame, isolation, and worthlessness, fostering emotional resilience and promoting a more gentle and accepting relationship with oneself throughout the healing journey.

Popular Trauma Workbooks Available as PDFs

Trauma workbooks for adults in PDF format, such as those inspired by “The Body Keeps the Score” and “Trauma and Recovery”, offer accessible support.

“The Body Keeps the Score” Workbook

Based on Bessel van der Kolk’s groundbreaking book, a “The Body Keeps the Score” workbook (PDF) extends the core concepts into practical application for trauma recovery.

These workbooks typically focus on somatic experiencing – exercises designed to reconnect individuals with their bodies and release stored trauma. They often include journaling prompts encouraging exploration of sensations, emotions, and memories linked to traumatic events.

Expect sections dedicated to understanding the neurobiology of trauma, building self-awareness, and developing coping mechanisms. Many versions emphasize grounding techniques, mindfulness practices, and cultivating a sense of safety within the body.

While not an official companion created by van der Kolk himself, numerous therapists and organizations have developed resources inspired by his work, readily available as downloadable PDF guides.

“Trauma and Recovery” Workbook

Based on Judith Herman’s seminal work, “Trauma and Recovery” workbooks (PDF) offer a structured approach to understanding and addressing the long-term effects of trauma, particularly complex trauma.

These resources typically delve into the three stages of recovery outlined in the book: safety and stabilization, remembrance and mourning, and reconnection. Expect exercises focused on establishing boundaries, processing traumatic memories, and rebuilding relationships.

Workbooks often include journaling prompts to explore the impact of trauma on identity, self-esteem, and interpersonal patterns. They emphasize the importance of creating a supportive network and challenging maladaptive beliefs.

Like “The Body Keeps the Score,” various therapists have created supplemental PDF workbooks to complement Herman’s theories, aiding in a comprehensive healing journey.

“Healing Your Past” Workbook

“Healing Your Past” workbooks (often available as PDF downloads) generally focus on identifying and resolving core emotional wounds stemming from adverse childhood experiences and past traumas.

These resources typically guide individuals through exercises designed to uncover limiting beliefs, patterns of behavior, and emotional blocks that hinder personal growth and well-being. Expect a strong emphasis on self-exploration and inner child work.

Workbooks often incorporate techniques from various therapeutic modalities, such as Cognitive Behavioral Therapy (CBT) and mindfulness, to promote emotional regulation and resilience.

They encourage users to practice self-compassion, forgiveness, and acceptance as essential components of the healing process, offering a pathway towards lasting emotional freedom and a more fulfilling life.

Accessing Free Trauma Workbooks & Resources

Free trauma workbooks (PDF format) are available through SocialWorkersToolbox.com, online therapy platforms, and university counseling centers, offering accessible support.

Social Workers Toolbox Resources

SocialWorkersToolbox.com presents a comprehensive Trauma Worksheets Bundle, a valuable and readily accessible resource for adults navigating trauma recovery. This extensive collection is thoughtfully designed to aid individuals in processing difficult emotions, managing triggers, and ultimately, fostering healing.

The bundle incorporates evidence-based therapeutic techniques, making it a practical tool for self-help or as a supplement to professional therapy. Users can expect to find worksheets addressing various aspects of trauma, including identifying trauma responses, developing coping mechanisms, and building resilience.

Notably, these resources are available as PDF downloads, ensuring convenient access and portability. The site provides a structured approach to trauma work, offering a range of exercises to suit different needs and stages of recovery, all at no cost.

Online Therapy Platforms Offering Workbooks

Several online therapy platforms are increasingly integrating trauma workbooks, often in PDF format, as part of their comprehensive care offerings. These platforms recognize the value of structured self-help alongside professional guidance, providing users with accessible tools for healing.

Typically, these workbooks are designed to complement therapy sessions, reinforcing concepts and providing exercises for between-session practice. They often focus on skills like emotional regulation, grounding techniques, and cognitive reframing, crucial for trauma recovery.

While specific offerings vary, platforms may include workbooks as part of subscription packages or as supplemental resources. This blended approach—combining digital workbooks with therapist support—offers a convenient and potentially more effective path towards processing trauma and building resilience.

University Counseling Center Resources

University Counseling Centers frequently provide students with access to valuable trauma workbooks, often available as downloadable PDF documents. Recognizing the unique stressors faced by students, these centers prioritize mental health support and offer resources for trauma recovery.

These workbooks are typically curated by qualified counselors and psychologists, ensuring they align with evidence-based practices. Students can often access these materials directly through the center’s website or during scheduled appointments.

Beyond providing workbooks, centers may also host workshops or support groups centered around trauma-informed care. This holistic approach combines self-help tools with professional guidance, fostering a supportive environment for students navigating challenging experiences and promoting well-being.

Using a Trauma Workbook Safely & Effectively

Trauma workbooks (PDF format included) are best used with professional guidance, prioritizing self-care and pacing to avoid re-traumatization during the healing process.

Working with a Therapist

Utilizing a trauma workbook (PDF or physical copy) alongside therapy significantly enhances the recovery journey. A therapist provides a safe and supportive space to process difficult emotions and experiences that surface during workbook exercises.

They can offer personalized guidance, ensuring you’re not re-traumatizing yourself and helping you navigate challenging content effectively. A therapist can also help you contextualize workbook insights within your unique history and current circumstances.

Workbooks are excellent supplemental tools, but they aren’t a replacement for professional care. A therapist can address complex trauma patterns, co-occurring mental health conditions, and provide tailored coping strategies beyond the workbook’s scope. They can also monitor your progress and adjust the pace as needed, maximizing the workbook’s benefits.

Pacing Yourself & Avoiding Re-traumatization

When using a trauma workbook (PDF or printed), prioritize a slow and gentle pace. Trauma work can be intensely emotional, and rushing through exercises can be re-traumatizing.

Listen to your body and emotional state; if an exercise feels overwhelming, pause or skip it. It’s crucial to establish a strong foundation of self-care before diving into deeply triggering content.

Remember, healing isn’t linear. Some days will be easier than others. Avoid pushing yourself beyond your capacity, and allow ample time for processing and integration. If distressing memories or sensations arise, utilize grounding techniques and seek support from a therapist or trusted individual.

Self-Care Strategies During Workbook Use

Utilizing a trauma workbook (PDF format or physical copy) necessitates consistent self-care. Integrate calming activities into your routine, such as mindfulness, deep breathing exercises, or gentle movement like yoga.

Prioritize adequate sleep, nutritious meals, and hydration. Engage in hobbies and activities that bring you joy and relaxation. Maintain social connections with supportive friends and family.

Schedule regular breaks from the workbook to prevent overwhelm. Practice self-compassion; acknowledge your progress and be kind to yourself during challenging moments. Remember that self-care isn’t selfish—it’s essential for navigating the emotional intensity of trauma work.

Evaluating the Quality of a Trauma Workbook

Trauma workbooks (PDF or print) should demonstrate evidence-based approaches and be authored by qualified professionals with relevant expertise in trauma recovery.

Clear structure and understandable language are vital for effective self-guided work.

Evidence-Based Approaches

Trauma workbooks for adults, particularly those offered as PDF downloads, gain significant credibility when grounded in established therapeutic modalities.

Look for workbooks incorporating principles from Cognitive Behavioral Therapy (CBT), Dialectical Behavior Therapy (DBT), and Eye Movement Desensitization and Reprocessing (EMDR) – approaches proven effective in trauma treatment.

These methods help individuals challenge negative thought patterns, regulate emotions, and process traumatic memories safely.

A quality workbook will explicitly state its theoretical foundation and demonstrate how exercises align with these evidence-based practices, ensuring a higher likelihood of positive outcomes and responsible self-help.

Resources like those from SocialWorkersToolbox.com emphasize these principles.

Author Credentials & Expertise

When selecting a trauma workbook for adults, especially in PDF format, scrutinize the author’s qualifications.

Ideally, the author should be a licensed mental health professional – a psychologist, therapist, or counselor – with specialized training and experience in trauma-informed care.

Verify their credentials and professional affiliations to ensure they possess the necessary expertise to guide individuals through sensitive material.

A lack of clear author information or questionable qualifications should raise red flags.

Workbooks developed by individuals without appropriate clinical backgrounds may lack the nuance and safety considerations crucial for effective trauma recovery, potentially causing harm.

Workbook Structure & Clarity

A well-designed trauma workbook for adults, whether accessed as a PDF or in physical form, should exhibit a logical and progressive structure.

The content should flow seamlessly, building upon previously introduced concepts and skills.

Clear, concise language is paramount, avoiding jargon or overly complex terminology that could be confusing or triggering.

Effective workbooks incorporate varied exercises – journaling prompts, worksheets, and self-assessment tools – to cater to different learning styles.

Look for a workbook with a clear table of contents, easily navigable sections, and a user-friendly layout to enhance the overall experience and promote engagement.

Digital vs. Physical Trauma Workbooks

PDF trauma workbooks offer accessibility and convenience, allowing users to engage with materials on various devices, anytime and anywhere they feel safe.

Benefits of PDF Format

PDF trauma workbooks present numerous advantages for individuals navigating their healing journey. The digital format enhances accessibility, allowing users to readily access the workbook on smartphones, tablets, or computers – fostering engagement whenever and wherever they feel most comfortable and secure.

This convenience is particularly valuable for those with limited mobility or geographical barriers to traditional therapy. PDFs also facilitate easy printing of specific exercises or sections, catering to diverse learning preferences. Furthermore, the digital nature allows for discreet use, minimizing potential stigma associated with seeking mental health support.

The portability of PDF workbooks ensures continuity of care during travel or times of transition, empowering individuals to maintain their self-healing practices consistently. Cost-effectiveness is another benefit, as digital versions are often more affordable than physical copies, broadening access to valuable trauma resources.

Accessibility & Convenience

Trauma workbooks in PDF format dramatically increase accessibility to vital mental health resources. Individuals can download and begin working through materials immediately, bypassing shipping times or bookstore visits. This is especially beneficial for those in remote areas or facing mobility challenges.

The convenience of a PDF allows for flexible scheduling; users can engage with exercises at their own pace and during times that feel safest and most conducive to processing difficult emotions. Digital formats often include interactive features, like fillable forms, enhancing engagement.

Furthermore, PDFs are compatible with screen readers, improving accessibility for visually impaired individuals. The ability to zoom in on text and adjust display settings caters to diverse needs, ensuring a more comfortable and effective therapeutic experience.

deep dish pizza costco instructions

Costco Deep Dish Pizza: A Comprehensive Guide

Navigating the delicious world of Costco’s deep dish pizza requires understanding optimal cooking methods for a truly satisfying experience.
This guide details instructions, ensuring a perfectly baked pizza every time, from preheating to achieving a crispy crust.

Costco’s deep dish pizza, a collaboration with Motor City Pizza Co., has quickly become a fan favorite, offering a taste of Detroit-style pizza to a wider audience. This isn’t your average pizza; it’s a substantial, thick-crust delight designed for sharing – or enjoying solo over multiple meals!

The appeal lies in its generous toppings, particularly the Double Pepperoni variety, and a uniquely crispy, buttery crust. However, achieving that perfect bake requires a bit more attention than a standard pizza. Understanding the specific cooking instructions is key to unlocking its full potential.

This guide will walk you through everything you need to know, from preheating your oven to troubleshooting common issues, ensuring a consistently delicious experience with every Costco deep dish pizza purchase.

Understanding the Motor City Pizza Co. Brand

Motor City Pizza Co. embodies the spirit of Detroit-style pizza, renowned for its square shape, thick, airy crust, and generous cheese application. This style, born in Detroit, utilizes a steel pan to create a uniquely crispy and caramelized edge. Costco’s partnership brings this authentic experience to its members, offering a convenient way to enjoy a regional specialty.

The key to Motor City’s success lies in the dough’s high hydration and extended fermentation, resulting in a light and flavorful base. Their pizzas are characterized by the sauce being applied after the bake, preserving its fresh tomato flavor.

Knowing this background helps appreciate why specific cooking instructions are crucial – replicating the Detroit-style experience requires attention to detail, even when baking from frozen at home.

Costco Availability and Delivery Options

Costco’s Motor City Pizza Co. deep dish pizza is primarily available in select warehouses, though availability can vary. Checking your local Costco’s inventory online or via the Costco app is recommended before making a trip. Beyond in-store purchases, Costco offers grocery delivery, but with limitations.

Delivery options include a 2-Day Delivery service for non-perishable items, incurring a $3 surcharge per item. However, frozen pizzas like the deep dish may not always qualify for this service due to temperature requirements. Costco grocery delivery is restricted to one address per order and requires a valid Costco membership.

For immediate access, visiting a warehouse remains the most reliable option.

Grocery Delivery Limitations

Costco’s grocery delivery service, while convenient, presents specific limitations regarding frozen items like the deep dish pizza. Availability is restricted to select markets and necessitates an active Costco membership for ordering. The 2-Day Delivery option, applicable to non-perishable goods, adds a $3 surcharge per item, but often excludes frozen pizzas due to temperature control challenges during transit.

Furthermore, delivery is capped at one address per order, potentially impacting bulk purchases. If your membership has lapsed, renewal is possible online within 90 days of expiration, or in-person/via phone at any time.

Ultimately, relying on in-warehouse shopping offers the most consistent access to this popular pizza.

Membership Requirements for Ordering

Accessing Costco’s Motor City Pizza Co. deep dish pizza, whether in-store or through delivery, fundamentally requires a valid Costco membership. This applies to all purchase methods, ensuring member-exclusive pricing and benefits. Without an active membership, obtaining the pizza directly from Costco is impossible.

If your membership has expired, convenient renewal options exist. You can renew online within a 90-day grace period post-expiration, or instantly at any Costco warehouse checkout register. Phone renewal is also available.

For immediate access, renewing at the register during a shopping trip is the quickest solution, unlocking the ability to enjoy this popular pizza.

Costco Deep Dish Pizza: Varieties Available

Currently, Costco primarily offers the Motor City Pizza Co. Deep Dish Pizza, specifically the Double Pepperoni variety. This Detroit-style pizza comes in a convenient two-pack, providing ample servings for families or gatherings. While Costco’s pizza selection rotates, the Double Pepperoni deep dish remains a consistent favorite.

The pizza is characterized by its thick, crispy crust and generous toppings. It’s designed for a satisfying, hearty meal. Although other flavors haven’t been consistently available, Costco occasionally introduces limited-edition deep dish options, so checking your local warehouse is worthwhile.

Focus remains on delivering a high-quality, flavorful deep dish experience with the core Double Pepperoni offering.

Double Pepperoni Deep Dish Pizza

The Costco Motor City Pizza Co. Double Pepperoni Deep Dish Pizza is a standout offering, boasting a thick, buttery crust and abundant pepperoni slices. This Detroit-style pizza features a generous layer of cheese, extending to the edges for a delightful, caramelized finish. The two-pack provides substantial value, perfect for sharing or enjoying over multiple meals.

Reviewers note the increased cheese thickness requires slightly longer cooking times to achieve optimal browning. The pizza is delivered with a tray designed for a crispy crust, but direct baking on a sheet enhances bottom crispness.

Expect a rich, garlicky flavor profile alongside the savory pepperoni, creating a truly indulgent pizza experience.

Detailed Cooking Instructions

Achieving pizza perfection with Costco’s deep dish requires following a few key steps. Begin by removing the pizza from its plastic wrapper, but crucially, keep it in the provided tray. This tray is specifically designed to promote a crispy crust during baking. Place the pizza on the center rack of your oven – avoid using the broil function throughout the cooking process.

For those desiring an even crispier bottom, a modification is recommended: transfer the pizza directly onto a baking sheet during the final 23 minutes of baking.

Always monitor doneness a few minutes early, as oven variations exist.

Preheating the Oven

The foundation of a perfectly cooked Costco deep dish pizza lies in proper oven preheating. Before even considering unwrapping the pizza, ensure your oven is fully preheated to 425 degrees Fahrenheit. This precise temperature is critical for achieving the desired balance of a cooked-through center and a delightfully crispy crust.

Allow sufficient time for the oven to reach the set temperature – typically around 15-20 minutes. A properly preheated oven guarantees even heat distribution, preventing undercooked spots or a soggy base.

Confirm the oven has reached 425°F before proceeding to the next step in the cooking process.

Initial Baking Phase (with Tray)

Begin the baking process by leaving the Costco deep dish pizza in its included tray. Remove the plastic wrapper, but crucially, keep the pizza nestled within the tray for the initial phase of cooking. Place the trayed pizza on the center rack of your preheated 425°F oven.

Avoid using the broiler during this stage; consistent, even heat is key. This initial bake, typically lasting around 23-25 minutes, allows the cheese to melt beautifully and the toppings to begin setting. The tray helps contain the generous toppings and contributes to a more even cooking experience.

Monitor closely, but resist the urge to open the oven frequently.

Optimizing for a Crispier Crust

For those desiring a truly crispy crust, a simple adjustment to the baking method yields fantastic results. After the initial 23-25 minutes of baking with the tray, carefully remove the pizza from the tray. Transfer it directly onto a baking sheet – this is the crucial step!

Continue baking for an additional 2-3 minutes. This direct contact with the hot baking sheet allows the bottom crust to crisp up beautifully, achieving that desirable, slightly browned texture. Always check for doneness a couple of minutes early, as oven variations exist.

This method delivers a buttery, garlicky, deep-dish crunch throughout the entire pizza.

Directly on Baking Sheet Method

To achieve maximum crispiness, employing the “directly on baking sheet” method is highly recommended. After the initial baking phase – approximately 23-25 minutes with the included tray – carefully remove the pizza from its original container.

Transfer the pizza directly onto a preheated baking sheet. This eliminates the insulating effect of the tray, allowing for direct heat transfer to the crust. Continue baking for the final 2-3 minutes, closely monitoring for desired browning and crispness.

This technique ensures a delightfully crunchy bottom crust, complementing the thick, cheesy interior. Remember to check doneness early, as oven temperatures can vary.

Monitoring Doneness

Accurately assessing doneness is crucial for a perfectly cooked Costco deep dish pizza. Begin checking the pizza a few minutes before the recommended baking time concludes, as oven variations exist.

Look for a golden-brown and bubbly cheese layer, indicating thorough heating. The crust should be firm to the touch and exhibit a pleasing golden-brown color. Gently lift a corner to inspect the underside – it should be crisp and not doughy.

If the cheese isn’t fully melted or the crust lacks color, continue baking in 2-3 minute increments, checking each time. Avoid overbaking, which can lead to a dry or burnt pizza.

Recommended Baking Time & Temperature

For optimal results, preheat your oven to 425°F (218°C) before beginning the baking process. This ensures even cooking and a delightfully crispy crust. Costco’s Motor City Pizza Co. deep dish pizza benefits from a consistent temperature throughout baking.

The standard baking time is approximately 25-28 minutes when utilizing the included tray. However, this is a guideline; always monitor doneness as described previously. If opting for the directly-on-baking-sheet method for increased crispness, reduce the final baking time by a few minutes.

Remember to place the pizza on the center rack and avoid broiling, as this can burn the cheese before the crust is fully cooked.

Standard Baking Time (425°F)

When baking Costco’s Motor City Pizza Co. deep dish pizza at the recommended 425°F (218°C), a baking time of 25 to 28 minutes generally yields excellent results. This timeframe applies when the pizza remains in the provided tray throughout the entire cooking process.

Initially, ensure the oven is fully preheated to guarantee consistent heat distribution. Place the pizza on the center rack, avoiding any contact with the oven walls. Do not broil, as this can lead to uneven cooking and a potentially burnt top layer before the base is adequately heated.

Monitor the pizza closely during the final few minutes, checking for a golden-brown crust and bubbling cheese.

Troubleshooting Common Issues

Encountering issues while baking Costco’s deep dish pizza is common, but easily addressed. Unevenly cooked pizza often stems from inconsistent oven temperatures; ensure proper preheating and avoid opening the oven door frequently during baking. If the center remains pale, consider rotating the pizza halfway through;

Soggy crust prevention is crucial. Utilizing the provided tray helps, but for extra crispness, transfer the pizza directly onto a baking sheet during the last 23 minutes of cooking. Always check for doneness a couple of minutes early, as oven variations exist.

Remember, thorough cooking is key – trust the process and allow sufficient baking time!

Unevenly Cooked Pizza

Addressing an unevenly cooked Costco deep dish pizza requires a focused approach to heat distribution. The most frequent cause is an inconsistent oven temperature, so verifying accurate preheating to 425°F is paramount. Avoid repeatedly opening the oven door during the baking process, as this disrupts the internal heat.

If the center appears undercooked while the edges are browned, rotating the pizza halfway through the baking time can significantly improve results. This ensures all sections receive equal exposure to the oven’s heat.

Careful monitoring and slight adjustments can transform a patchy bake into a perfectly cooked pizza!

Soggy Crust Prevention

Preventing a soggy crust with Costco’s Motor City Pizza Co. deep dish is achievable with a few key techniques. Utilizing the included tray initially is crucial, as it promotes airflow and helps crisp the bottom. However, for enhanced crispness, consider a direct-to-baking-sheet method during the final 2-3 minutes of baking.

Removing the pizza from the plastic wrapper while keeping it in the tray before baking is essential. Avoid adding extra toppings that release moisture. Ensuring thorough cooking, especially in the center, prevents a doughy, soggy base.

A well-baked crust is the foundation of a great deep-dish experience!

Costco App & Store Hours Information

Locating your nearest Costco warehouse and checking its specific operating hours is easily done through the official Costco app. Available for free download on both iTunes and Google Play app stores, the app provides convenient access to store details, including addresses and contact information.

Executive members may enjoy exclusive early shopping hours at select locations as of June 30, 2025. Always verify these hours within the app, as availability varies by warehouse. The app also streamlines membership management and renewal processes, ensuring uninterrupted access to Costco’s offerings, including the popular deep dish pizza!

Plan your pizza run accordingly!

Locating Costco Warehouses

Finding a Costco warehouse to purchase the Motor City Pizza Co. deep dish pizza is straightforward. The most convenient method is utilizing the official Costco app, available on both the iTunes and Google Play app stores. This app features a store locator function, pinpointing the nearest warehouses based on your location.

Alternatively, Costco’s website offers a comprehensive warehouse directory. Simply enter your zip code to generate a list of nearby locations, complete with addresses and phone numbers. Remember to check store hours before heading out, as they can vary. Planning your trip ensures you don’t miss out on grabbing this popular pizza!

Don’t forget to check for availability!

Executive Member Early Shopping Hours

Costco Executive members often enjoy exclusive benefits, including potential early shopping hours at select warehouse locations. As of June 30, 2025, these earlier access times may be available, offering a prime opportunity to secure the coveted Motor City Pizza Co. deep dish pizza before it sells out.

However, it’s crucial to verify if your local Costco participates in this program. The availability of early hours varies by warehouse, so checking store details directly is essential. You can find this information within the Costco app or on the Costco website’s store locator; Taking advantage of these hours guarantees first dibs!

Don’t miss out on this perk!

Costco Pizza Renewal & Membership Details

Maintaining an active Costco membership is essential for enjoying the Motor City Pizza Co. deep dish pizza and other warehouse benefits. If your membership has lapsed, renewal is straightforward, ensuring uninterrupted access to your favorite pizza. You can renew online within 90 days of expiration, or conveniently in person at any Costco warehouse register during checkout.

Alternatively, membership renewal is also available via phone. Don’t let an expired card prevent you from indulging! Renewing at the register while purchasing the deep dish pizza is the quickest solution. A valid membership unlocks access to exclusive items and savings, making every pizza purchase even more rewarding.

Keep your membership current!

Renewing Expired Memberships

Don’t let an expired Costco membership stand between you and a delicious Motor City Pizza Co. deep dish pizza! Fortunately, Costco offers flexible renewal options to quickly restore your access. You have a 90-day grace period after your expiration date to renew online, allowing continued enjoyment of warehouse benefits and pizza purchases.

For immediate access, the most convenient method is renewing in person at the register while checking out. This allows you to grab a pizza and reinstate your membership simultaneously. Phone renewal is also available for those preferring a direct approach.

Ensure uninterrupted pizza enjoyment – renew today!

baofeng uv 5r user manual

Baofeng’s UV-5R is a popular, affordable handheld transceiver, frequently sought with a readily available user manual․ It supports both VHF and UHF frequencies, making it versatile for various communication needs․

What is the Baofeng UV-5R?

The Baofeng UV-5R is a compact, handheld two-way radio transceiver, widely recognized for its affordability and broad functionality․ Often accompanied by a detailed user manual, it operates on both Very High Frequency (VHF) and Ultra High Frequency (UHF) radio bands, offering communication across a diverse range of frequencies․

This portable radio is designed for both amateur radio enthusiasts and professionals needing reliable, short-range communication․ It’s frequently used in scenarios like hiking, camping, security, and event coordination․ The device supports features like channel scanning, CTCSS/DCS codes for private conversations, and a built-in flashlight․

Numerous online resources, including annotated manuals and programming guides (like those found on miklor․com), enhance the user experience․ It’s a popular entry point into the world of ham radio, offering a cost-effective way to explore radio communication․

Intended Use and Applications

The Baofeng UV-5R, detailed in its user manual, serves a wide spectrum of communication needs․ It’s commonly employed by amateur radio operators for local communication and experimentation within licensed frequency bands․ Professionals in security, construction, and event management utilize it for on-site coordination, benefiting from its portability and ease of use․

Outdoor enthusiasts, such as hikers, campers, and hunters, find it invaluable for staying connected in areas with limited cellular service․ Its robust design and long battery life make it suitable for challenging environments․ The radio also finds application in emergency preparedness kits, providing a reliable communication method during disasters․

Furthermore, the UV-5R is often used for family communication during outdoor activities or large events․ Its affordability makes it accessible for a broad range of users, and readily available programming resources facilitate customization․

Package Contents – Unpacking and Initial Check

Upon receiving your Baofeng UV-5R, referencing the user manual is crucial for a thorough unpacking․ The standard package typically includes the UV-5R handheld transceiver itself, a high-gain antenna for extended range, and a rechargeable Li-ion battery pack to power the device․ A convenient desktop charger with an AC adapter is also provided for easy recharging․

Additionally, you should find a belt clip for hands-free carrying, and an earphone/microphone headset for discreet communication․ The package also contains a programming cable, enabling connection to a computer for advanced configuration․ Carefully inspect all components for any physical damage sustained during shipping․

Verify that all listed items are present․ A quick functional test – powering on the radio and testing the volume – confirms initial operability․ Retain the original packaging for potential warranty claims or returns․

Safety Information

Baofeng UV-5R operation requires adherence to safety guidelines detailed in the user manual․ Prioritize RF exposure limits and proper battery handling for safe, responsible use․

Important Safety Precautions

Prior to operating your Baofeng UV-5R, carefully review the user manual’s safety section․ Always use approved accessories, as improper attachments can cause damage or injury․ Avoid operating the radio in hazardous environments where it could interfere with critical safety equipment․

Never disassemble the radio yourself; repairs should only be performed by qualified technicians․ Keep the radio dry and away from extreme temperatures․ Be mindful of your surroundings and avoid transmitting while driving or operating machinery․

Ensure the antenna is securely attached before transmitting․ Prolonged transmission at high power can cause the radio to heat up; allow it to cool down periodically․ Follow all local regulations regarding radio frequency use and licensing․ Responsible operation ensures both your safety and the safety of others․

RF Exposure Limits and Guidelines

The Baofeng UV-5R, like all radio transmitters, emits radio frequency (RF) energy․ To ensure safe operation, adhere to established RF exposure limits as outlined in the user manual and relevant regulations․ Maintain a safe distance between your body and the radio during transmission․

The Specific Absorption Rate (SAR) measures RF energy absorption․ While the UV-5R’s SAR levels are generally within acceptable limits, prolonged exposure at high power should be avoided․ Utilize a headset or speaker-microphone to increase the distance between the radio and your head․

Be aware of occupational and general population exposure limits․ Regularly consult official guidelines from organizations like the FCC or ICNIRP for the most up-to-date information․ Responsible use and awareness of RF exposure are crucial for long-term health and safety․

Battery Safety Instructions

The Baofeng UV-5R utilizes a lithium-ion battery, requiring careful handling as detailed in the user manual․ Only use the specified charger designed for this battery; incompatible chargers can cause overheating, fire, or explosion․ Never short-circuit the battery terminals, as this generates significant heat and poses a safety risk․

Avoid exposing the battery to extreme temperatures (direct sunlight, high heat) or moisture․ Do not attempt to disassemble or modify the battery pack․ If the battery is damaged, discontinue use immediately and dispose of it responsibly according to local regulations․

Always ensure the battery is securely attached to the radio before operation․ Improperly secured batteries can disconnect during use, potentially causing interference or damage․ Store spare batteries in a cool, dry place, away from flammable materials․

Understanding the UV-5R Components

The Baofeng UV-5R, as outlined in its user manual, features a front panel with controls, side connectors for antenna/speaker, and a detachable battery for power․

Front Panel Overview – Buttons and Indicators

The Baofeng UV-5R’s front panel, detailed in the user manual, is central to operation․ The power button initiates device functionality, while the menu button accesses settings․ Channel selection is managed via the up/down arrow keys, allowing swift navigation․

The monitor button activates listening, and the squelch knob adjusts background noise filtering․ A large display showcases frequency, channel number, and operational mode․ Indicator lights signal transmission, reception, and battery status․ The PTT (Push-to-Talk) button initiates transmission, and the side keys offer quick access to frequently used functions․ Understanding these components, as the manual illustrates, is crucial for effective use․ The rotary knob controls volume and channel selection, providing intuitive control․

Side Panel Connectors – Antenna, Speaker/Mic

The Baofeng UV-5R’s side panel, as detailed in the user manual, features essential connectors․ The antenna connector, typically SMA, facilitates signal transmission and reception; proper attachment is vital for optimal performance․ A multi-pin connector accommodates both a speaker/microphone and programming cable․

Using an external speaker/microphone enhances clarity and allows for discreet communication․ The programming cable enables software-based configuration and frequency programming, expanding the radio’s capabilities․ The manual emphasizes correct connector usage to prevent damage․ Ensure secure connections for reliable operation․ These ports are crucial for extending the radio’s functionality beyond basic handheld use, offering versatility for various applications․ Careful handling of these connectors is recommended․

Battery and Charging Procedures

The Baofeng UV-5R utilizes a Li-ion battery pack, detailed in the user manual, requiring specific charging procedures for longevity and safety․ The radio employs a desktop charger; insert the radio (with battery attached) ensuring proper contact․ A red LED indicates charging, turning green upon completion․

The manual cautions against overcharging, recommending disconnection once the green LED illuminates․ Only use the supplied charger to avoid damage or potential hazards․ Initial charging may take longer․ Battery life varies based on transmit power and usage patterns․ Store the battery in a cool, dry place when not in use․ Avoid extreme temperatures․ Proper battery maintenance, as outlined in the manual, maximizes performance and extends the battery’s lifespan․

Basic Operations

The user manual details powering the Baofeng UV-5R, volume control, channel selection, and scanning․ Understanding these fundamental operations unlocks the radio’s core communication capabilities․

Powering On/Off and Volume Control

The Baofeng UV-5R user manual clearly outlines the power sequence․ To activate the radio, rotate the power/volume knob clockwise past the “OFF” position; a click indicates it’s on․ The same knob controls volume – continue rotating to increase․

Conversely, to power down, rotate the knob clockwise until it clicks to “OFF”․ Be mindful of the volume level when powering on, as a previously set high volume will immediately engage․ The manual emphasizes adjusting volume to a comfortable and safe level to prevent hearing damage․

A quick press of the “MONI” (Monitor) button allows for temporary volume adjustment without altering the saved setting․ This is useful for quickly checking weak signals․ The user manual also notes that the battery level is briefly displayed upon powering on, providing a quick status check․

Channel Selection and Scanning

The Baofeng UV-5R user manual details several channel selection methods․ You can directly input a channel number using the keypad, or utilize the up/down arrow buttons to navigate through available channels․ The manual highlights the importance of knowing the frequency associated with each channel for proper communication․

For broader signal searching, the scanning function is invaluable․ Pressing the “SCAN” button initiates a scan across all channels, stopping when a signal is detected․ The user manual advises monitoring scan results carefully, as brief or weak signals may be missed․

To refine scanning, the manual explains how to set scan lists, focusing on specific frequency ranges․ This prevents unnecessary scanning of irrelevant channels․ Remember to consult the manual for detailed instructions on programming scan lists for optimal performance․

Transmitting and Receiving

The Baofeng UV-5R user manual clearly outlines transmission procedures․ Press and hold the PTT (Push-To-Talk) button to transmit, ensuring the antenna is unobstructed for optimal range․ Speak clearly into the microphone while transmitting․ Releasing the PTT button immediately switches the radio to receive mode․

Receiving signals is automatic when a signal is present on the selected channel․ The volume control adjusts the audio level․ The user manual emphasizes the importance of adjusting the squelch level to filter out unwanted noise and interference, improving clarity․

Understanding transmit and receive indicators is crucial․ The manual details how these indicators illuminate to confirm transmission and reception status․ Always adhere to local regulations regarding radio communication while operating your UV-5R․

Advanced Features

Baofeng UV-5R’s user manual details features like CTCSS/DCS for private calls, VOX for hands-free operation, and squelch adjustment to minimize background noise․

Using CTCSS and DCS Codes

CTCSS (Continuous Tone-Coded Squelch System) and DCS (Digital Coded Squelch) are sub-audible tones or digital codes used to filter out unwanted transmissions on shared frequencies․ The Baofeng UV-5R user manual explains how to set these up․ By programming matching CTCSS/DCS codes on both transmitting and receiving radios, you ensure only stations with the correct code can hear your transmissions․

To utilize these features, access the programming menu and navigate to the CTCSS/DCS settings for each channel․ You can select a pre-defined tone or code, or manually enter a custom one․ The manual provides a list of available CTCSS frequencies and DCS codes․ Proper configuration enhances privacy and reduces interference, allowing for clearer communication within a group․ Remember to consult the manual for specific programming instructions, as the process varies depending on the programming method used – software or keypad․

VOX Function – Voice Operated Transmission

The Baofeng UV-5R user manual details the VOX (Voice Operated Transmission) function, enabling hands-free operation․ When activated, the radio transmits automatically when it detects sound – your voice․ This is particularly useful when operating with a compatible headset or speaker-microphone․

To enable VOX, access the menu settings and locate the VOX level adjustment․ The manual explains how to set the sensitivity; a higher level requires a louder voice to initiate transmission, while a lower level is more sensitive․ Experiment to find the optimal setting for your environment and voice․ Be mindful of background noise, as it can trigger unwanted transmissions․ The UV-5R manual also clarifies how to switch between different VOX levels and disable the function when not needed, ensuring efficient and clear communication․

Squlech Level Adjustment

The Baofeng UV-5R user manual explains the importance of the squelch control․ Squelch suppresses unwanted background noise, like static, when no signal is present․ Adjusting the squelch level correctly is crucial for clear reception․ A low squelch level will allow even weak signals to be heard, but also more noise․ Conversely, a high squelch level will block weak signals, providing a cleaner, quieter listening experience when a strong signal is available․

The manual details how to access the squelch settings via the menu․ It recommends starting with a low level and gradually increasing it until the noise disappears, while still receiving desired transmissions․ Proper squelch adjustment significantly improves communication clarity and reduces listener fatigue․ Experimentation is key to finding the optimal setting for your specific environment and usage conditions, as detailed in the UV-5R’s comprehensive guide․

Programming the UV-5R

Baofeng UV-5R user manual details programming options: utilizing dedicated software for computer connection, manual keypad entry, or a convenient cloning function for quick setup․

Using Programming Software (Overview)

Programming software, readily downloadable from sites like Hacker Public Radio or Miklor․com, offers a user-friendly interface for configuring your Baofeng UV-5R․ This method surpasses manual keypad programming, especially for complex setups․

Typically, a programming cable (sold separately) connects the radio to your computer via USB․ The software allows you to input frequencies, set channel names, configure CTCSS/DCS tones, and adjust power levels with precision․ It’s crucial to download software from reputable sources to avoid malware․

Before programming, consult your Baofeng UV-5R user manual for compatible software versions and driver installation instructions․ Remember to read the software’s documentation to fully understand its features and avoid accidental misconfigurations․ Backing up your existing configuration before making changes is always recommended․

Manual Programming via Keypad

While programming software is recommended, the Baofeng UV-5R can be programmed directly via its keypad․ This method requires navigating the radio’s menu system, which can be less intuitive for beginners․ Refer to your user manual for detailed step-by-step instructions․

Typically, you’ll enter programming mode by pressing and holding the ‘Menu’ button, then selecting the ‘Program’ option․ You can then input frequencies using the keypad, specifying the desired channel number․ Setting CTCSS/DCS tones also occurs within the menu․

Be mindful of the frequency bands and licensing requirements in your region․ Incorrect programming can lead to interference or legal issues․ Patience and careful attention to the manual are key to successful keypad programming․ It’s a slower process, but useful when a computer isn’t available․

Cloning Functionality

The Baofeng UV-5R offers a convenient cloning feature, allowing you to quickly duplicate settings from one radio to another․ This is particularly useful when configuring multiple radios with identical channel configurations․ A cloning cable, often sold separately, is required for this process․

Connect the cloning cable to the programming port on both radios․ Ensure both radios are powered off before connecting․ Power on the ‘source’ radio (the one you’re cloning from) first, then the ‘target’ radio (the one you’re cloning to)․

Access the cloning function through the radio’s menu, as detailed in your user manual․ Initiate the clone, and the settings will be transferred․ Verify the cloned settings on the target radio to ensure a successful transfer․ This feature streamlines setup for teams or events․

halo jump starter instructions

Halo Jump Starter Instructions: A Comprehensive Guide

Halo Bolt Ultimate offers portable power for jump-starting‚ tire inflation‚ and device charging‚ ensuring you’re prepared for emergencies on the road․

This comprehensive guide details safe operation‚ maintenance‚ and troubleshooting for your Halo Bolt‚ maximizing its versatility and longevity․

Understanding Your Halo Bolt Ultimate

The Halo Bolt Ultimate is a powerful‚ portable power station designed to provide a multitude of functions beyond a traditional jump starter․ It’s engineered with a robust 58830 mWh internal battery‚ delivering 12V/500Amps of jump-starting capability‚ enough to revive most vehicles․

Beyond jump-starting‚ the Ultimate boasts a 115V AC output port (65 Watts) allowing you to power laptops‚ cameras‚ and other devices․ Dual USB ports (5V/2․4A) provide convenient charging for smartphones‚ tablets‚ and more․ Select models also include an integrated air compressor for tire inflation‚ adding another layer of utility․

This device isn’t just about emergency power; it’s about portable convenience․ Its compact dimensions (3․82 x 7․17 x 1․6 inches) and lightweight design (1․66 lbs) make it easy to store in your vehicle and carry when needed․ The Halo Bolt Ultimate is a versatile tool for anyone seeking reliable power on the go‚ and is not a toy․

What’s Included in the Package

Upon opening your Halo Bolt Ultimate package‚ you’ll find a comprehensive set of accessories designed to maximize its functionality and ensure you’re prepared for various situations․ The core component‚ of course‚ is the Halo Bolt ACDC 58830 Ultimate jump starter itself‚ offering portable power and convenience․

Included alongside the unit is an AC Wall Charging Adapter‚ enabling you to recharge the internal battery from a standard wall outlet․ For on-the-go charging‚ a Car Charger is also provided‚ allowing you to replenish power during your travels․ A USB to Micro USB Cable facilitates data transfer and potential software updates․

To ensure safe and effective jump-starting‚ a set of Jumper Cables is included․ A durable Carrying Pouch protects your Halo Bolt Ultimate during storage and transport․ Finally‚ a detailed Product Manual provides essential instructions‚ safety guidelines‚ and troubleshooting tips for optimal use․ These components work together to deliver a complete portable power solution․

Key Features and Specifications

The Halo Bolt Ultimate boasts impressive specifications‚ making it a versatile power solution․ It delivers a robust 12V/500Amps of jump-starting power‚ capable of reviving most vehicle batteries․ Beyond jump-starting‚ it features a convenient AC Output port‚ providing 1x 115V (65 Watts) for powering various devices․

For charging smartphones‚ tablets‚ and other USB-powered gadgets‚ the unit includes 2x USB 5V/2․4A output ports․ The internal battery pack houses a substantial 58830 mWh of energy‚ ensuring ample power for multiple uses․ Its compact dimensions – 3․82 x 7․17 x 1․6 inches – and lightweight design of 1․66 lbs enhance portability․

Key features include safety checks during jump-starting‚ a user-friendly digital display‚ and the ability to inflate tires (if applicable‚ depending on the model)․ The Halo Bolt Ultimate is designed for ease of use and reliability‚ offering a powerful and convenient solution for emergency situations and everyday power needs․

Preparing to Jump Start Your Vehicle

Before jump-starting‚ ensure the Halo Bolt is adequately charged and familiarize yourself with your vehicle’s battery terminal locations for a safe connection․

Safety Precautions Before Use

Crucially‚ the Halo Bolt and its accessories are not intended for use as toys and must be kept securely out of reach of children․ Always prioritize safety when handling this powerful device․ To minimize the risk of damage to the electrical plug and cord‚ it is essential to grasp the plug itself – not the cord – when disconnecting the power pack from the outlet․

Before attempting to jump-start a vehicle‚ thoroughly inspect the jumper cables to ensure they are in good condition‚ free from any cracks or damage․ Confirm that the cables are fully and securely plugged into the jump start output on the Halo Bolt before making any connections to your vehicle’s battery․

Never attempt to jump-start a damaged battery․ Avoid contact with battery acid‚ and wear appropriate eye protection during the process․ Ensure the vehicle is parked on a level surface and the parking brake is engaged․ Disconnect all unnecessary electrical loads from both vehicles to prevent potential surges․

Checking the Halo Bolt’s Charge Level

Before relying on your Halo Bolt Ultimate for a jump start‚ it’s vital to ascertain its current charge level․ The device features an integrated charging indicator light system designed to provide clear feedback on its power status․ To initiate a charge‚ utilize the provided AC wall charging adapter‚ connecting it to both the Halo Bolt’s charge input and a standard wall outlet․

During the charging process‚ the indicator lights will illuminate‚ displaying the charging progress․ A full charge is indicated when all indicator lights are solid and no longer blinking․ It’s recommended to fully charge the Halo Bolt before extended periods of non-use to ensure it’s ready when needed․

Regularly checking the charge level‚ even when not planning immediate use‚ helps maintain preparedness․ A depleted Halo Bolt will not be able to deliver sufficient power for a successful jump start‚ so proactive monitoring is key․

Identifying Your Vehicle’s Battery Terminals

Successfully jump-starting your vehicle hinges on correctly identifying the battery terminals․ Typically‚ the positive (+) terminal is larger and often covered with a red cap or marked with a plus sign․ The negative (-) terminal is usually smaller and covered with a black cap or marked with a minus sign․ However‚ vehicle designs vary‚ so always double-check for specific markings․

Consult your vehicle’s owner’s manual if you’re unsure about terminal identification․ Incorrect connection can cause serious damage to your vehicle’s electrical system․ Ensure the area around the battery is clean and free of debris before proceeding․

Carefully locate both terminals‚ noting their positions relative to each other․ Proper identification is crucial for a safe and effective jump start․ Remember‚ connecting the cables in the wrong order can lead to sparks‚ damage‚ or even injury‚ so proceed with caution and verify before connecting․

Jump Starting Procedure

Halo Bolt’s jump start feature delivers 500 Amps of power‚ enabling a quick and safe vehicle restart․ Follow the connection sequence carefully for optimal results․

Prioritize safety and ensure correct cable placement before initiating the jump start process with your Halo Bolt Ultimate․

Connecting the Jumper Cables – Red Clamp First

Crucially‚ begin by connecting the red (positive) jumper cable to the positive terminal of your vehicle’s battery․ This terminal is typically marked with a “+” symbol or a red cover․ Ensure a secure and firm connection; a loose connection can prevent a successful jump start and potentially cause sparks․

Next‚ attach the other red clamp to the positive terminal on the Halo Bolt Ultimate․ Again‚ verify a solid connection․ It’s vital to maintain this order – positive to positive – to avoid short circuits and potential damage to your vehicle’s electrical system or the jump starter itself․

Double-check that both red clamps are securely fastened before proceeding to the black clamp connection․ A proper connection is paramount for a safe and effective jump-starting experience․ Remember‚ safety is the top priority when working with vehicle batteries and electrical components․

Always refer to your vehicle’s owner’s manual for specific battery terminal locations if you are unsure․

Connecting the Jumper Cables – Black Clamp

After securely connecting the red clamps‚ proceed with the black (negative) jumper cable․ Connect one black clamp to the negative terminal of your vehicle’s battery – usually marked with a “-” symbol or a black cover․ However‚ do not connect the other black clamp directly to the negative terminal of the Halo Bolt․

Instead‚ connect the remaining black clamp to a clean‚ unpainted metal surface on your vehicle’s engine block‚ away from the battery․ This grounding point minimizes the risk of sparks igniting any hydrogen gas that may have accumulated around the battery․ A suitable location is often a metal strut or bracket․

Ensure the black clamp makes solid contact with the metal surface․ A poor connection can hinder the jump-starting process․ Remember‚ completing this step correctly is crucial for safety and preventing potential damage․ Double-check all connections before initiating the jump start․

Never allow the black clamps to touch each other or any other metal parts of the vehicle․

Initiating the Jump Start Process

Once both clamps are securely connected – red to positive‚ black to ground – return to your vehicle․ Turn the ignition key to the start position and attempt to start the engine․ The Halo Bolt Ultimate will now deliver power to your vehicle’s battery‚ assisting in the starting process․

If the engine doesn’t start immediately‚ allow the Halo Bolt to charge the battery for a few minutes (up to 5 minutes) before attempting again․ Avoid prolonged cranking‚ as this can overheat the starter motor․ Repeat the starting attempt in short bursts․

Upon successful engine start‚ the Halo Bolt’s indicator lights will likely change‚ signaling a successful jump start․ Carefully disconnect the jumper cables in the reverse order of connection: black clamp from the vehicle’s ground‚ then black clamp from the Halo Bolt‚ followed by the red clamp from the Halo Bolt and finally the red clamp from the vehicle․

Ensure the vehicle continues running for at least 20-30 minutes to allow the alternator to recharge the battery․

What to Do After a Successful Jump Start

Following a successful jump start‚ it’s crucial to allow your vehicle’s engine to run for a minimum of 20-30 minutes․ This allows the alternator sufficient time to recharge the depleted battery․ Avoid immediately turning off the engine‚ as this could lead to another starting issue․

Consider having your vehicle’s battery and charging system professionally inspected by a qualified mechanic․ A failing battery or alternator may be the root cause of the initial problem‚ and addressing it will prevent future occurrences․ Don’t simply rely on jump-starting as a long-term solution․

After the drive‚ safely store the Halo Bolt Ultimate․ Check its charge level and recharge it promptly using the provided AC wall charging adapter or car charger to ensure it’s ready for the next emergency․ Proper maintenance extends the lifespan of your jump starter․

Remember to disconnect the jumper cables immediately after the vehicle starts‚ following the reverse order of connection․ Keep the Halo Bolt and its accessories in a safe‚ dry location․

Charging Your Halo Bolt

To recharge‚ use the AC wall adapter or car charger‚ plugging into the Halo Bolt’s charge input․ Charging is automatic‚ indicated by lights․

Using the AC Wall Charging Adapter

To initiate charging with the AC wall adapter‚ first locate the adapter within the accessories provided with your Halo Bolt Ultimate․ Ensure the adapter is in good condition‚ with no visible damage to the cord or plug․ Next‚ carefully plug the AC adapter’s plug into the designated charge input port on the Halo Bolt unit itself․ This port is specifically designed to receive power for recharging the internal battery․

Once the adapter is securely connected to the Halo Bolt‚ plug the other end of the adapter into a standard wall outlet․ It’s recommended to use a grounded outlet for optimal safety and performance․ Upon connection to the wall outlet‚ the Halo Bolt Ultimate will automatically begin the charging process․ You do not need to press any buttons or initiate the charge manually; it starts automatically․

During charging‚ observe the charging indicator lights on the Halo Bolt․ These lights will provide visual feedback on the charging status‚ indicating whether the unit is currently charging‚ fully charged‚ or experiencing an issue․ Refer to the “Understanding the Charging Indicator Lights” section for detailed information on interpreting these signals․ Allow sufficient time for a full charge‚ typically several hours‚ depending on the initial battery level․

Charging via Car Charger

For convenient charging on the go‚ the Halo Bolt Ultimate can be recharged using the included car charger․ Locate the car charger accessory and the provided USB to Micro USB cable․ Begin by plugging the Micro USB end of the cable into the charge input port on your Halo Bolt unit – this is the same port used with the AC wall adapter․

Next‚ insert the other end of the car charger into a compatible 12V cigarette lighter or accessory power outlet within your vehicle․ Ensure your vehicle’s ignition is switched on‚ or in the accessory position‚ to provide power to the outlet․ Once connected‚ the Halo Bolt will automatically initiate the charging process‚ drawing power from your car’s electrical system․

Charging times via the car charger may be longer compared to using the AC wall adapter‚ depending on your vehicle’s charging output and the Halo Bolt’s current battery level․ Monitor the charging indicator lights to track the charging progress․ Remember to disconnect the car charger once the Halo Bolt is fully charged to prevent overcharging and conserve your vehicle’s battery․

Understanding the Charging Indicator Lights

The Halo Bolt Ultimate utilizes a series of indicator lights to communicate its charging status and overall power level․ These lights provide crucial feedback‚ ensuring you understand when the unit is charging‚ fully charged‚ or experiencing an issue․ Typically‚ a pulsing light indicates that the unit is actively charging‚ whether via the AC adapter or the car charger․

When all the indicator lights are illuminated steadily‚ it signifies that the Halo Bolt has reached a full charge and is ready for use․ A flashing or rapidly pulsing light may indicate a low battery level or a potential charging error․ If you observe an unusual flashing pattern‚ consult the troubleshooting section of this guide․

Pay close attention to the light patterns during charging․ A slow pulse suggests a slower charging rate‚ potentially due to a weaker power source․ Understanding these indicators allows you to effectively manage the Halo Bolt’s power and ensure it’s always prepared when you need it most‚ providing reliable portable power․

Additional Features & Usage

Halo Bolt Ultimate extends beyond jump-starting‚ offering a 115V AC output port and USB ports for powering and charging your essential electronic devices conveniently․

Utilizing the AC Output Port (115V/65W)

The Halo Bolt Ultimate’s integrated 115V AC output port (65 Watts) provides a convenient power source for a variety of devices‚ allowing you to operate or charge them on the go․ This feature is incredibly useful during power outages‚ camping trips‚ or any situation where access to a standard wall outlet is unavailable․

Before connecting a device‚ ensure it does not exceed the 65-watt power limit․ Exceeding this limit may damage the Halo Bolt or the connected device․ Common devices suitable for use with the AC output port include laptops‚ smartphones‚ tablets‚ cameras‚ and small fans․

To utilize the AC output‚ simply plug your device’s power cord directly into the AC port on the Halo Bolt․ Verify a secure connection before powering on the device․ Monitor the Halo Bolt’s battery level during use to avoid unexpected power loss․ Remember to turn off the AC output when not in use to conserve battery life․

Using the USB Output Ports (5V/2․4A)

The Halo Bolt Ultimate features two USB output ports‚ each delivering 5V/2․4A of power‚ making them ideal for charging a wide range of portable electronic devices․ These ports offer a quick and convenient charging solution for smartphones‚ tablets‚ Bluetooth speakers‚ headphones‚ and other USB-powered gadgets․

To charge your device‚ simply connect a compatible USB cable from the Halo Bolt’s USB port to your device․ The Halo Bolt will automatically detect the connected device and begin charging․ You can charge two devices simultaneously using both USB ports‚ though charging speed may be slightly reduced when both ports are in use․

These USB ports are a valuable asset during travel‚ outdoor adventures‚ or emergency situations where access to traditional power sources is limited․ Regularly check the Halo Bolt’s battery level to ensure sufficient power for your charging needs․ Remember to disconnect your devices once fully charged to conserve battery life․

Inflating Tires with the Integrated Air Compressor (If Applicable)

Certain Halo Bolt Ultimate models include a built-in air compressor‚ offering a convenient solution for inflating tires on cars‚ bikes‚ and inflatable items․ Before use‚ ensure the compressor is securely attached and the power is on․ Connect the air hose to the tire valve stem‚ ensuring a tight seal to prevent air leakage․

Power on the air compressor using the designated button․ The Halo Bolt’s digital display will show the current tire pressure․ Use the controls to set your desired pressure‚ and the compressor will automatically stop when the target pressure is reached․ Regularly monitor the pressure during inflation․

This feature is incredibly useful for maintaining proper tire pressure‚ improving fuel efficiency‚ and ensuring safe driving conditions․ Always refer to your vehicle’s owner’s manual for recommended tire pressure settings․ Be mindful of compressor duty cycle to prevent overheating and extend its lifespan․

Troubleshooting Common Issues

Halo Bolt issues like failing to power on‚ jump start‚ or charge can often be resolved with simple checks of connections and power sources․

Halo Bolt Won’t Turn On

If your Halo Bolt Ultimate fails to power on‚ begin by verifying it has sufficient charge․ Connect the AC wall charging adapter to both the device and a functioning wall outlet‚ observing the charging indicator lights for activity․

Ensure the AC adapter is securely plugged into the charge input on the Halo Bolt․ If charging doesn’t initiate‚ try a different outlet or the car charger to rule out power source issues․ A completely depleted battery may require several hours to show a charging indication․

Inspect the power button for any physical damage or obstruction․ Press and hold the power button for a few seconds to ensure a proper activation attempt․ If the unit still doesn’t respond‚ there might be an internal issue requiring professional assistance or contacting Halo support․ Remember‚ the Halo Bolt is not a toy and should be handled with care․

Double-check that the jumper cables aren’t inadvertently draining the battery‚ as a connected cable can sometimes prevent the unit from powering on correctly․ Disconnect any attached cables and retry powering on the device․

Jump Start Fails to Initiate

If the Halo Bolt doesn’t initiate a jump start after connecting the cables‚ first re-examine the cable connections․ Confirm the red clamp is firmly attached to the positive terminal and the black clamp to a grounded metal surface on the vehicle’s engine – not the negative battery terminal directly․

Ensure the jumper cables are fully plugged into the jump start output on the Halo Bolt before attempting to jumpstart․ A loose connection can prevent power transfer․ Verify your vehicle’s battery voltage is within the 12V range‚ as the Halo Bolt is designed for 12V systems only․

Allow the Halo Bolt a few minutes to recognize the vehicle’s battery after connection․ If it still fails‚ briefly disconnect and reconnect the cables‚ then retry․ A severely discharged battery may require a longer charging period before a successful jump start is possible․

Check for any warning lights or error messages on the Halo Bolt’s display․ Refer to the product manual for specific error code meanings and troubleshooting steps․ Misusing or incorrectly connecting the jump starter may cause damage․

Charging Problems

If the Halo Bolt isn’t charging‚ first verify the AC wall charging adapter is securely plugged into both the Halo Bolt’s charge input and a functioning wall outlet․ Try a different outlet to rule out a power source issue․ Ensure the USB to Micro USB cable is also firmly connected at both ends․

Observe the charging indicator lights․ If no lights illuminate‚ the adapter or cable may be faulty․ If a light flashes erratically‚ it could indicate a charging error․ Refer to the “Understanding the Charging Indicator Lights” section for specific interpretations․

Attempt charging via the car charger as an alternative method․ If neither the AC adapter nor the car charger works‚ the Halo Bolt’s internal charging circuitry might be malfunctioning․

Avoid exposing the Halo Bolt to extreme temperatures during charging‚ as this can hinder the charging process․ To reduce risk of damage‚ pull the plug rather than the cord when disconnecting the power pack․

innova 5010 code reader manual

Innova 5010 Code Reader Manual: A Comprehensive Guide

This manual provides detailed instructions for utilizing the Innova 5010, a powerful diagnostic tool․
It explains code retrieval, interpreting results, and troubleshooting potential issues, ensuring a smooth user experience․

The 5010 displays “0 DTC” when no codes are present, indicating a healthy powertrain control module․
Proper connection is key; the keyed connector fits one way, and vehicle service manuals can assist․

The Innova 5010 is a widely-used, entry-level OBD II (On-Board Diagnostics II) scan tool designed for both professional mechanics and DIY automotive enthusiasts․ It empowers users to quickly diagnose vehicle issues by accessing the vehicle’s computer, retrieving diagnostic trouble codes (DTCs), and understanding the potential causes of the illuminated Check Engine Light․

This user-friendly device offers a cost-effective solution for identifying problems ranging from minor emissions issues to more serious engine malfunctions․ The 5010’s compact design and simple interface make it accessible to individuals with varying levels of automotive knowledge․ It’s a valuable tool for understanding your vehicle’s health and potentially avoiding costly repairs․

Beyond basic code reading, the Innova 5010 provides code definitions, allowing users to decipher the meaning behind the DTCs․ It also offers features like resetting the Check Engine Light after repairs and assessing the vehicle’s I/M readiness status for emissions testing․ This manual will guide you through each function, maximizing the benefits of your Innova 5010․

What is an OBD II Code Reader?

An OBD II code reader, like the Innova 5010, is a diagnostic tool used to communicate with a vehicle’s onboard computer system – the Powertrain Control Module (PCM)․ Since 1996, all cars and light trucks sold in the United States have been required to comply with the OBD II standard, creating a universal system for accessing diagnostic information․

These readers retrieve Diagnostic Trouble Codes (DTCs), which are essentially error messages generated when the PCM detects a malfunction within the engine or emissions system․ These codes provide a starting point for identifying the source of the problem․ Without a code reader, diagnosing vehicle issues can be a time-consuming and often inaccurate process․

OBD II readers connect to the vehicle’s Data Link Connector (DLC), typically located under the dashboard․ They translate the complex data from the PCM into easily understandable codes and definitions, empowering users to understand their vehicle’s issues and make informed repair decisions․ The Innova 5010 simplifies this process, making vehicle diagnostics accessible to everyone․

Key Features of the Innova 5010

The Innova 5010 boasts several key features making it a valuable tool for both novice and experienced users․ It quickly retrieves and clears Diagnostic Trouble Codes (DTCs), helping pinpoint vehicle issues and reset the Check Engine Light (CEL) once repairs are completed․

A standout feature is its extensive code definition lookup, providing clear explanations of each DTC, eliminating guesswork․ The reader also displays I/M readiness monitor status, crucial for emissions testing․ This indicates whether the vehicle’s systems are prepared for inspection․

Its user-friendly interface and simple button layout ensure ease of operation․ The 5010’s compatibility with all OBD II compliant vehicles (1996 and newer) broadens its applicability; Furthermore, the keyed connector prevents incorrect connections to the DLC, ensuring a reliable diagnostic process․

Setting Up Your Innova 5010

Proper setup is crucial for accurate diagnostics․ Locate your vehicle’s Data Link Connector (DLC), connect the 5010, and power on the device for initialization․

Connecting to Your Vehicle’s DLC

Establishing a secure connection to your vehicle’s Data Link Connector (DLC) is the first step in utilizing the Innova 5010․ The DLC is typically located under the dashboard, near the steering column, but its exact position varies depending on the vehicle’s make and model․ Consult your vehicle’s owner’s manual for the precise location․

The Innova 5010’s cable connector is specifically designed to be keyed, meaning it will only fit into the DLC in one orientation․ If you encounter resistance when attempting to connect, do not force it․ Rotate the connector 180 degrees and try again․ Forcing the connection could damage the DLC or the code reader․

Before connecting, ensure both the vehicle and the code reader are turned off․ Once the cable is securely connected, you are ready to proceed with powering on the Innova 5010 and initiating the diagnostic process․ A firm, stable connection is vital for reliable data transmission․

Understanding the DLC Location

Locating your vehicle’s Data Link Connector (DLC) is crucial for successful diagnostics with the Innova 5010․ While standardization exists, the DLC’s position isn’t uniform across all vehicles․ Generally, you’ll find it under the dashboard, commonly near the steering column, but variations are frequent․

Consulting your vehicle’s owner’s manual is the most reliable method for pinpointing the DLC’s exact location․ The manual will provide a diagram or specific instructions tailored to your car’s make and model․ Some vehicles may have the DLC located under the hood, near the engine compartment․

If you’re unable to find the DLC using the owner’s manual, online resources specific to your vehicle can be helpful․ Remember to verify the information’s accuracy․ Once located, visually inspect the DLC for any damage or obstructions before connecting the Innova 5010 cable․

Powering On and Initializing the Reader

To power on the Innova 5010, simply press and hold the power button, typically located on the front or side of the device․ The LCD screen will illuminate, initiating the startup sequence․ Allow a few moments for the reader to complete its self-test and initialize․

During initialization, the 5010 may display a welcome message or version information․ Ensure the device is properly connected to your vehicle’s DLC before proceeding․ A secure connection is vital for accurate data retrieval․ The reader is designed to automatically detect the vehicle’s communication protocol․

If the reader fails to power on, verify the batteries are correctly installed or the charging cable is securely connected․ A low battery can prevent proper initialization․ Once initialized, the main menu will appear, allowing you to select diagnostic functions․

Reading and Interpreting Codes

The Innova 5010 retrieves DTCs from your vehicle’s computer, offering insights into potential issues․
Understanding these codes is crucial for effective diagnosis and repair procedures․

A “0 DTC” message signifies no current problems, while other codes require decoding to pinpoint the source of the malfunction․

Retrieving Diagnostic Trouble Codes (DTCs)

To retrieve DTCs with the Innova 5010, begin by ensuring the vehicle is properly connected and the ignition is in the “ON” position, but the engine is off․ Navigate through the scanner’s menu using the directional buttons until you locate the “Read Codes” or similar option․ Press the “Enter” or “OK” button to initiate the scan․

The 5010 will then communicate with the vehicle’s Powertrain Control Module (PCM) and begin searching for any stored Diagnostic Trouble Codes․ This process usually takes only a few seconds․ If codes are present, the scanner will display them on the screen, typically as a combination of a letter and numbers (e․g․, P0301)․

If no codes are found, the scanner will display a message indicating “0 DTC” or “No Codes Found,” meaning there are currently no active or stored trouble codes in the PCM․ Remember to note down all displayed codes for further interpretation and diagnosis․

Understanding “0 DTC” Message

Encountering a “0 DTC” message on the Innova 5010 signifies that the vehicle’s Powertrain Control Module (PCM) currently holds no stored Diagnostic Trouble Codes․ This doesn’t necessarily mean the vehicle is perfectly healthy; it simply indicates no issues triggered a code at the time of the scan․ Intermittent problems might not have occurred during testing․

It’s important to understand that a “0 DTC” reading is a positive sign, suggesting no active malfunctions are being detected․ However, a previously stored code could have been cleared, or the issue might be related to a system not monitored by the PCM․

Consider recent repairs or maintenance․ If a problem was addressed, the code may have been erased․ Always verify the check engine light is off․ A “0 DTC” result provides a baseline, but continued monitoring is recommended if you suspect an underlying issue․

Decoding DTCs: What Do the Codes Mean?

Diagnostic Trouble Codes (DTCs) are alphanumeric codes generated by your vehicle’s onboard diagnostic system when a fault is detected․ The Innova 5010 retrieves these codes, but they require interpretation․ A DTC isn’t a diagnosis itself; it’s a clue pointing to a potential problem area․

Each code consists of a letter followed by four numbers․ The letter indicates the system where the fault lies: ‘P’ for Powertrain, ‘B’ for Body, ‘C’ for Chassis, and ‘U’ for Network/Communication․ The following numbers pinpoint the specific component or circuit experiencing the issue․

The Innova 5010’s code definition lookup function is crucial․ It translates the DTC into a plain-language description of the potential problem․ However, further investigation – including visual inspection and testing – is often necessary to confirm the diagnosis and implement the correct repair․

Common DTC Categories (P, B, C, U)

Diagnostic Trouble Codes are categorized by a leading letter, providing a quick indication of the affected vehicle system․ ‘P’ codes relate to the Powertrain, encompassing engine, transmission, and related components – the most frequently encountered category․

‘B’ codes address the Body system, covering functions like airbags, power windows, door locks, and interior lighting․ Issues here often relate to electrical circuits or sensor malfunctions․ ‘C’ codes signify Chassis problems, dealing with braking systems (ABS), suspension, and steering․

Finally, ‘U’ codes indicate network or communication errors․ These are often more complex, suggesting a problem with the vehicle’s data bus where various modules exchange information․ Understanding these categories narrows down the diagnostic process, guiding you towards the source of the issue when using the Innova 5010․

Using the Innova 5010’s Functions

The Innova 5010 offers several key functions, including code definition lookup and resetting the Check Engine Light․
It also provides I/M readiness monitor status for emissions testing compliance․

Code Definition Lookup

The Innova 5010 excels at providing clear and concise code definitions, transforming cryptic DTCs into understandable explanations․ After retrieving a Diagnostic Trouble Code (DTC), the reader allows you to quickly access a database of potential causes and associated repair information․

This feature is invaluable for both novice and experienced users, eliminating the need to consult separate repair manuals or online resources․ The on-screen definitions offer a starting point for diagnosis, guiding you towards the most likely source of the problem․

To utilize the Code Definition Lookup, simply enter the retrieved DTC into the reader․ The Innova 5010 will then display a detailed description of the code, potential symptoms, and possible solutions․ This function significantly streamlines the diagnostic process, saving time and effort․

Remember to always verify the definition with other diagnostic steps and consider the specific symptoms your vehicle is exhibiting for an accurate assessment․

Resetting Check Engine Light (CEL)

The Innova 5010 allows you to erase the Check Engine Light (CEL) once you’ve identified and addressed the underlying issue causing the DTC․ This function doesn’t fix the problem itself; it simply clears the indicator, allowing you to re-evaluate if the issue persists after repairs․

Before resetting the CEL, ensure all repairs have been completed and verified․ Clearing the code without fixing the root cause will only result in the light illuminating again․ The 5010 provides a straightforward process for resetting the CEL, typically involving navigating to a “Reset” or “Erase Codes” option in the menu․

After resetting, it’s crucial to perform a drive cycle to allow the vehicle’s computer to re-run diagnostics and confirm the repair․ The I/M Readiness Monitor Status function (discussed elsewhere in this manual) can help determine if the system is ready․

Caution: Resetting the CEL may affect emissions testing results if the vehicle isn’t fully ready․

I/M Readiness Monitor Status

The Innova 5010’s I/M Readiness Monitor Status function is vital for preparing your vehicle for emissions testing․ These monitors continuously assess various vehicle systems, and must be in a “ready” state to pass inspection․

This feature displays the status of each monitor – whether it’s ready, not ready, or incomplete․ Common monitors include the catalytic converter, oxygen sensor, EVAP system, and more․ A “not ready” status indicates the system hasn’t completed its self-test since the last code clear or battery disconnect․

Understanding this status is crucial because a vehicle with “not ready” monitors will fail an emissions test․ The 5010 helps you determine which systems need to be driven to complete their testing cycles․ Performing a drive cycle, as outlined in your vehicle’s service manual, is often necessary․

Use this function to proactively ensure your vehicle is compliant before heading to the inspection station․

Troubleshooting Common Issues

Addressing connection problems requires checking both the DLC and reader connectors;
If the reader won’t power on, verify battery installation or cable integrity for optimal performance․

Inaccurate readings may stem from a poor connection; ensure a secure fit․

Connection Problems with the DLC

Establishing a solid connection between the Innova 5010 and your vehicle’s Data Link Connector (DLC) is crucial for accurate diagnostics․ If you encounter difficulties, begin by visually inspecting both the DLC on your vehicle and the connector on the code reader itself for any signs of damage, such as bent pins or debris․

The DLC connector is keyed, meaning it will only fit in one orientation․ If it doesn’t seem to connect easily, rotate the connector 180 degrees and attempt again․ Avoid forcing it, as this could cause damage․ A loose connection can lead to communication errors and inaccurate readings․

If problems persist, consult your vehicle’s service manual․ It will provide the exact location of the DLC and any specific instructions for accessing it․ Some vehicles have DLCs located in less accessible areas․ Ensure the ignition is off before connecting or disconnecting the reader․ A secure connection is paramount for reliable data retrieval․

Remember to always double-check the connection before initiating a scan․

Reader Not Powering On

If your Innova 5010 fails to power on, several potential issues could be at play․ First, verify the batteries are correctly installed, paying close attention to the polarity (+ and -) markings within the battery compartment․ Ensure the batteries are fresh and have sufficient charge; low batteries are a common cause of power failure․

If using an external power source, confirm the adapter is securely connected to both the reader and a functioning power outlet․ Inspect the power cable for any visible damage, such as frayed wires or a broken connector․ Try a different outlet to rule out a power supply issue․

In some cases, a blown fuse within the reader may be the culprit․ Consult the manual for instructions on locating and replacing the fuse․ If none of these steps resolve the issue, contact Innova Electronics customer support for further assistance․ Do not attempt to disassemble the reader yourself․

Always prioritize safety when troubleshooting electrical devices․

Inaccurate or Confusing Code Readings

Experiencing inaccurate or confusing DTCs with your Innova 5010 can stem from several factors․ A poor connection to the vehicle’s DLC (Data Link Connector) is a primary suspect; ensure a secure, clean connection, and try rotating the connector 180 degrees if initial attempts fail․ Inspect both the vehicle’s DLC and the reader’s connector for any damage or corrosion․

Intermittent faults can also generate misleading codes․ These may not be consistently present, making diagnosis challenging․ Consider if the issue occurs under specific driving conditions․ Verify the vehicle’s year, make, and model are correctly selected within the reader’s settings․

Remember that the Innova 5010 provides a starting point for diagnosis․ Always cross-reference the DTC with a reliable repair database and consider performing further tests to confirm the root cause․ If uncertainty persists, consult a qualified mechanic․

Proper interpretation is crucial for effective repairs․

Advanced Features & Considerations

The Innova 5010 offers live data streaming, displaying real-time engine parameters․
Battery voltage monitoring provides crucial system health insights, and software updates ensure optimal performance․

Data Stream Display (Live Data)

The Innova 5010’s live data stream feature is a powerful diagnostic tool, allowing users to monitor real-time data from the vehicle’s computer․ This data includes parameters like engine RPM, coolant temperature, fuel trim, and oxygen sensor readings․ Accessing this information provides a dynamic view of the engine’s operation, helping pinpoint intermittent issues that static code readings might miss․

Navigating the data stream involves selecting specific parameters to display․ The reader presents this data in a numerical or graphical format, enabling easy interpretation․ Analyzing trends and comparing values to manufacturer specifications can reveal potential problems․ For example, a fluctuating oxygen sensor reading could indicate a vacuum leak or a failing sensor․

Understanding the data requires some technical knowledge, but the Innova 5010 simplifies the process․ It’s crucial to consult the vehicle’s service manual for specific parameter ranges and expected values․ Utilizing live data alongside DTCs provides a comprehensive diagnostic approach, leading to more accurate repairs and improved vehicle performance․

Battery Voltage Monitoring

The Innova 5010 incorporates a battery voltage monitoring function, providing a quick assessment of the vehicle’s electrical system health․ This feature displays the current battery voltage, allowing users to identify potential issues before they escalate into more significant problems․ A consistently low voltage reading can indicate a failing battery, a faulty alternator, or parasitic drain․

Monitoring battery voltage is crucial for preventative maintenance․ A healthy battery should typically display around 12․6 volts when the engine is off․ Lower readings suggest the battery may struggle to start the vehicle, especially in cold weather․ Conversely, excessively high voltages could point to an alternator overcharge issue․

This feature assists in diagnosing starting problems and electrical anomalies․ While not a substitute for a dedicated battery tester, the Innova 5010’s voltage monitoring provides a valuable initial check․ Regular monitoring helps ensure reliable vehicle operation and extends battery life, saving on costly replacements and roadside assistance․

Updating the Innova 5010 Software

Maintaining up-to-date software is vital for optimal performance of your Innova 5010 code reader․ Regular updates ensure compatibility with a wider range of vehicles and access to the latest diagnostic trouble code (DTC) definitions․ These updates also incorporate bug fixes and improvements to the reader’s functionality, enhancing its accuracy and reliability․

Updates are typically performed via a USB connection to a computer and the Innova website․ Download the latest software version from the official Innova Electronics support page and follow the provided instructions carefully․ The process usually involves connecting the 5010 to your computer, running the update utility, and allowing the software to install․

Consistent software updates guarantee the most accurate and comprehensive diagnostics․ Outdated software may lack support for newer vehicle models or contain inaccuracies in DTC interpretations․ Prioritize regular updates to maximize the benefits of your Innova 5010 and ensure it remains a valuable tool for vehicle maintenance and repair․

water be the guide new balance

The New Balance 2002R “Water Be The Guide”‚ a collaboration with Salehe Bembury‚ quickly became a coveted sneaker‚ blending unique design with premium materials․

The Collaboration with Salehe Bembury

Salehe Bembury‚ a Los Angeles-based footwear designer‚ partnered with New Balance to create the 2002R “Water Be The Guide․” This collaboration instantly elevated the 2002R’s profile‚ injecting Bembury’s signature aesthetic – inspired by natural landscapes and textures – into the classic silhouette․ His design vision resonated deeply with sneaker enthusiasts‚ resulting in a highly sought-after release․

Initial Release and Hype

The Salehe Bembury x New Balance 2002R “Water Be The Guide” debuted on June 25‚ 2021‚ and immediately generated significant hype․ Limited quantities and Bembury’s established fanbase fueled rapid sell-outs․ Online raffles and resale platforms saw prices soar‚ demonstrating the immense demand for this unique colorway and design․ The release was a resounding success for both parties․

Design and Aesthetics of the “Water Be The Guide”

The “Water Be The Guide” showcases a distinctive aesthetic‚ blending vibrant hues with textured materials‚ creating a visually striking and highly sought-after sneaker design․

Color Palette: Team Teal and Rose Water

The “Water Be The Guide” distinguishes itself through a captivating color scheme․ The dominant “Team Teal” provides a refreshing‚ aquatic base‚ reminiscent of flowing water․ This is beautifully contrasted by accents of “Rose Water‚” a soft‚ muted pink that evokes desert blooms;

This pairing creates a harmonious balance‚ mirroring Bembury’s inspiration from natural landscapes and the interplay between water and arid environments‚ resulting in a unique visual appeal․

Unique Texture and Material Combination

The 2002R “Water Be The Guide” showcases a compelling blend of textures and materials․ Premium suede forms the majority of the upper‚ offering a luxurious feel and visual depth․ This is strategically combined with breathable textile panels‚ enhancing comfort and adding subtle contrast․

These materials work in harmony‚ elevating the sneaker’s overall aesthetic and providing a tactile experience that complements its distinctive design․

The Ripple Design and Inspiration

Salehe Bembury’s “Water Be The Guide” draws heavily from topographical maps of the Grand Canyon‚ translating natural formations into a unique sneaker design․ The defining feature is the wavy‚ ripple-like overlays across the suede upper‚ mimicking the contours of canyons and waterways․

This design element isn’t merely aesthetic; it’s a direct visual representation of the shoe’s core inspiration․

Technical Specifications and Features

The New Balance 2002R “Water Be The Guide” (ML2002RJ)‚ released June 25‚ 2021‚ features a suede and textile upper with responsive ABZORB cushioning technology․

Model Number: ML2002RJ

The designated model number for this highly sought-after collaboration is ML2002RJ․ This alphanumeric code uniquely identifies the Salehe Bembury x New Balance 2002R “Water Be The Guide” within New Balance’s extensive catalog․ It’s crucial for accurate searches‚ authentication‚ and tracking resale market values․ Knowing this number ensures you’re referencing the correct iteration of this iconic sneaker․

Release Date: June 25‚ 2021

The Salehe Bembury x New Balance 2002R “Water Be The Guide” initially launched on June 25th‚ 2021․ This date marks the beginning of the sneaker’s journey from a highly anticipated release to a cultural icon․ The initial drop generated significant hype‚ quickly selling out and establishing its place in sneaker history․

Upper Materials: Suede and Textile

The “Water Be The Guide” showcases a premium construction utilizing both suede and textile materials․ The suede provides a luxurious feel and textural depth‚ while the textile elements enhance breathability and flexibility․ This combination creates a comfortable and visually appealing upper‚ contributing to the shoe’s overall quality․

Midsole Technology: ABZORB Cushioning

New Balance’s renowned ABZORB cushioning technology is integrated into the 2002R “Water Be The Guide” midsole․ This provides exceptional shock absorption and responsiveness‚ ensuring a comfortable experience during wear․ ABZORB effectively disperses impact forces‚ enhancing both performance and all-day comfort for the wearer․

Retail and Resale Market

Initially retailing at an accessible price point‚ the “Water Be The Guide” quickly surged in resale value‚ now commanding significantly higher prices due to high demand․

Original Retail Price

Upon its initial release on June 25‚ 2021‚ the Salehe Bembury x New Balance 2002R “Water Be The Guide” was offered to consumers at a retail price that aimed for accessibility․ While specific figures varied slightly depending on the retailer and region‚ the average retail price hovered around $140 USD․

Current Resale Prices (as of 02/17/2026)

As of today‚ February 17‚ 2026‚ the resale market for the New Balance 2002R “Water Be The Guide” demonstrates significant appreciation․ Prices generally range from $28‚697 RUB (approximately $310 USD) to $54‚000 RUB (around $600 USD)‚ depending on size and condition․ Highly sought-after sizes command premium prices․

Factors Influencing Resale Value

Several key factors dictate the resale value of the New Balance 2002R “Water Be The Guide․” Limited release quantities‚ the enduring popularity of Salehe Bembury‚ and overall condition significantly impact price․ Box inclusion‚ size rarity‚ and prevailing sneaker market trends also contribute to fluctuations in value․

The Impact of the Collaboration

Salehe Bembury’s design vision revitalized the New Balance 2002R‚ propelling it to mainstream attention and solidifying his influence within sneaker culture․

Salehe Bembury’s Influence on Sneaker Culture

Salehe Bembury has rapidly become a pivotal figure‚ celebrated for his innovative designs and unique storytelling through footwear․ His collaboration with New Balance‚ specifically the “Water Be The Guide” 2002R‚ demonstrated a keen understanding of texture‚ color‚ and consumer desire․

Bembury’s ability to create hype and connect with audiences through compelling narratives has significantly impacted how sneakers are perceived and marketed‚ elevating them beyond mere products․

New Balance 2002R’s Rise in Popularity

The New Balance 2002R experienced a significant surge in popularity‚ initially fueled by the highly successful Salehe Bembury collaboration․ Its retro-inspired design‚ combined with modern comfort technology like ABZORB cushioning‚ resonated with a broad audience․

The “Water Be The Guide” release acted as a catalyst‚ propelling the 2002R into a mainstream spotlight and establishing it as a sought-after silhouette․

Comparisons to Other New Balance Models

Compared to the 990v3 and 991 Anniversary XLD‚ the 2002R offers a bolder‚ more contemporary aesthetic‚ appealing to a different sneakerhead preference․

2002R vs․ 990v3

The 2002R and 990v3 represent distinct New Balance philosophies․ The 990v3 prioritizes classic‚ understated comfort and American craftsmanship‚ utilizing premium suede and a traditional silhouette․ Conversely‚ the 2002R‚ especially the “Water Be The Guide‚” leans into bolder design elements and collaborative energy‚ offering a more fashion-forward statement while still delivering excellent cushioning․

2002R vs․ 991 Anniversary XLD

Comparing the 2002R to the 991 Anniversary XLD reveals differing approaches to retro aesthetics․ The 991 XLD emphasizes a streamlined‚ vintage look with a focus on subtle color blocking․ The 2002R‚ particularly the “Water Be The Guide‚” showcases a more textured and dynamic design‚ driven by Salehe Bembury’s innovative ripple pattern and vibrant colorway․

Styling the “Water Be The Guide”

The “Water Be The Guide” sneakers effortlessly complement both casual and streetwear outfits‚ offering a bold statement with its unique teal and rose water hues․

Outfit Ideas for Men

For a relaxed look‚ pair the “Water Be The Guide” with tailored beige chinos and a crisp white linen shirt․ Alternatively‚ elevate your streetwear game with dark wash jeans‚ an oversized graphic tee‚ and a bomber jacket․

Consider earth-toned palettes to accentuate the shoe’s colors‚ or embrace contrasting shades for a bolder statement․ Accessorize with minimalist jewelry and a matching cap for a complete ensemble․

Outfit Ideas for Women

The “Water Be The Guide” pairs beautifully with a flowy midi skirt in a complementary teal or earthy tone‚ and a simple white crop top․ For a more casual vibe‚ try high-waisted denim shorts and an oversized knit sweater․

Accessorize with delicate gold jewelry and a crossbody bag․ Don’t be afraid to experiment with color blocking or monochromatic looks to showcase the shoe’s unique aesthetic․

New Balance and TAG Heuer Collaboration

New Balance partnered with TAG Heuer‚ uniting sport and style with the Connected Calibre E5 smartwatch and premium training apparel․

Synergy Between Sport and Style

The collaboration between New Balance and TAG Heuer transcends typical brand partnerships‚ celebrating individuals dedicated to intentional excellence․ It’s a fusion of athletic performance and luxury watchmaking‚ appealing to those who value both function and refined aesthetics․ This synergy highlights a lifestyle where pushing boundaries meets sophisticated design‚ creating a statement beyond conventional sportswear․

The Connected Calibre E5 and Training Gear

TAG Heuer’s Connected Calibre E5 smartwatch anchors this collaboration‚ offering advanced sports tracking alongside a luxurious design․ Paired with New Balance apparel‚ the collection provides a complete premium training experience․ This innovative gear blends cutting-edge technology with performance fabrics‚ empowering athletes to pursue excellence with both style and precision․

Authenticity and Counterfeits

Genuine “Water Be The Guide” sneakers feature precise stitching‚ quality suede‚ and accurate labeling (ML2002RJ)․ Beware of inconsistencies and low prices indicating fakes․

Identifying Genuine “Water Be The Guide” Sneakers

Authentic pairs boast exceptional craftsmanship‚ notably in the suede quality and ripple-like texture․ Inspect the stitching for precision – it should be clean and consistent throughout the shoe․ Verify the model number (ML2002RJ) is accurately printed on the label․ Genuine sneakers will have a substantial feel‚ reflecting the ABZORB cushioning and quality materials․ Pay close attention to the box and included tags; counterfeits often have errors or are missing details․

Common Signs of Fake Sneakers

Counterfeit “Water Be The Guide” sneakers frequently exhibit poor stitching‚ uneven coloring‚ and inferior suede quality․ Look for discrepancies in the ripple design and inaccurate labeling – often missing the ML2002RJ model number․ A lightweight feel or flimsy construction are red flags․ Be wary of significantly lower prices and examine the box for misspellings or low-resolution printing․

Sizing and Fit Guide

The New Balance 2002R “Water Be The Guide” generally runs true to size‚ though some with wider feet may prefer to go half a size up for optimal comfort․

True to Size or Run Small/Large?

Generally‚ the Salehe Bembury x New Balance 2002R “Water Be The Guide” is considered to run true to size for most individuals․ However‚ those with wider feet or who prefer a more relaxed fit might consider ordering a half size up․

Standard sneaker sizing applies‚ but trying on is always recommended if possible․ Consider your typical New Balance size as a starting point for a comfortable experience․

Recommendations for Different Foot Types

For narrow feet‚ the standard sizing should provide a snug‚ secure fit with the 2002R “Water Be The Guide․” Individuals with wider feet may benefit from going up half a size to accommodate the shoe’s unique design and avoid discomfort․

Those with high arches might appreciate the ABZORB cushioning‚ while neutral feet will enjoy overall comfort․

Care and Maintenance

Maintaining the “Water Be The Guide” requires gentle cleaning of the suede and textile upper‚ alongside protecting the ABZORB midsole for lasting quality․

Cleaning Suede and Textile Uppers

To effectively clean the suede and textile upper of the New Balance 2002R “Water Be The Guide”‚ utilize a soft-bristled brush to gently remove loose dirt․ For suede‚ employ a specialized suede cleaner and avoid excessive water․ Textile portions can be cleaned with mild soap and a damp cloth‚ ensuring a thorough rinse and air drying to preserve the unique texture and vibrant colorway․

Protecting the ABZORB Midsole

Maintaining the ABZORB cushioning of the “Water Be The Guide” requires avoiding prolonged exposure to harsh chemicals or extreme temperatures․ Regularly wipe the midsole with a damp cloth to remove dirt and debris․ Consider a midsole protector spray to shield against staining and wear‚ preserving the responsive comfort and extending the lifespan of this key New Balance technology․

Global Availability and Distribution

Initially released in June 2021‚ the “Water Be The Guide” saw limited distribution through New Balance retailers and select online platforms worldwide‚ creating high demand․

Initial Release Locations

The Salehe Bembury x New Balance 2002R “Water Be The Guide” launched at key retailers globally on June 25‚ 2021․ Initial stockists included New Balance’s flagship stores in select cities‚ alongside prominent sneaker boutiques like Bodega․ Online releases occurred simultaneously through NewBalance․com and partner retailer websites‚ though quantities were extremely limited‚ fueling immediate sell-outs and driving up resale prices shortly after launch․

Current Availability in Different Regions

As of February 17‚ 2026‚ the New Balance 2002R “Water Be The Guide” is primarily available on the resale market․ Stock levels vary significantly by region‚ with higher availability in North America and Europe․ Limited quantities occasionally appear on international New Balance websites‚ but sell out rapidly․ Russian availability is largely through resale platforms․

The “Water Be The Guide” in the Broader Sneaker Landscape

The 2002R “Water Be The Guide” significantly impacted New Balance’s trajectory‚ influencing subsequent collaborations and solidifying the 2002R as a modern classic․

Its Place in New Balance’s History

The “Water Be The Guide” marked a pivotal moment for New Balance‚ demonstrating the power of designer collaborations to elevate a retro runner․ It revitalized the 2002R silhouette‚ transforming it from a relatively obscure model into a highly sought-after sneaker within the broader culture․ This success broadened New Balance’s appeal‚ attracting a new generation of sneaker enthusiasts and solidifying its position as a leading innovator in footwear․

Influence on Subsequent Collaborations

The resounding success of the “Water Be The Guide” paved the way for future New Balance collaborations‚ proving the brand’s willingness to embrace bold designs and innovative partnerships․ It established a blueprint for blending unique aesthetics with technical performance‚ inspiring subsequent projects and solidifying New Balance’s collaborative strategy within the sneaker landscape․

Future Potential Re-releases

Rumors persistently circulate regarding a retro release of the “Water Be The Guide‚” fueled by consistent demand and its iconic status within the sneaker community․

Rumors and Speculation

Online forums and sneaker news outlets frequently discuss a potential re-release of the Salehe Bembury x New Balance 2002R “Water Be The Guide․” Speculation centers around a faithful recreation‚ potentially including updated materials or slight design modifications․ The immense popularity and consistently high resale values strongly suggest New Balance recognizes the demand‚ making a retro release a viable possibility‚ though no official confirmation exists currently․

Demand for a Retro Release

The “Water Be The Guide” consistently commands high resale prices‚ often exceeding the original retail value by a significant margin‚ demonstrating substantial consumer demand․ Social media buzz and online petitions further amplify calls for a retro release․ This fervent desire stems from the shoe’s unique aesthetic and limited initial availability‚ fueling hopes for a wider opportunity to purchase․

Where to Buy (as of 02/17/2026)

Currently‚ finding a new pair is challenging; resale platforms like StockX and GOAT are primary sources‚ alongside limited availability at select online retailers․

Online Retailers

As of today‚ February 17‚ 2026‚ direct availability from New Balance’s official online store is extremely limited‚ with sizes frequently selling out instantly upon restock․ Several international retailers occasionally offer the “Water Be The Guide‚” but stock is unpredictable․ Checking sites specializing in limited-edition sneakers is advisable‚ though prices will likely reflect the shoe’s high demand and collector status․ Be wary of unverified sellers!

Resale Platforms

Currently‚ resale platforms are the primary source for acquiring the New Balance 2002R “Water Be The Guide․” StockX and GOAT consistently list pairs‚ with prices ranging from approximately 54‚000 to 52‚000 (currency unspecified in source data)․ eBay also features listings‚ requiring careful verification of authenticity․ Expect to pay a premium above the original retail price due to its popularity and limited availability․

The Salehe Bembury x New Balance 2002R “Water Be The Guide” transcends a simple sneaker release; it’s a cultural moment․ Its innovative design and immediate sell-out solidified Bembury’s influence and propelled the 2002R into mainstream popularity‚ influencing subsequent New Balance collaborations and cementing its place in sneaker history․

hamilton beach stay or go crock pot manual

Hamilton Beach Stay or Go Crockpot Manual: Article Plan

This comprehensive guide details the Hamilton Beach Stay or Go Crockpot, covering features, settings, operation, troubleshooting, and accessing the official manual online.

The Hamilton Beach Stay or Go Crockpot has become a kitchen staple for many, celebrated for its convenience and versatility in slow cooking. This article serves as a detailed resource, offering insights into maximizing your cooking experience with this popular appliance. Whether you’re a seasoned slow-cooker enthusiast or a first-time user, understanding the nuances of your Stay or Go model is key to achieving delicious and effortless meals.

We’ll delve into the specific features that set this crockpot apart, including the innovative “Stay or Go” functionality, which allows for seamless portability. Furthermore, we’ll provide a clear overview of the control panel, explain the various cooking settings, and offer practical guidance on utilizing the temperature probe for precise cooking. Access to the official manual (http://useandcares.hamiltonbeach.com/files/840143900.pdf) will also be highlighted, alongside troubleshooting tips and essential safety precautions.

Understanding the Hamilton Beach Stay or Go Crockpot

The Hamilton Beach Stay or Go Crockpot distinguishes itself through a design prioritizing both in-kitchen cooking and convenient portability. This functionality is particularly useful for potlucks, gatherings, or simply moving a dish from the kitchen to the dining area without interrupting the cooking process. The crockpot’s core function revolves around slow, moist heat, ideal for tenderizing tougher cuts of meat and developing rich flavors in soups, stews, and casseroles.

Understanding the interplay between the heating element, the stoneware crock, and the lid is crucial. The stoneware ensures even heat distribution, while the tightly fitting lid traps moisture, preventing the food from drying out. The “Stay or Go” feature often involves a locking lid mechanism, ensuring spill-proof transport. Referencing the official manual (http://useandcares.hamiltonbeach.com/files/840143900.pdf) provides detailed insights into the specific mechanics of your model.

Key Features of the Stay or Go Model

The defining characteristic of the Hamilton Beach Stay or Go Crockpot is its secure locking lid. This feature allows for safe and easy transportation of the crockpot while maintaining temperature and preventing spills – perfect for potlucks or family gatherings. Beyond portability, these models typically offer multiple cooking settings, including Low, High, and Warm, providing versatility for various recipes.

Many Stay or Go models also incorporate a temperature probe, enabling precise cooking of meats to desired internal temperatures. This eliminates guesswork and ensures food safety. The stoneware crock is removable for easy cleaning, and is often dishwasher safe. The full manual (http://useandcares.hamiltonbeach.com/files/840143900.pdf) details specific features of each model, including wattage and dimensions. These features combine to offer a convenient and reliable slow cooking experience.

Available Models and Sizes

Hamilton Beach offers a range of Stay or Go Crockpots to suit different needs, with model number 33969 being a commonly referenced example. Sizes typically range from 1.5 quarts, ideal for smaller portions or dips, up to 6 quarts, suitable for family-sized meals. Larger capacities, like 7 or 8 quarts, are also available for those who frequently cook for crowds.

Variations exist within the Stay or Go line, some featuring digital control panels while others utilize simpler manual controls. The availability of specific models can vary by retailer. Checking the official Hamilton Beach website or retailers like Amazon will provide the most up-to-date information on current offerings. Referencing the user manual (http://useandcares.hamiltonbeach.com/files/840143900.pdf) is crucial for determining the exact capacity and features of your particular model.

Control Panel Overview

The Hamilton Beach Stay or Go Crockpot’s control panel varies slightly depending on the model, but generally includes intuitive settings. Digital models feature a digital display and buttons for power, time adjustment (hours and minutes), and temperature selection (Low, High, Warm). Some models incorporate a “Stay or Go” button, enabling automatic switching to Warm after cooking is complete.

Manual control models typically have a simple dial to select the desired setting – Low, High, or Warm. The temperature probe functionality, when present, has dedicated input jacks and associated controls for setting the target temperature. Familiarizing yourself with the specific layout of your model’s control panel, as detailed in the user manual (http://useandcares.hamiltonbeach.com/files/840143900.pdf), is essential for optimal operation and safe usage.

Cooking Settings Explained

Understanding the cooking settings on your Hamilton Beach Stay or Go Crockpot is crucial for successful meal preparation. The Low setting provides gentle, slow cooking – ideal for all-day tenderness, typically requiring 6-8 hours. High offers faster cooking, usually completing meals in 3-4 hours, but may require more liquid monitoring. The Warm setting maintains food temperature after cooking, preventing spoilage for serving convenience.

Certain models feature Probe Cooking, allowing precise temperature control. This setting utilizes a temperature probe inserted into the food to automatically switch to Warm once the desired internal temperature is reached. Refer to your model’s manual for specific temperature guidelines and probe usage instructions. Proper setting selection ensures food safety and optimal flavor development.

Low, High, and Warm Settings

The Hamilton Beach Stay or Go Crockpot offers three primary cooking settings: Low, High, and Warm. The Low setting is best for extended, slow cooking – typically 6-8 hours – perfect for tougher cuts of meat, ensuring maximum tenderness. It’s ideal for all-day cooking when you’re not readily available to monitor the process.

High provides faster cooking, generally completing meals in 3-4 hours. This setting is suitable for when you have less time, but requires occasional liquid level checks to prevent burning. Finally, the Warm setting doesn’t cook food, but maintains its temperature after cooking is complete, keeping meals safe and ready to serve for several hours.

Probe Cooking Functionality

The Stay or Go Crockpot models boast a sophisticated temperature probe feature, allowing for precise cooking based on internal food temperature rather than time. This is particularly useful for meats, ensuring they reach a safe and desired level of doneness. The probe transmits real-time temperature readings to the control panel, offering accurate monitoring throughout the cooking process.

This functionality eliminates guesswork, preventing overcooking or undercooking. You simply set your desired final temperature, insert the probe into the thickest part of the food, and the Crockpot automatically adjusts cooking time to achieve that temperature; Once reached, it automatically switches to the Warm setting, maintaining food safety and quality.

Using the Temperature Probe

Proper temperature probe usage is crucial for accurate cooking. First, ensure the probe is clean before each use. Insert the probe into the thickest part of the food, avoiding bone, fat, or gristle, as these can provide inaccurate readings. The probe wire should be positioned so it doesn’t rest directly on the bottom or sides of the crockpot.

Connect the probe securely to the Crockpot’s designated port. On the control panel, select the “Probe” cooking setting and input your desired final internal temperature. The display will show both the current and target temperatures. Monitor the progress; the Crockpot will automatically switch to Warm once the target is reached. Always verify the final temperature with a separate thermometer for confirmation.

Manual Operation Instructions

For manual operation, bypass the probe function and directly select your desired cooking setting: Low, High, or Warm. Begin by preparing your ingredients and placing them inside the ceramic crock. Secure the lid firmly. Plug the Crockpot into a grounded electrical outlet.

Use the control panel buttons to choose your cooking time. Note that cooking times are estimates and may vary based on the recipe and quantity of food. Regularly check the food’s progress, especially during longer cooking cycles. The ‘Stay or Go’ feature allows portability; ensure the lid is securely fastened during transport. Once cooking is complete, switch to the ‘Warm’ setting to keep food at a safe temperature until serving.

Recipe Suggestions for Stay or Go Crockpot

The Hamilton Beach Stay or Go excels with slow-cooked classics. Consider a hearty pot roast – perfect for a 3-hour cook time, as one user inquired. Pulled pork, requiring 6-8 hours on Low, benefits from the consistent temperature. Chicken chili, a family favorite, cooks beautifully on Low for 4-6 hours.

For simpler meals, try slow-cooked oatmeal or overnight applesauce. The ‘Warm’ setting is ideal for keeping dips or appetizers at serving temperature during gatherings. Explore online resources and recipe books specifically designed for slow cookers to maximize your Crockpot’s potential. Remember to adjust cooking times based on your chosen model and desired tenderness. Experiment with flavors and enjoy the convenience!

Cleaning and Maintenance

Proper cleaning ensures longevity for your Hamilton Beach Stay or Go Crockpot. Always unplug the unit and allow it to cool completely before cleaning. The stoneware crock and glass lid are typically dishwasher safe, though hand washing is recommended to prevent chipping. Avoid abrasive cleaners, which can damage the surfaces.

The heating base should be wiped clean with a damp cloth. Never immerse the base in water. For stubborn food residue, soak the crock in warm, soapy water. Regularly inspect the temperature probe for cleanliness and proper function. Ensure all parts are thoroughly dry before reassembling and storing. Consistent maintenance will keep your Crockpot performing optimally for years to come.

Troubleshooting Common Issues

Encountering problems with your Hamilton Beach Stay or Go Crockpot? Here are solutions to common issues. If the Crockpot isn’t turning on, verify the outlet is functioning and the power cord is securely connected. Check the control panel settings to ensure it’s programmed correctly.

Temperature probe malfunctions can occur; ensure it’s properly inserted into the food and the display is reading accurately. If issues persist, try resetting the unit by unplugging it for several minutes. For other concerns, consult the official manual (http://useandcares.hamiltonbeach.com/files/840143900.pdf) for detailed guidance. If problems continue, contact Hamilton Beach customer support for assistance.

Crockpot Not Turning On

If your Hamilton Beach Stay or Go Crockpot fails to power on, begin with the simplest checks. First, confirm the appliance is securely plugged into a working electrical outlet. Test the outlet with another device to rule out a power supply issue. Inspect the power cord for any visible damage, such as cuts or fraying, which could prevent operation.

Next, examine the control panel. Ensure no buttons are stuck or malfunctioning. Sometimes, a brief reset can resolve the issue – unplug the Crockpot for a few minutes, then plug it back in. If these steps don’t work, consult the official manual (http://useandcares.hamiltonbeach.com/files/840143900.pdf) for further troubleshooting or contact customer support.

Temperature Probe Malfunctions

If the temperature probe on your Hamilton Beach Stay or Go Crockpot isn’t functioning correctly, several issues could be at play. First, ensure the probe is fully and correctly inserted into the thickest part of the food, avoiding bone or fat. Verify the probe wire isn’t damaged or kinked, as this can disrupt the signal.

Check the connection point where the probe connects to the Crockpot base; ensure it’s secure. A faulty probe can display inaccurate temperatures or prevent the Crockpot from entering probe cooking mode. Refer to the official manual (http://useandcares.hamiltonbeach.com/files/840143900.pdf) for specific troubleshooting steps or consider contacting Hamilton Beach customer support for assistance or a replacement probe.

Safety Precautions

When using your Hamilton Beach Stay or Go Crockpot, prioritize safety. Always ensure the unit is placed on a stable, heat-resistant surface away from flammable materials. Never immerse the base, cord, or plug in water or other liquids. Avoid using extension cords; if necessary, use a heavy-duty cord rated for appliance use.

Exercise caution when handling hot surfaces, utilizing oven mitts or pot holders. Never leave the Crockpot unattended while in operation. Keep the lid tightly sealed during cooking to prevent steam burns. Allow the unit to cool completely before cleaning. Disconnect from the power outlet when not in use and before cleaning. Refer to the official manual for complete safety guidelines.

Accessing the Official Manual

For detailed information and comprehensive guidance, accessing the official Hamilton Beach Stay or Go Crockpot manual is crucial. Fortunately, Hamilton Beach provides easy online access to digital versions of their manuals.

You can find the manual by visiting the Hamilton Beach website and navigating to the support or product manuals section. Alternatively, a direct link to the manual for many models, including those similar to the Stay or Go, is available at http://useandcares.hamiltonbeach.com/files/840143900.pdf. This resource offers detailed instructions on operation, safety precautions, cleaning, and troubleshooting. Downloading and reviewing the manual ensures optimal performance and safe usage of your Crockpot.

Warranty Information

Hamilton Beach provides a warranty on their Stay or Go Crockpots, offering customers peace of mind against manufacturing defects. While specific warranty terms can vary depending on the model and purchase date, generally, Hamilton Beach warrants its products to be free from defects in materials and workmanship under normal household use.

To understand the exact coverage for your specific Crockpot, it’s essential to review the warranty information included with your product or found on the Hamilton Beach website. Typically, the warranty covers defects for a specified period, often one year from the date of purchase. Proof of purchase is usually required to make a warranty claim. The warranty does not cover damage resulting from misuse, accidents, or unauthorized repairs.

Where to Buy Replacement Parts

Finding replacement parts for your Hamilton Beach Stay or Go Crockpot is crucial for extending its lifespan and maintaining optimal performance. Several avenues are available for sourcing these parts, ensuring you can easily repair or restore your appliance.

The official Hamilton Beach website is an excellent starting point, often offering a dedicated section for replacement parts. Major retailers like Amazon, Walmart, and Target also frequently stock common replacement components, such as lids, stoneware inserts, and control panels. Additionally, appliance parts retailers specializing in small kitchen appliances can provide a wider selection and expert assistance in identifying the correct part for your model. When ordering, always verify the part number to ensure compatibility with your specific Stay or Go Crockpot.

The Hamilton Beach Stay or Go Crockpot stands as a versatile and reliable kitchen companion, simplifying meal preparation with its convenient features and user-friendly operation. Understanding its settings, proper usage, and maintenance procedures—as outlined in this guide and the official manual—will maximize its performance and longevity.

Whether you’re a seasoned slow-cooking enthusiast or a beginner, the Stay or Go model offers a seamless cooking experience. From utilizing the temperature probe for precise results to leveraging the portability feature for gatherings, this crockpot adapts to diverse culinary needs. Remember to prioritize safety precautions and address any issues promptly using the troubleshooting tips provided. With proper care, your Hamilton Beach Stay or Go Crockpot will undoubtedly become a cherished staple in your kitchen for years to come.