
Watco Danish Oil Instructions: A Comprehensive Guide
Welcome to this comprehensive guide on using Watco Danish Oil! This guide will provide step-by-step instructions for achieving a professional finish on your interior wood projects․ Whether you’re a seasoned woodworker or a beginner, follow along for great results․
What is Watco Danish Oil?
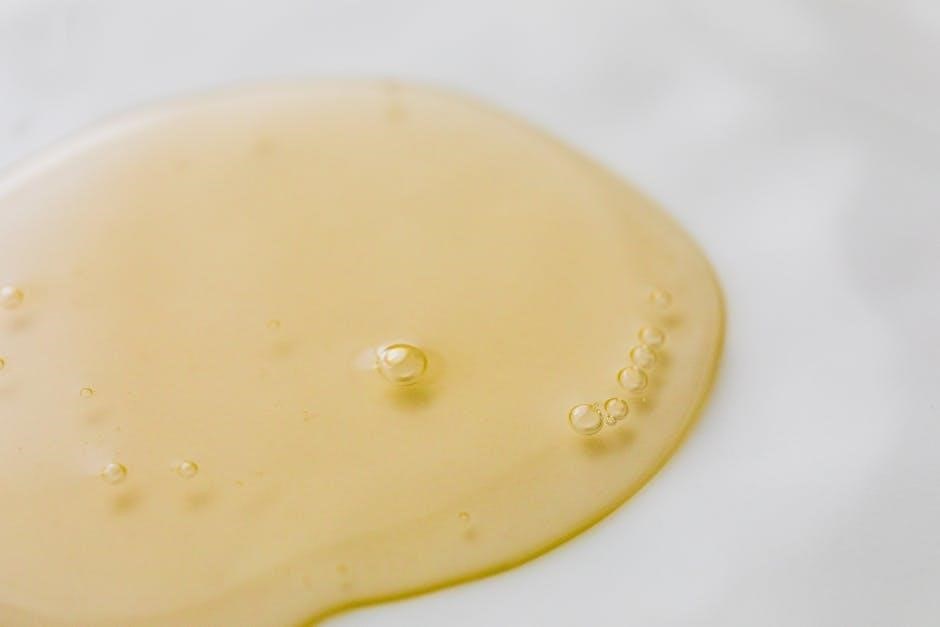
Watco Danish Oil is a unique and popular wood finish known for its ease of application and beautiful results․ Unlike traditional surface coatings that form a film on top of the wood, Watco Danish Oil is a penetrating oil finish․ This means it soaks into the wood pores, hardening within the wood itself rather than on its surface․
This penetrating action provides several advantages․ Firstly, it enhances the natural grain and beauty of the wood, bringing out its depth and character․ Secondly, it offers good protection from within, making the wood more resistant to scratches and moisture․ It’s also remarkably forgiving during application, not being overly sensitive to dust or minor imperfections;
Watco Danish Oil is a blend of oil and varnish, offering the benefits of both․ The oil component penetrates and nourishes the wood, while the varnish provides a degree of hardness and durability․ This combination results in a finish that is both aesthetically pleasing and protective, making it a favorite among woodworkers and DIY enthusiasts for various interior projects․
Unique Blend of Penetrating Oil and Varnish
Watco Danish Oil distinguishes itself through its carefully crafted composition, a blend of penetrating oil and varnish․ This combination is key to its performance and the beautiful finish it imparts to wood surfaces․ The oil component, often based on boiled linseed oil, is designed to deeply penetrate the wood pores, saturating the fibers and enhancing the wood’s natural grain․
This penetration not only enriches the wood’s appearance but also provides a measure of protection from within, increasing resistance to moisture and minor abrasions․ Simultaneously, the varnish component adds durability and a subtle sheen to the finish․ Unlike oils alone, the varnish helps to harden the finish, creating a more robust surface that can withstand everyday wear and tear․
The balance between oil and varnish in Watco Danish Oil is carefully calibrated to achieve an optimal result: a finish that highlights the wood’s beauty while providing a level of protection that is superior to a simple oil finish․ This unique blend contributes to the ease of application and the overall quality that Watco Danish Oil is known for, resulting in a finish that is both attractive and long-lasting․

Ideal Interior Applications
Watco Danish Oil is ideally suited for a wide range of interior wood applications, offering both aesthetic enhancement and a degree of protection to the wood surface․ It excels on furniture pieces, bringing out the natural beauty of the wood grain and providing a soft, satin finish that is pleasing to the touch․ From tables and chairs to cabinets and shelves, Danish Oil can transform ordinary pieces into stunning focal points․
It is also an excellent choice for trim and molding, adding warmth and character to any room․ The penetrating nature of the oil ensures that even intricate details are highlighted, creating a rich and inviting atmosphere․ Additionally, Danish Oil can be used on bare wood surfaces, such as countertops and butcher blocks, providing a durable and food-safe finish․
However, it’s important to note that Watco Danish Oil is specifically designed for interior use and is not recommended for exterior applications or flooring․ Its formulation is optimized for the controlled environment of indoor spaces, where it can cure properly and provide the desired level of protection; For these interior applications, Danish Oil offers a fantastic combination of beauty and practicality․
Surface Preparation Before Application
Proper surface preparation is crucial for achieving a flawless finish with Watco Danish Oil․ Before applying any oil, ensure that the wood is completely dry and free from any existing coatings, such as paint, varnish, shellac, lacquer, or heavy stains․ These coatings will prevent the Danish Oil from properly penetrating the wood pores, hindering its ability to harden and provide a durable finish․ If such coatings are present, they must be thoroughly removed through sanding or chemical stripping․
Begin by assessing the condition of the wood surface․ If it is rough or uneven, start with a coarser grit sandpaper to level it out․ Progress to finer grits to refine the surface and eliminate any scratches․ Remember to always sand in the direction of the wood grain to avoid creating unsightly marks․ After sanding, meticulously remove all sanding dust and dirt using a vacuum cleaner, followed by a tack cloth to ensure a pristine surface․

A clean and properly prepared surface will allow the Watco Danish Oil to penetrate deeply into the wood, enhancing its natural beauty and providing a long-lasting, protective finish․ Skipping this step can lead to uneven absorption, poor adhesion, and ultimately, an unsatisfactory result․
Sanding: Grit Progression
Achieving a smooth, even surface for your Watco Danish Oil finish hinges on proper sanding techniques, particularly the use of a thoughtful grit progression․ This systematic approach involves starting with coarser sandpaper to remove imperfections and gradually moving to finer grits to refine the surface․ The initial grit selection depends on the wood’s condition; rough surfaces necessitate coarser grits like 120 to effectively level the wood․ Subsequent grits, such as 150, 180, and finally 220, progressively smooth the surface, eliminating scratches left by the previous grit․
It’s crucial to avoid skipping grits, as this can result in visible scratch marks in the final finish․ Each grit should remove the scratches left by the preceding one, creating a consistently smooth surface․ Remember to sand in the direction of the wood grain to prevent cross-grain scratches, which are more difficult to remove․ After each sanding stage, thoroughly remove dust with a vacuum and a tack cloth to ensure a clean surface for the next grit․
Proper grit progression ensures optimal penetration and adhesion of the Watco Danish Oil, resulting in a professional-looking finish that highlights the natural beauty of the wood․
Removing Previous Coatings
Before applying Watco Danish Oil, it’s crucial to ensure that the wood surface is free from any existing coatings like varnish, shellac, lacquer, or heavy stains․ These coatings create a barrier that prevents the Danish oil from properly penetrating the wood pores, hindering its ability to harden and provide the desired finish․ Failure to remove these coatings will result in a subpar finish with poor adhesion and potential for peeling or flaking․
Several methods can be employed to remove previous coatings, including chemical strippers, sanding, and scraping․ Chemical strippers are effective for dissolving thick layers of finish, but require careful handling and proper ventilation․ Sanding is a more controlled approach, but can be time-consuming, especially with stubborn coatings․ Start with a coarse-grit sandpaper (e․g․, 80-grit) to remove the bulk of the finish, then gradually move to finer grits (e․g․, 120-grit, 150-grit) to smooth the surface․ Scraping is useful for removing loose or peeling finishes․
Regardless of the method chosen, ensure that all traces of the old finish are completely removed before proceeding with the Watco Danish Oil application․ A clean, bare wood surface is essential for optimal penetration and a beautiful, durable finish․
Application Steps
Applying Watco Danish Oil is a straightforward process, but attention to detail is key to achieving a beautiful and durable finish․ Begin by ensuring your workspace is well-ventilated and free from dust․ This will prevent contaminants from settling on the surface during application and drying;
The first step is to apply a liberal coat of Watco Danish Oil to the prepared wood surface․ Use a brush, cloth, or foam applicator to evenly distribute the oil, working in the direction of the wood grain․ Allow the oil to penetrate for 20-30 minutes․ This allows the oil to soak deep into the pores of the wood․
After the penetration period, wipe away any excess oil with a clean, lint-free cloth․ Ensure that no puddles or pools of oil remain on the surface․ Excess oil can lead to a sticky or uneven finish․ Allow the first coat to dry completely, typically for 6-8 hours, before proceeding with subsequent coats․ Multiple thin coats are always better than one thick coat for optimal results․ Repeat the application and wiping process for each additional coat, following the recommended drying times․ Remember to de-nib between coats to ensure a smooth finish․
Applying the First Coat
The first coat of Watco Danish Oil is crucial for establishing a solid foundation for the finish; Before you begin, ensure that the wood surface is clean, dry, and free of any dust or debris from sanding․ Use a tack cloth or a vacuum with a brush attachment to remove any remaining particles․
When applying the first coat, it’s important to work in a well-lit area so you can easily see the coverage․ Pour a small amount of Watco Danish Oil onto the surface or into a container․ Use a brush, a lint-free cloth, or a foam applicator to spread the oil evenly across the wood, following the direction of the grain․ Apply a generous amount, ensuring that the entire surface is thoroughly saturated․
Allow the oil to penetrate the wood for approximately 20-30 minutes․ This allows the oil to soak into the pores and begin the hardening process․ After the penetration period, use a clean, lint-free cloth to wipe away any excess oil from the surface․ This is essential to prevent a sticky or uneven finish․ Ensure that no puddles or pools of oil remain․ Let the first coat dry completely, usually for 6-8 hours, before proceeding․
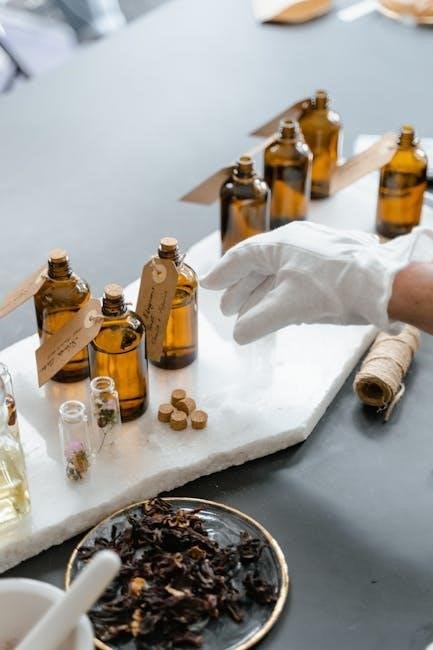
Tools for Application (Foam Brush, Cloth, Steel Wool)

Selecting the right tools is essential for a successful Watco Danish Oil application․ Each tool offers unique advantages, catering to different preferences and project requirements․ A foam brush provides a smooth, even application, ideal for covering large surfaces quickly․ Opt for high-density foam brushes to minimize air bubbles and ensure a consistent finish․ Clean foam brushes thoroughly with mineral spirits after each use to prolong their lifespan․
Lint-free cloths, such as cheesecloth or cotton rags, are excellent for applying thin, even coats of Danish oil․ They also excel at wiping away excess oil, preventing buildup and ensuring a smooth, satin finish․ Ensure the cloth is clean and free of any loose fibers that could contaminate the finish․ Fold the cloth into a pad for better control and even distribution․

Fine steel wool (grade 0000) can be used for burnishing the finish between coats․ This technique helps to smooth out any imperfections and enhance the sheen․ Apply light pressure and work with the grain of the wood․ Be sure to remove any steel wool residue with a tack cloth before applying the next coat of Danish oil․
Reapplying Coats

After applying the initial coat of Watco Danish Oil and allowing it to penetrate the wood for the recommended time, reapplication is often necessary to achieve the desired level of protection and sheen․ The number of coats required depends on the wood’s porosity and the desired finish․ Typically, two to three coats are sufficient, but more may be needed for softer woods or projects requiring enhanced durability․
Before reapplying, inspect the surface for any imperfections, such as dust particles or raised grain․ Lightly de-nib the surface with fine steel wool (0000 grade) or 220-grit sandpaper to smooth out any irregularities․ Remove all sanding dust with a tack cloth or vacuum before proceeding․
Apply subsequent coats of Danish oil in the same manner as the first, using a foam brush or lint-free cloth․ Ensure each coat is thin and even, allowing the oil to penetrate the wood pores fully․ After application, wait the recommended time, then wipe away any excess oil․ Allow each coat to dry completely before applying the next, following the manufacturer’s guidelines for drying times․

De-nibbing Between Coats
De-nibbing is a crucial step in achieving a smooth, professional finish when using Watco Danish Oil․ This process involves lightly sanding the surface between coats to remove any imperfections, such as raised grain or dust particles that may have settled during the drying process․ These imperfections, if left unaddressed, can result in a less-than-perfect final product․
After the first coat of Danish oil has dried completely, inspect the surface carefully․ Use fine steel wool (grade 0000) or very fine sandpaper (220 grit or higher) to gently rub down the surface․ The goal is not to remove the finish, but to knock down any small bumps or imperfections․ Apply light pressure and work with the grain of the wood to avoid scratching․
Once you’ve de-nibbed the entire surface, remove all sanding dust using a tack cloth, vacuum cleaner with a soft brush attachment, or a clean, dry cloth․ Ensure no dust remains before applying the next coat of Danish oil․ This step ensures that the subsequent coat adheres properly and results in a flawlessly smooth finish․
Drying Conditions: Temperature and Humidity
Optimal drying conditions are crucial for achieving a durable and beautiful finish with Watco Danish Oil․ Temperature and humidity significantly affect the drying time and the overall quality of the finish․ Ideally, apply Watco Danish Oil in a well-ventilated area with a temperature above 10 degrees Celsius (50 degrees Fahrenheit) to ensure proper curing․
High humidity levels can slow down the drying process, potentially leading to a tacky or uneven finish․ Avoid applying Danish Oil in damp conditions or on rainy days․ Aim for a relative humidity level below 70% for best results․ Good ventilation helps to dissipate moisture and promote even drying throughout the wood․

Avoid direct sunlight during the drying process, as it can cause the oil to dry too quickly on the surface, trapping moisture underneath and potentially leading to blistering or cracking․ Maintain consistent temperature and humidity levels throughout the drying period for a uniform and long-lasting finish․ Allow each coat to dry completely before applying the next, following the manufacturer’s recommended drying times․
Dealing with Over-Application
One of the advantages of Watco Danish Oil is its forgiving nature; however, over-application can still occur and requires prompt attention․ Recognizing and addressing over-application early is key to achieving a smooth and even finish․ The telltale signs of over-application include a persistently wet or sticky surface long after the recommended drying time, pooling of the oil in corners or crevices, and a generally uneven appearance․
If you notice over-application, the first step is to immediately wipe away the excess oil with a clean, lint-free cloth․ Apply firm pressure and wipe in the direction of the wood grain to remove as much of the excess as possible․ If the oil has already begun to tack up, you may need to use a slightly dampened cloth with mineral spirits to help loosen and remove the excess․
For stubborn areas, consider using fine steel wool (grade 0000) to gently buff the surface and remove the excess oil․ Be careful not to apply too much pressure, as this could damage the finish․ After removing the excess, allow the surface to dry completely, ensuring proper ventilation and temperature conditions․ Inspect the finish again and, if necessary, apply a very thin, even coat to blend any remaining inconsistencies․