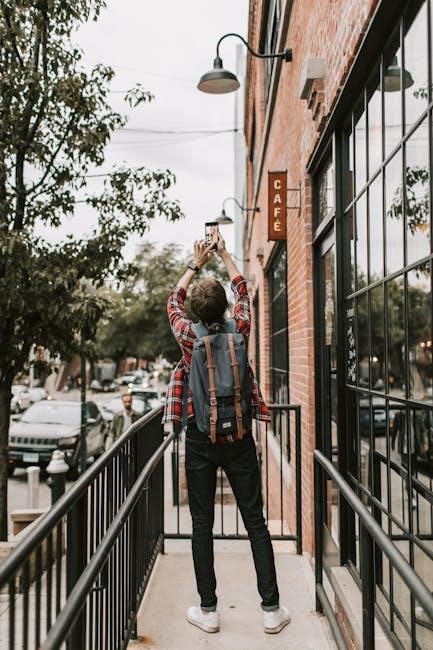
size guide for boots

Navigating boot sizing differs greatly from standard shoe sizes; consistency is lacking. Riedell, Roces, and ski boots utilize specific charts based on foot measurements, not typical shoe sizing.

Why Standard Shoe Size Isn’t Enough

Relying on your usual shoe size for boots is often inaccurate. Experiences vary – one person might need a size down in Riedell skates compared to their shoe size, while another finds a similar size barely fits; Shoe sizes themselves aren’t standardized; a size 7 in Converse differs from a 7 in hiking boots or heels.

This inconsistency highlights why foot measurements are crucial for boot fitting. Boot manufacturers, like Riedell and those producing ski boots, provide size guides based on actual foot length, offering a more precise fit than simply referencing your standard shoe size. Different boot constructions and intended activities further necessitate individualized sizing.

The Variability of Shoe Sizing

Shoe sizing lacks universal consistency, a significant issue when selecting boots. A wearer might experience a size 7 fitting in one brand of shoes, yet require a 7.5 for hiking boots or even a size 6 in heels. This demonstrates the unreliability of using your regular shoe size as a baseline for boot purchases.

Manufacturers employ different lasts (foot shapes) and sizing conventions, contributing to this variability. Therefore, relying on foot measurements—length and width—is paramount. Boot-specific size charts, like those offered by Riedell and for ski boots using the Mondopoint system, provide a more dependable guide than generalized shoe sizes.

Understanding Boot Sizing Systems

Boot sizing employs various systems, including Mondopoint (universal), European (EU), and US standards for men, women, and youth—each requiring careful conversion and consideration.

Mondopoint System Explained

The Mondopoint system, a globally recognized standard in boot sizing, measures foot length in millimeters. This eliminates the inconsistencies found in traditional sizing methods. Ski boots heavily rely on this system, offering a precise fit based on actual foot dimensions.

Unlike US or EU sizes, Mondopoint focuses solely on length, simplifying the process. To use it, measure your foot’s length from heel to longest toe. Then, consult a size chart converting millimeters to the corresponding Mondopoint size. This ensures a more accurate fit, crucial for performance and comfort, especially in activities like skiing where precision is key. It’s a universal language for boot fitters worldwide.

European (EU) Sizing

European (EU) sizing is commonly used for boots, particularly in skating and ski boots, but can vary between manufacturers. It’s a numerical system where higher numbers indicate larger sizes. Generally, EU sizes run smaller than US sizes, requiring careful conversion.

Conversion charts are essential when dealing with EU sizing, as a US size 7 might equate to an EU size 38 or 39, depending on the brand. Always refer to the specific manufacturer’s size guide for the most accurate fit. Remember that EU sizing doesn’t account for width, so considering foot width is also crucial for optimal comfort and performance.

US Sizing for Men, Women, and Youth

US boot sizing differentiates between men, women, and youth, adding complexity to finding the right fit. Men’s sizes typically start at 6, while women’s begin at 5, with youth sizes starting even smaller; A size 7 shoe doesn’t directly translate to a size 7 boot; variations exist.

Women’s sizes often include a “B” for standard width, while men’s may have “D.” Youth sizes are denoted differently. It’s vital to consult specific brand charts, as sizing can fluctuate. Remember, a size 7 Converse differs from a size 7 hiking boot, highlighting the inconsistency and the need for precise measurement.

Specific Boot Types & Sizing

Boot sizing varies significantly by type; Riedell skates, Roces adjustable boots, ski boots (Redster charts), and hiking boots each require unique sizing approaches for optimal fit.

Riedell Boot Sizing – A Case Study

Riedell boot sizing presents unique challenges, deviating from standard shoe sizes. A user wearing a size 7 shoe found a size 6 Riedell 135 boot too large, necessitating a size 5 for a perfect fit. However, experiences vary, with another skater barely fitting into a size 5 despite wearing a size 7 shoe normally.

Riedell emphasizes utilizing their website’s size guide, which relies on actual foot measurements rather than conventional shoe sizes. This highlights the inconsistency of general shoe sizing – one person might wear a 7 in Converse, a 7.5 in hiking boots, or even a 6 in heels – reinforcing the need to avoid basing skate sizes on shoe size alone.

Roces Idea 6in1 Boot Sizing

The Roces Idea 6in1 boot offers adjustable sizing through four different size options. Users can modify the fit by turning a pin to one of the designated slots, allowing for personalized comfort. This adjustability caters to individual preferences and accommodates slight variations in foot size.

While size charts provide a general recommendation, Roces strongly advises visiting a local ski shop or a professional boot fitter for optimal results. Locating a store nearby is easily done through their website. Remember, these charts are guidelines; a professional fitting ensures the best possible fit for performance and comfort.

Ski Boot Sizing & Redster Charts

Ski boot sizing predominantly utilizes the Mondopoint system, a universal measurement method focused on foot length in centimeters. Redster charts, like those provided, display sizing conversions across European (EU) and UK measurements. These charts illustrate dimensions for footwear, not paws, emphasizing accurate selection.

The Redster chart showcases a range from Euro 34.5 to 46, correlating to UK sizes 2.5 to 7.5. However, these are merely recommendations. For a precise fit, visiting a local ski shop or a qualified boot fitter is crucial. They can assess your foot shape and volume for optimal performance and comfort on the slopes.

Hiking Boot Sizing Considerations

Unlike standard shoes, hiking boots require careful sizing due to varying activities and terrain. A common experience is needing a half to full size larger in hiking boots compared to everyday shoes, even if you typically wear a size 7. This accounts for sock thickness and foot swelling during hikes.

Consider the type of hiking you’ll be doing. Longer treks demand more room for comfort, while shorter, faster hikes may benefit from a snugger fit. Prioritize measuring your foot length and width, as these are more reliable than relying on your usual shoe size, which can be inconsistent across brands and styles.

Measuring Your Feet for Boots

Accurate foot measurement, including length and width, is crucial for proper boot fit. Printable charts at 100% scale ensure precise sizing, bypassing inconsistent shoe sizes.

Accurate Foot Measurement Techniques

Achieving a precise boot fit begins with accurate foot measurements. Trace your foot on paper while standing, ensuring weight is evenly distributed. Measure the longest distance from heel to toe, and also the width at the widest point. Repeat for both feet, as sizes can differ.

When using printable charts, confirm they are printed at a 100% scale – crucial for accuracy. Measure in the afternoon or evening, as feet tend to swell throughout the day. Wear the socks you intend to use with the boots during measurement. Consider professional measurement for optimal results, especially for specialized boots.

Printing Foot Size Charts (100% Scale)

Utilizing printable foot size charts is a valuable step, but printing at the correct scale – 100% – is paramount. Many charts include a test square; verify its dimensions match after printing. If the test square isn’t accurate, adjust your printer settings to ensure a true-to-size chart.

Incorrect scaling renders the chart useless, leading to inaccurate measurements and ill-fitting boots. Double-check printer settings before each print. A misaligned chart can easily result in purchasing the wrong size. Prioritize accuracy; a properly scaled chart is fundamental for a comfortable and functional boot fit.

Measuring Foot Length and Width

Accurate foot length measurement is crucial; place your foot flat on the chart, heel against a wall. Measure from the wall to the longest toe. For width, measure across the widest part of your foot. Repeat with both feet, as sizes can differ.

Don’t simply rely on your usual shoe size, as boot sizing varies significantly. Consider that inner seams and sock thickness impact fit. Precise length and width measurements, combined with manufacturer-specific charts, provide the best foundation for selecting the correct boot size, ensuring comfort and performance.

Factors Affecting Boot Fit

Sock thickness, foot shape, and boot construction all influence fit. Volume and materials play a role; a professional fitting considers these elements for optimal comfort.

Sock Thickness and Material

The thickness and material of your socks significantly impact boot fit. Thicker socks naturally take up more volume within the boot, potentially requiring a larger size. Conversely, thinner socks may necessitate a snugger fit to prevent unwanted movement. Consider the activity; hiking boots often pair with thicker wool or synthetic blends for cushioning and warmth, while skating boots might utilize thinner, moisture-wicking socks.

Different materials compress differently. Wool retains warmth even when damp, adding bulk, while synthetic materials offer consistent compression. Always try on boots with the socks you intend to wear during the activity to ensure an accurate and comfortable fit. Ignoring sock considerations can lead to blisters, discomfort, or even reduced performance.

Foot Shape and Volume

Beyond length and width, foot shape and volume are crucial for boot fit. Some individuals have high arches, wide forefeet, or narrow heels, impacting how a boot conforms to their foot. High-volume feet require boots with more internal space, while low-volume feet benefit from a snugger, more secure fit.

Consider whether you have a “square” or “Greek” foot shape. Boots designed for specific shapes will provide better comfort and support. Ignoring foot volume can lead to pressure points, slippage, or overall discomfort. A professional boot fitter can assess your foot shape and recommend boots that accommodate your unique anatomy, ensuring optimal performance and preventing injuries.

Boot Construction and Materials

Boot construction significantly influences fit. Stiffer boots, common in skiing and some work boots, require a more precise fit as they offer less give. Softer boots, like many skate boots, may allow for a slightly looser fit initially, conforming more to the foot over time.

Materials also play a role. Leather boots stretch and mold to the foot, while synthetic materials maintain their shape. The internal construction, including padding and support structures, impacts overall comfort and fit. Understanding these factors is vital when selecting a boot size, ensuring it complements the boot’s design and intended use.

Troubleshooting Boot Fit Issues

If boots are too large, consider thicker socks or insoles. For boots too small, explore stretching options or, if severe, consider a larger size altogether.

Boots Too Big: Solutions

When boots feel overly spacious, several remedies can improve the fit. The most immediate solution is upgrading sock thickness; heavier, denser socks fill volume effectively. Adding insoles is another excellent approach, providing both cushioning and a more snug fit by reducing the internal space within the boot.

Consider utilizing tongue pads to take up additional room, particularly if the issue is localized to the instep. For minor size discrepancies, boot stretchers can subtly reshape the boot, tightening the overall fit. However, significant size differences may necessitate exploring a smaller boot size, as excessive looseness compromises performance and comfort.

Boots Too Small: Solutions

If your boots feel constricting, several strategies can offer relief. Initially, assess sock thickness – switching to thinner socks can create valuable space. Boot stretching is a viable option, particularly for leather or flexible materials; a professional boot fitter can expertly expand the boot’s width or length.

Consider using a boot stretcher at home for minor adjustments, but proceed cautiously to avoid damage. For localized pressure points, tongue pads can alleviate discomfort. If the boot remains uncomfortably tight, exploring a larger size is often the most effective long-term solution, ensuring optimal comfort and preventing blisters.

Dealing with Width Issues

Foot width is a crucial, often overlooked, aspect of boot fit. If boots feel too narrow, causing pinching or discomfort, several solutions exist. Boot stretching, performed by a professional, can widen the boot’s toe box or overall width. Utilizing a boot stretcher at home is possible for minor adjustments, but caution is advised.

Consider boots specifically designed for wider feet; many manufacturers offer width options. Thinning or replacing the boot’s liner can also create more internal space. Conversely, if boots are too wide, thicker socks or custom footbeds can help secure your foot and minimize movement within the boot.

Advanced Boot Fitting Tips

Professional boot fitters offer expertise, assessing flex and recommending custom footbeds for optimal comfort and performance. These enhancements personalize the fit significantly.

Visiting a Professional Boot Fitter

Seeking guidance from a professional boot fitter is invaluable, especially given the inconsistencies in standard shoe sizing and the nuances of boot construction. Experienced fitters utilize specialized tools and techniques to accurately measure your feet – length, width, and volume – going beyond simple measurements.

They assess your foot shape, gait, and the specific demands of your activity to recommend boots that provide the best possible fit. A fitter can identify potential pressure points, recommend appropriate modifications like shell stretching or liner adjustments, and advise on the use of custom footbeds or orthotics to enhance comfort and performance. Don’t underestimate the benefit of their expertise!

Understanding Boot Flex

Boot flex refers to the stiffness of the boot’s shell, significantly impacting performance and comfort. A softer flex is more forgiving and comfortable, ideal for beginners or those prioritizing ease of movement. Stiffer flexes offer greater responsiveness and control, favored by experienced users demanding precision.

Flex is often rated on a scale (e.g., 60-130), with higher numbers indicating greater stiffness. Choosing the correct flex depends on your skill level, body weight, and the activity. Incorrect flex can lead to discomfort, reduced control, and even injury. Consider seeking professional advice to determine the optimal flex for your needs.

Custom Footbeds and Orthotics

While accurate sizing is crucial, custom footbeds and orthotics can dramatically enhance boot fit and performance. Standard boot footbeds often lack the support needed for individual foot shapes and arches. Custom footbeds mold to your foot, providing personalized support, improved alignment, and enhanced comfort.

Orthotics address specific biomechanical issues, like overpronation or supination. They can alleviate pressure points, reduce fatigue, and improve overall stability. Investing in custom solutions, especially for high-performance activities, can significantly optimize boot fit and prevent injuries, complementing a proper size selection.

Boot Sizing for Specific Activities

Different activities—ice skating, work, or skiing—demand unique fits; Specialized boot sizing guides cater to each sport’s requirements, prioritizing performance and safety.

Ice Skating Boot Sizing

Ice skating boots require a precise fit, often differing significantly from regular shoe size. Many skaters find they need to size down, sometimes by a full size or more, compared to their street shoe. Riedell, a prominent skate boot manufacturer, emphasizes using foot measurements rather than relying on standard sizing.

A snug fit is crucial for control and performance, but not so tight as to cause discomfort. Consider the sock thickness you’ll be wearing while skating. Professional fitting is highly recommended, as boot shape and individual foot characteristics play a significant role. Improper sizing can lead to blisters, pain, and reduced skating ability;

Work Boot Sizing

Work boots demand a comfortable yet protective fit, often requiring adjustments from your usual shoe size. Unlike athletic footwear, work boots prioritize durability and support, necessitating a more precise fit to prevent foot fatigue and injury. Account for the thickness of work socks, which are typically heavier than everyday socks.

Consider the boot’s construction – steel-toe boots, for example, may require extra toe room. Width is also critical; a too-narrow boot can cause blisters, while a too-wide boot can lead to instability. Prioritize trying boots on at the end of the day when feet are naturally more swollen.

Digital Resources & Size Charts

Online conversion charts and manufacturer-specific guides offer valuable sizing recommendations. Nidecker provides boot size conversions for US, EU, and youth measurements for accuracy.

Online Boot Size Conversion Charts

Numerous websites offer boot size conversion charts, attempting to bridge the gap between different sizing systems like US, EU, and Mondopoint. However, relying solely on these charts can be misleading due to the inherent variability in boot construction and individual foot shapes. These charts serve as a starting point, providing a general estimate, but aren’t foolproof.

It’s crucial to remember that a US size 7 in a Converse sneaker won’t translate directly to a size 7 in a Riedell skate boot or a hiking boot. Always prioritize manufacturer-specific size guides when available, as they account for the unique characteristics of their boots. Cross-referencing multiple charts can offer a broader perspective, but ultimately, accurate foot measurement remains paramount for a proper fit.

Manufacturer-Specific Size Guides

Prioritizing manufacturer-specific size guides is essential for accurate boot fitting. Brands like Riedell and Roces provide detailed charts tailored to their boot constructions, often emphasizing foot length measurements over standard shoe sizes. These guides acknowledge the unique nuances of each boot model, accounting for factors like width, volume, and intended activity.

For example, Roces’ Idea 6in1 boots feature adjustable sizing, but still require referencing their specific chart. Ski boot manufacturers, like those utilizing the Redster charts, rely on the Mondopoint system. Always consult the official website or product documentation for the most up-to-date and precise sizing information, as variations can occur between models.

Secure Boot & UEFI Considerations

Secure Boot, enabled with UEFI, enhances system security during startup, utilizing the EFI System Partition (ESP) and bootmgfw.efi for crucial functions.

Secure Boot and UEFI Interaction

The synergy between Secure Boot and UEFI (Unified Extensible Firmware Interface) is fundamental to modern system security. Secure Boot, a feature of UEFI, ensures that only trusted software can load during the boot process. This prevents malicious software, like rootkits, from compromising the system before the operating system even starts.

UEFI replaces the older BIOS system, offering enhanced security features and a more flexible architecture. A critical component is the EFI System Partition (ESP), which stores boot loaders and drivers necessary for the boot process. Secure Boot verifies the digital signatures of these components against a database of trusted keys, guaranteeing their integrity. This interaction safeguards the boot sequence, bolstering overall system protection.

EFI System Partition (ESP)

The EFI System Partition (ESP) is a crucial element within UEFI-based systems, acting as a dedicated space for boot loaders, drivers, and system utilities. It’s formatted with the FAT32 file system to ensure compatibility across various UEFI implementations.

During the boot process, the UEFI firmware locates the ESP and retrieves the necessary files, notably bootmgfw.efi in Windows environments, to initiate the operating system’s loading sequence; Maintaining the integrity of the ESP is paramount; corruption or modification can render the system unbootable. Secure Boot relies heavily on the ESP to verify the authenticity of boot components before execution, enhancing system security.

Boot Manager Issues & Troubleshooting

Windows 11 boot manager problems can stem from multiple OS installations, corrupted system files, or incorrect boot configurations, often relating to the boot loader.

Windows 11 Boot Manager Problems

The Windows 11 Boot Manager appearing during startup often indicates underlying issues. These can range from the presence of multiple operating systems competing for control, to critical system file corruption impacting the boot process. Incorrect boot configurations, stemming from user adjustments or software conflicts, also frequently contribute to these problems. Crucially, these issues typically center around the boot loader – the component responsible for initiating the operating system’s launch sequence. Diagnosing the root cause requires careful examination of boot settings and potential system file integrity checks. Resolving these errors often involves rebuilding the boot configuration data or repairing corrupted system files using specialized tools.

Resolving Boot Loader Errors

Addressing boot loader errors demands a systematic approach. Initially, verifying disk integrity using tools like CHKDSK is crucial, ensuring no physical issues impede the boot process. Subsequently, employing the Bootrec.exe utility – specifically commands like “FixMbr,” “FixBoot,” and “RebuildBcd” – can often reconstruct a damaged boot configuration. If these fail, utilizing Windows Recovery Environment (WinRE) to perform a startup repair is recommended. For persistent issues, consider a clean installation of Windows, though this necessitates data backup. Remember, accurate diagnosis is key; understanding the error message provides vital clues for effective resolution.

guide by wire

Guide by Wire technology utilizes physical wires or electrical signals for remote control, enabling precise navigation in diverse applications like missiles and AGVs.

This innovative approach, gaining traction in automotive steering, offers enhanced control and automation, representing a significant leap in modern engineering.

What is Guide by Wire?

Guide by Wire represents a control system where the operator isn’t mechanically linked to the controlled device. Instead, commands are transmitted via a physical wire or, increasingly, electrical signals. This fundamentally alters traditional mechanical linkages, offering advantages in precision and remote operation.

Originally prominent in anti-tank missiles, where a wire trails behind for guidance, the concept extends to Automated Guided Vehicles (AGVs) and, notably, steer-by-wire automotive systems. Essentially, it’s a method of transmitting steering or directional control electronically, bypassing direct mechanical connections. This allows for sophisticated control algorithms and enhanced safety features.

Historical Development of Guide by Wire Systems

Guide by Wire’s origins lie in military applications, specifically the development of wire-guided missiles during the Cold War. Early systems, appearing in the mid-20th century, relied on a physical wire spooled out as the missile flew, allowing real-time operator control.

The technology evolved alongside advancements in electronics. The late 20th and early 21st centuries saw its adaptation for industrial automation, with AGVs utilizing wire guidance for precise path following. More recently, steer-by-wire systems have emerged in the automotive industry, though adoption remains limited, primarily internationally, representing a shift towards fully electronic control.

Types of Guide by Wire Systems

Guide by Wire manifests in diverse forms: wire-guided missiles for precision targeting, AGVs for automated transport, and steer-by-wire for vehicle control.

Wire-Guided Missiles: A Core Application

Wire-guided missiles represent a foundational application of Guide by Wire technology. These systems employ a thin electrical wire physically connected to the missile and the launching platform.

This connection transmits control signals, allowing operators to adjust the missile’s trajectory mid-flight, particularly effective against tank targets. As the missile travels, the wire spools out, maintaining a continuous link.

This method provides a reliable guidance system, especially in scenarios where other guidance methods might be compromised. It’s commonly used in anti-tank guided missiles (ATGMs) due to its accuracy and operational flexibility.

Automated Guided Vehicles (AGVs) and Wire Guidance

Automated Guided Vehicles (AGVs) frequently utilize Guide by Wire systems for precise navigation within controlled environments like warehouses and factories. A wire is embedded in the floor, emitting a radio frequency signal.

AGVs follow this signal, enabling them to autonomously transport materials along predefined routes. Crucially, the system integrates with the AGV’s braking system; signal loss triggers automatic deceleration and stopping, enhancing safety.

This method offers a cost-effective and reliable solution for material handling, improving efficiency and reducing labor costs in industrial settings. It’s a cornerstone of modern logistics.

Steer-by-Wire Systems in Automotive Industry

Steer-by-Wire represents a significant advancement in automotive technology, replacing the traditional mechanical linkage between the steering wheel and wheels with electronic signals. This “Guide by Wire” approach transmits driver input via sensors and actuators, offering enhanced precision and responsiveness.

Currently, adoption is limited, with only one U.S. vehicle utilizing the system, but it’s gaining international popularity. This technology allows for customizable steering feel and integration with advanced driver-assistance systems (ADAS), paving the way for fully autonomous driving.

It’s a rapidly evolving field.

Components of a Guide by Wire System

Guide by Wire systems fundamentally require a guidance wire, signal transmission controls, and a reliable power supply for effective operation across applications.

These elements work in harmony to ensure precise and dependable remote control.

The Guidance Wire: Material and Specifications

The guidance wire itself is a critical component, demanding specific material properties for reliable performance. Typically, these wires are constructed from durable, yet flexible materials capable of withstanding tension during deployment and operation.

Specifications often include considerations for tensile strength, electrical conductivity (for signal transmission), and resistance to environmental factors like temperature and corrosion. The wire’s diameter and coating also play vital roles, influencing both signal integrity and longevity.

Materials used range from specialized alloys to high-strength polymers, tailored to the specific application – whether it’s a missile guidance system or an automated guided vehicle.

Signal Transmission and Control Systems

Signal transmission within a guide by wire system relies on encoding control commands onto a carrier signal traveling along the guidance wire. This signal, originating from a control unit, dictates the direction and speed of the guided device.

Sophisticated control systems interpret operator input or pre-programmed instructions, converting them into electrical signals. These signals are then modulated and transmitted, ensuring accurate and responsive control.

Feedback mechanisms are often incorporated, allowing the system to monitor the guided device’s position and adjust the signal accordingly, maintaining precise tracking and navigation.

Power Supply and Management

Power supply is a critical aspect of guide by wire systems, demanding reliable energy delivery to both the signal transmission components and the guided device itself. Systems often utilize dedicated power sources, ensuring uninterrupted operation even during extended use.

Effective power management is essential, particularly in mobile applications like missiles and AGVs, where battery life or generator capacity is limited. Sophisticated circuitry regulates voltage and current, optimizing energy efficiency.

Redundancy in power supply, such as backup batteries, is frequently implemented to maintain functionality in case of primary power failure, enhancing system reliability and safety.

How Wire Guidance Works in Different Applications

Wire guidance varies by application; missiles use wires for direct control, AGVs follow paths, and automotive systems employ electronic signals for steering precision.

Missile Guidance: Tracking and Control

Missile guidance via wire relies on a continuous connection transmitting control signals from the launch platform to the missile itself. As the missile travels, the wire spools out, maintaining a physical link.

This system allows operators to make real-time adjustments to the missile’s trajectory, particularly crucial for anti-tank applications where navigating complex terrain and hitting moving targets is essential. The fire control/guidance system interprets operator commands and translates them into adjustments sent along the wire.

This method provides a highly reliable and accurate guidance solution, especially in scenarios where GPS or other wireless systems might be compromised.

AGV Navigation: Path Following and Obstacle Detection

Automated Guided Vehicles (AGVs) utilize wire guidance by following a wire embedded in the floor. The AGV’s onboard sensors detect the signal emitted by the wire, enabling precise path following throughout a facility.

This system is often integrated with the AGV’s braking system; signal loss triggers an automatic slowdown and stop, enhancing safety. While primarily focused on path adherence, wire guidance can be combined with other sensors for obstacle detection.

This combination provides a robust and reliable navigation solution for material handling and automated logistics applications.

Automotive Steering: Electronic Control Units (ECUs)

Steer-by-wire systems in automobiles replace the traditional mechanical linkage with electronic signals transmitted by wires. These signals are processed by Electronic Control Units (ECUs), which interpret driver input from the steering wheel and translate it into commands for the steering actuators.

This technology allows for variable steering ratios and enhanced responsiveness. While currently uncommon in the U.S., steer-by-wire is gaining popularity internationally, offering potential for improved vehicle dynamics and advanced driver-assistance systems.

The ECU plays a crucial role in ensuring safe and reliable operation.

Advantages of Guide by Wire Technology

Guide by Wire delivers increased precision, enhanced safety through features like automatic stops, and improved efficiency via automation in applications like AGVs and missiles.

Increased Precision and Accuracy

Guide by Wire systems excel in delivering exceptionally precise control, surpassing traditional mechanical linkages. The direct connection – whether physical wire or electronic signal – minimizes play and responsiveness delays. This is particularly crucial in applications demanding pinpoint accuracy, such as missile guidance where even minor deviations can significantly impact the target.

Automated Guided Vehicles (AGVs) benefit immensely, navigating predefined paths with remarkable consistency. Furthermore, steer-by-wire automotive systems promise more accurate steering responses, enhancing vehicle handling and stability. The technology’s inherent feedback loops contribute to maintaining the desired trajectory, resulting in superior operational performance.

Enhanced Safety Features

Guide by Wire systems incorporate several safety mechanisms to mitigate risks. Crucially, signal loss protocols are implemented; for example, AGVs automatically slow and stop if the wire connection is severed, preventing uncontrolled movement. Redundancy is also common, with backup systems ensuring continued operation even in case of component failure.

Emergency stop systems are integral, allowing immediate termination of operation. In automotive steer-by-wire, fail-safe designs prioritize driver control, reverting to a mechanical backup if electronic systems malfunction. These features collectively enhance operational safety, minimizing potential hazards across diverse applications.

Improved Efficiency and Automation

Guide by Wire technology significantly boosts efficiency through precise control and automation. AGVs utilizing wire guidance navigate defined paths consistently, optimizing material handling in industrial settings. Automated steering in vehicles, though currently limited in US markets, promises increased fuel efficiency and reduced driver fatigue.

The technology allows for complex maneuvers and repeatable actions, minimizing human error and maximizing throughput. Integrating these systems into handling systems, like forklifts, enables independent operation, streamlining workflows and reducing labor costs. This leads to substantial gains in productivity and operational effectiveness.

Disadvantages and Challenges

Guide by Wire systems face challenges like signal interference, potential wire breakage leading to system failure, and the inherent complexity and cost of implementation.

Signal Interference and Reliability

Signal integrity is a critical concern in Guide by Wire systems. External electromagnetic interference can disrupt signal transmission, potentially leading to inaccurate control or complete system failure. Maintaining a reliable connection, especially in dynamic environments, presents a significant challenge. The physical wire itself is susceptible to damage, creating breaks that immediately impact functionality.

Robust shielding and error-checking protocols are essential to mitigate interference. Furthermore, system designs must account for potential signal degradation over distance, ensuring consistent performance. The reliability of the entire system hinges on the consistent and accurate transmission of control signals, demanding rigorous testing and quality control measures.

Wire Breakage and System Failure

Wire breakage represents a primary failure point in Guide by Wire systems. Physical stress, environmental factors, or simple wear and tear can compromise the wire’s integrity, immediately halting control. Systems must incorporate fail-safe mechanisms to address this risk. For example, AGV systems integrate the guidance wire with the braking system, automatically slowing and stopping the vehicle upon signal loss.

Missile guidance systems also require robust protocols to handle wire disconnection during flight. Redundancy and backup systems are crucial, alongside immediate shutdown procedures, to prevent uncontrolled operation and ensure safety. Preventing catastrophic outcomes relies on anticipating and mitigating the consequences of wire failure.

Complexity and Cost of Implementation

Guide by Wire systems, while offering precision, present significant implementation challenges. Integrating these systems demands specialized engineering expertise, increasing initial development costs. The need for robust signal transmission, reliable power supplies, and fail-safe mechanisms adds to the overall expense. Furthermore, installing and maintaining the guidance infrastructure – particularly the wires themselves – requires ongoing investment.

Compared to emerging wireless alternatives, the physical infrastructure of wired systems can be costly. However, the proven reliability and security of wired connections often justify the expense in critical applications, despite the inherent complexity.

Safety Mechanisms in Guide by Wire Systems

Guide by Wire systems incorporate emergency stops, signal loss protocols, and redundancy features to ensure operational safety and prevent uncontrolled movement or failures.

Emergency Stop Systems

Emergency Stop Systems are critical safety components within Guide by Wire technology. These systems are designed for immediate and complete shutdown of the guided vehicle or device. As highlighted in AGV applications, a lost signal automatically triggers braking, halting movement.

This functionality extends to missile guidance, where unexpected signal disruptions necessitate immediate control termination. Redundant systems and fail-safe mechanisms are often integrated, ensuring the emergency stop functions even with primary system failures. These systems prioritize safety by preventing unintended operation and potential hazards.

Signal Loss Protocols

Signal Loss Protocols are fundamental to the safe operation of Guide by Wire systems. When the connection between the control system and the guided device is interrupted, pre-programmed protocols initiate. As seen in AGV applications, these protocols typically involve automatic deceleration and a controlled stop, preventing runaway scenarios.

For missile guidance, signal loss necessitates immediate termination of control, ensuring the missile doesn’t continue on an unintended trajectory. These protocols often include diagnostic checks to determine the cause of signal loss and prevent false alarms, maximizing system reliability and safety.

Redundancy and Backup Systems

Redundancy and Backup Systems are critical components in robust Guide by Wire implementations, mitigating risks associated with single points of failure. These systems often involve duplicate guidance wires or entirely separate control pathways. Should the primary wire break or signal degrade, the backup system seamlessly takes over, maintaining control and preventing operational disruption.

In automotive steer-by-wire, this might mean a secondary electrical connection. For missiles, redundant wires ensure continued guidance even with damage. These backups aren’t merely copies; they include independent power supplies and diagnostic capabilities, bolstering overall system resilience.

Future Trends in Guide by Wire Technology

Guide by Wire is evolving with AI integration, exploring wireless alternatives, and focusing on durable wire materials for enhanced performance and reliability in diverse applications.

Integration with Artificial Intelligence (AI)

The fusion of Guide by Wire technology with Artificial Intelligence (AI) represents a pivotal advancement. AI algorithms can analyze data from the guidance system, predicting potential issues and optimizing performance in real-time. This synergy allows for adaptive path planning, particularly beneficial in AGV navigation and complex missile maneuvers.

AI can also enhance safety protocols, improving obstacle detection and emergency response capabilities. Furthermore, machine learning can refine control parameters, leading to increased precision and efficiency. This integration promises a future where Guide by Wire systems are not just remotely controlled, but intelligently guided.

Wireless Alternatives and Hybrid Systems

While traditional Guide by Wire relies on physical connections, the emergence of wireless technologies presents compelling alternatives. Systems utilizing radio frequencies or laser guidance offer increased flexibility and eliminate the constraints of a physical wire. However, concerns regarding signal interference and security remain.

Consequently, hybrid systems – combining wired and wireless elements – are gaining prominence. These systems leverage the reliability of wired control for critical functions while utilizing wireless communication for supplementary data or remote monitoring. This approach offers a balanced solution, maximizing both precision and adaptability in Guide by Wire applications.

Advancements in Wire Materials and Durability

Improving the robustness of guidance wires is crucial for reliable system operation. Current research focuses on developing materials with enhanced tensile strength, flexibility, and resistance to environmental factors like temperature extremes and corrosion. Specialized polymers and composite materials are being explored to minimize wire breakage, a significant failure point in Guide by Wire systems.

Nanomaterials and advanced coatings are also showing promise, offering increased durability and reduced weight. These advancements aim to extend the operational lifespan of the wires, reduce maintenance requirements, and enhance the overall safety and dependability of Guide by Wire technology.

Applications Beyond Military and Automotive

Guide by Wire extends beyond traditional uses into robotics, medical guidewires for precise navigation, and industrial handling systems, automating complex processes efficiently.

Robotics and Automation

Guide by Wire principles are increasingly integrated into robotic systems, offering a reliable method for precise path following and controlled movement within automated environments. This technology allows for the creation of automated handling systems, like those employing trilateral forklifts or AGVs, capable of independent operation.

The inherent accuracy of wire guidance proves valuable in scenarios demanding repeatable precision, such as assembly lines or material transport. Furthermore, the system’s integration with braking mechanisms, ensuring automatic slowdowns upon signal loss, enhances operational safety within dynamic robotic workflows.

Medical Guidewires

Guide by Wire technology finds a critical application in medical guidewires, enabling precise navigation of instruments within the human body. These specialized wires act as conduits, directing catheters and other devices to targeted locations during minimally invasive procedures.

Companies specializing in this field, focusing on “one product – guidewires,” demonstrate the technology’s focused utility. The precision offered by wire guidance is paramount in delicate operations, ensuring accurate placement and minimizing patient trauma. Advancements continue to refine wire materials and designs for improved maneuverability and biocompatibility.

Industrial Handling Systems

Guide by Wire systems are increasingly integrated into industrial handling, automating the movement of materials and products. These systems allow forklifts and Automated Guided Vehicles (AGVs) to navigate independently along predefined paths, enhancing efficiency and reducing labor costs.

The technology’s reliability is bolstered by safety features; signal loss automatically initiates braking, preventing collisions. Installation services provide complete solutions, adapting wire guidance to existing infrastructure. This precise control streamlines logistics, optimizing warehouse operations and manufacturing processes for increased throughput and accuracy.

Current Manufacturers and Suppliers

Leading companies specialize in wire guidance technology, alongside component suppliers and integrators offering complete systems for diverse applications, from robotics to AGVs.

Leading Companies in Wire Guidance Technology

Several key players dominate the guide by wire landscape, offering specialized solutions. While specific company names are not explicitly detailed in the provided snippets, the industry encompasses firms focused on missile guidance systems – crucial for anti-tank applications – and those specializing in Automated Guided Vehicle (AGV) technology.

These companies engineer and integrate complete systems, including the guidance wires themselves and associated control mechanisms. Furthermore, suppliers provide essential components like specialized guidewires for medical applications and handling systems. The automotive sector sees increasing involvement, though currently limited to international markets, with companies pioneering steer-by-wire technologies.

Component Suppliers and Integrators

The guide by wire ecosystem relies on a network of specialized suppliers and integrators. Component suppliers focus on manufacturing the guidance wires themselves, ensuring material specifications meet demanding application requirements – from durable wires for missiles to precise guidewires for medical use.

Integrators, conversely, combine these components with control systems, power supplies, and safety mechanisms to create complete, functional systems. They install wire-guided systems for handling equipment like trilateral forklifts and AGVs, enabling independent movement. These firms often provide custom engineering solutions tailored to specific client needs.

Regulatory Standards and Compliance

Guide by wire systems, particularly in automotive steer-by-wire, face stringent safety regulations. AGV guidance also adheres to specific industry standards, ensuring operational reliability.

Safety Regulations for Automotive Steer-by-Wire

Automotive steer-by-wire systems are subject to rigorous safety standards due to their critical role in vehicle control. Regulations prioritize redundancy and fail-safe mechanisms, demanding multiple layers of protection against system failures. These standards often require comprehensive testing and validation to ensure reliable performance under diverse conditions.

Key areas of focus include electromagnetic compatibility (EMC) to prevent signal interference, cybersecurity measures to protect against hacking, and robust diagnostic capabilities for early fault detection. Compliance with standards like ISO 26262 – functional safety – is crucial, dictating stringent development processes and safety lifecycle management.

Industry Standards for AGV Guidance Systems

AGV guidance systems employing wire guidance adhere to several industry standards ensuring safe and efficient operation. ANSI/ITSDF B56.5 is a prominent standard outlining safety requirements for AGVs, covering hazard assessment, risk reduction, and performance criteria. This standard addresses aspects like emergency stops and safe speed limitations.

Furthermore, standards related to electromagnetic compatibility (EMC) are vital to prevent interference with the guidance signal. Manufacturers often follow internal quality control procedures and may seek certifications demonstrating compliance with relevant safety and performance benchmarks, guaranteeing reliable path following and obstacle detection.

router guide bushings how to use

Router template routing delivers accuracy, utilizing a router bushing – a cylindrical collar – to guide the bit along a template’s edge for consistent cuts.

What are Router Guide Bushings?

Router guide bushings are cylindrical collars that attach to your router’s baseplate, acting as a guide for the router bit. They enable precise routing along a template’s edge, offering exceptional accuracy for replicating shapes and creating consistent parts. Essentially, the bushing slides against the template, controlling the bit’s path.

These bushings unlock advanced jig and template routing possibilities, surpassing the limitations of standard flush trim or pattern bits. They are crucial for projects demanding repeatability and precision, transforming a versatile tool into a highly specialized instrument.

Why Use Router Guide Bushings?

Employing router guide bushings elevates woodworking precision, enabling the creation of multiple identical parts with consistently high accuracy. They excel when a flush trim or pattern bit falls short, offering solutions for complex curves or internal cutouts. Bushings provide an “adrenaline shot of functionality” to your router.

This method guarantees clean, professional results, especially beneficial for intricate designs or large-scale production. They’re ideal for situations demanding repeatability and control, ensuring each piece perfectly matches the template.

Types of Router Guide Bushings

Two primary bushing styles exist: Porter-Cable, utilizing a screw-on locking ring, and Bosch, which clicks into place, though adapters expand compatibility.

Porter-Cable Style Bushings

Porter-Cable style bushings are recognized by their two-piece construction, offering broad compatibility across numerous router models. These bushings secure to the router base via a screw-on locking ring, firmly holding the tubular guide in place. This design allows for easy adjustments and replacements of the guide tube itself, catering to various cutting needs.

Their widespread acceptance makes them a popular choice for woodworkers seeking versatility. Adapters are readily available to further expand their usability with different router brands, solidifying their position as a go-to option for template routing.

Bosch Style Bushings

Bosch style guide bushings distinguish themselves through a click-in installation method, designed specifically for compatibility with Bosch routers. Unlike the Porter-Cable style, they don’t require a locking ring; instead, they snap directly into a designated opening on the router base. This offers a quick and convenient setup for Bosch router owners.

However, it’s crucial to note that this style isn’t universally compatible. If you don’t own a Bosch router, you’ll need to explore adapters or subbases to utilize these bushings effectively in your woodworking projects.

Universal/Adapter Bushings

For routers lacking native compatibility with standard Porter-Cable or Bosch guide bushings, universal adapters and subbases present a versatile solution. These adapters bridge the gap, allowing you to utilize a wider range of bushings with your existing router. Subbases replace the router’s original baseplate, providing a pre-drilled opening for accepting bushings.

Investing in these components expands your routing capabilities, enabling template routing and precise duplication even with less common router models. Careful selection ensures a secure and accurate fit.

Understanding Bushing Sizes

Bushing sizes dictate the offset distance from the bit to the template edge; they’re available in both metric and imperial measurements, influencing routing precision and application.

Metric vs. Imperial Sizes

When selecting router guide bushings, understanding the difference between metric and imperial sizes is crucial for accurate template routing. Imperial bushings are measured in inches, commonly seen in older tools and American-made templates, while metric bushings utilize millimeters – prevalent in European systems.

Converting between these systems is essential when using templates from different regions. A slight mismatch can lead to inaccuracies in your finished projects. Always double-check the template’s specified bushing size and ensure compatibility with your chosen bushing set to achieve consistent, precise results.

Common Bushing Sizes and Their Applications

Several common router guide bushing sizes cater to diverse woodworking applications. A 1/2″ bushing is versatile for general-purpose routing, ideal for creating consistent edges and joinery. Smaller 3/8″ and 1/4″ bushings excel in intricate work, like box joints or delicate curves, offering greater control.

Larger bushings, such as 3/4″ or 1″, are suited for bigger projects or when offsetting the router bit further from the template. Selecting the appropriate size depends on the template design and desired cut width, ensuring optimal precision and efficiency.

Setting Up Your Router for Guide Bushing Use

Securely attach the chosen bushing to your router base, ensuring a snug fit. Proper alignment is crucial for accurate template following and clean, consistent cuts.

Attaching the Bushing to the Router Base

Two primary bushing styles exist: Porter-Cable and Bosch. Porter-Cable uses a screw-on locking ring, fitting many routers, while Bosch bushings click directly into compatible routers. If your router lacks compatibility, adapters and subbases are available.

Ensure the bushing is firmly secured to prevent wobble during operation. A loose bushing compromises accuracy. Tighten the locking ring adequately, or confirm a solid click-in connection for Bosch styles. Double-check the attachment before each use to maintain precision and safety throughout your routing process.

Ensuring Proper Alignment

Precise alignment is crucial for accurate template routing. After attaching the bushing, verify it’s perfectly centered relative to the router bit. Any misalignment introduces errors into your cuts.

Test alignment by slowly rotating the router bit and observing the gap between the bit and the bushing’s inner diameter. This gap must be consistent around the entire circumference. Minor adjustments to the bushing’s position may be needed. A properly aligned setup guarantees clean, repeatable results and prevents template damage.

Template Creation for Router Bushings

Templates, essential for guided routing, can be crafted from materials like MDF or plywood, designed for accuracy, and dictate the final shape of your workpiece.

Materials for Templates

When crafting templates for router guide bushings, material selection is crucial for accuracy and longevity. Medium-density fiberboard (MDF) stands out as a premier choice due to its stability, smooth surface, and affordability, minimizing wear on both the bushing and the template itself.

Plywood, particularly Baltic birch, offers excellent dimensional stability and resistance to warping, making it suitable for larger or more complex templates. However, plywood’s layered construction can sometimes exhibit slight imperfections.

Solid wood is generally avoided as it’s prone to expansion and contraction with humidity changes, potentially compromising accuracy. Acrylic or polycarbonate can also be used for specialized applications requiring visibility, but they may scratch more easily.

Designing Templates for Accuracy

Precise template design is paramount when employing router guide bushings. Templates should extend beyond the intended cut line by at least the bushing’s outer diameter to ensure smooth, consistent routing. Account for the bushing’s offset when drawing your design; the bit’s cutting edge will be displaced from the template edge.

Internal cutouts require careful consideration – ensure sufficient material remains to support the template during routing.

Avoid sharp internal corners, opting for generous radii to facilitate smooth bushing travel. Securely fasten the template to your workpiece to prevent shifting during operation, guaranteeing accurate results.

The Router Bushing Routing Process

Select a suitable router bit and control feed rate and depth of cut for optimal results when using guide bushings with templates.

Choosing the Right Router Bit

When employing router guide bushings, bit selection significantly impacts the final outcome. Straight bits are most common for general template work, ensuring clean edges. Spiral bits excel at plunge cuts and creating smooth curves, though they can generate more heat.

Consider the material being routed; harder woods benefit from bits with sharper angles and durable coatings. The bit’s shank size must match your router’s collet. Furthermore, the bit’s cutting depth should align with the template thickness and desired final product dimensions for precise results. Always prioritize quality bits for accuracy and safety.

Feed Rate and Depth of Cut

Controlling feed rate and depth of cut is crucial when using router guide bushings. A slower, consistent feed rate prevents tear-out and ensures a smooth finish, especially with hardwoods. Multiple shallow passes are preferable to a single deep cut, minimizing stress on the bit and router.

Adjust the router’s depth of cut incrementally, typically no more than half the bit’s diameter per pass. This approach maintains control and accuracy while reducing the risk of overheating or damaging the template. Monitor the router’s performance and adjust accordingly.

Advanced Techniques with Router Guide Bushings

Guide bushings unlock offset routing, nested templates, and multi-bushing setups, expanding routing possibilities beyond simple edge following for complex projects.

Offset Routing

Offset routing leverages the space between the router bit and the guide bushing’s inner diameter to create cuts parallel to a template edge; This technique is invaluable when you need to replicate a shape with a specific wall thickness or create grooves at a precise distance. By selecting a bushing with the appropriate offset, you can consistently produce identical parts without recalculating measurements for each cut. It’s a powerful method for creating joinery, inlays, or decorative elements, offering both precision and efficiency in your woodworking projects. Mastering offset routing expands your design capabilities significantly.

Nested Templates

Nested templates maximize material efficiency when producing multiple identical parts. This involves arranging the outlines of your desired shapes closely together on a single template sheet. Using a router and guide bushing, you can then cut out all the parts in a single pass, minimizing waste. This technique is particularly useful for smaller components or intricate designs. Careful planning of the template layout is crucial to ensure clean separation of the parts during routing, optimizing both time and resources for your woodworking endeavors.

Using Multiple Bushings

Employing multiple guide bushings expands routing capabilities, allowing for complex operations like creating mortises or dadoes. By switching between different sized bushings, you can achieve varying offsets from the template edge in a single setup. This eliminates the need for repeated template adjustments, enhancing precision and workflow. Strategically selecting bushing sizes and carefully designing templates are key to successful multi-bushing routing, unlocking intricate joinery and design possibilities within your woodworking projects.

Guide Bushing Materials

Guide bushings come in metal (steel, brass) for durability, and plastic for reduced friction; material choice impacts smoothness and template interaction during routing.

Metal Bushings (Steel, Brass)

Metal bushings, typically crafted from steel or brass, represent a durable and precise option for template routing. Steel bushings offer exceptional longevity and resistance to wear, making them ideal for frequent or demanding applications. Brass bushings, while softer than steel, provide reduced friction against the template surface, potentially resulting in smoother cuts and minimizing template damage.

The added weight of metal bushings can also contribute to stability during operation. However, it’s crucial to ensure the template material can withstand the bushing’s weight without shifting or distorting. Regularly inspecting metal bushings for any signs of damage, like cracks or deformation, is essential for maintaining accuracy and safety.

Plastic Bushings

Plastic bushings present a lightweight and cost-effective alternative to their metal counterparts, particularly suitable for softer template materials like melamine or acrylic. Their reduced weight minimizes the risk of template slippage during routing, enhancing accuracy, especially with larger templates. However, plastic bushings generally exhibit lower durability compared to steel or brass.

They are more susceptible to wear and tear, potentially losing their precise circular shape over time. Frequent use can lead to deformation, impacting the quality of cuts. Regularly checking for wear and replacing plastic bushings as needed is vital for maintaining consistent results.

Maintaining Your Router Guide Bushings

Regular cleaning and lubrication are crucial for optimal performance; inspect bushings frequently for wear, ensuring consistent, accurate routing and extending their lifespan effectively.

Cleaning and Lubrication

Maintaining your router guide bushings involves regular cleaning to remove accumulated sawdust and debris, which can impede smooth operation and affect accuracy. After each use, thoroughly wipe down the bushing with a clean, dry cloth. For stubborn residue, a soft brush or compressed air can be employed.

Lubrication is equally important; apply a small amount of lubricant – such as silicone spray or a specialized bushing lubricant – to the bushing’s inner surface. This reduces friction and ensures a consistently smooth glide along the template. Avoid oil-based lubricants, as they can attract dust. Proper cleaning and lubrication significantly extend the life and performance of your guide bushings.

Inspecting for Wear and Tear

Regularly inspect your router guide bushings for any signs of wear or damage. Look closely at the inner and outer surfaces for scratches, dents, or deformation. Any imperfections can compromise the bushing’s ability to guide the router accurately, leading to inconsistent cuts.

Check the locking mechanism – whether it’s a screw-on ring or a click-in system – to ensure it’s functioning correctly and securely holds the bushing in place. Replace any bushings exhibiting significant wear, as attempting to use damaged bushings can negatively impact project quality and safety.

Troubleshooting Common Issues

Common problems include bushing wobble and template slippage; ensure a secure bushing lock and template adhesion for accurate routing and consistent results.

Bushing Wobble

Bushing wobble significantly impacts routing accuracy, creating uneven cuts and deviating from the intended template path. Several factors contribute to this issue, including a loose bushing within the router base or a damaged bushing itself. First, verify the bushing is securely fastened; tighten the locking ring or ensure a proper click-in fit.

Inspect the bushing for any visible damage, like cracks or deformation. Also, check the router base for debris or inconsistencies preventing a snug fit. If wobble persists, consider using a different bushing or exploring adapter options for improved stability and precision during your routing operations.

Template Slippage

Template slippage is a common frustration when using router guide bushings, leading to inaccurate cuts and inconsistent results. To prevent this, securely fasten the template to your workpiece using double-sided tape, clamps, or screws – ensuring it remains immobile during routing.

Consider the template material; slick surfaces increase slippage risk. A slightly textured material offers better grip. Regularly check the template’s position throughout the routing process, and avoid excessive feed rates that can exacerbate movement. Proper template adhesion is crucial for precision.

Router Guide Bushings vs. Pattern Bits

Guide bushings and pattern bits both enable template routing, but bushings offer versatility with offset capabilities, while bits rely on bearing contact.

Comparing the Two Methods

Pattern bits utilize a bearing that follows the template’s edge, directly controlling the cut; this is ideal for flush trimming. However, router guide bushings provide greater flexibility. They mount to the router base and allow for offset routing, creating parts larger or smaller than the template.

Bushings excel when you need consistent spacing or multiple passes, while pattern bits are simpler for direct edge following. Choosing depends on the project’s complexity and desired outcome – bushings unlock advanced jigging possibilities.

When to Use Each Technique

Employ pattern bits for straightforward tasks like flush-trimming edges or replicating a template’s exact shape. When precision and repeatability are paramount, especially for multiple identical parts, router guide bushings shine. They’re invaluable for creating inlays, joinery, or offset patterns.

If a project demands offset cuts or complex template work, bushings are the superior choice. For simple edge refinement, a pattern bit offers convenience. Consider the project’s geometry and desired level of control when deciding.

Safety Precautions When Using Router Guide Bushings

Always wear eye and ear protection during operation. Effective dust collection is crucial for a safe and healthy workspace when routing with bushings.

Eye and Ear Protection

Routing generates significant noise and produces flying debris, making robust personal protective equipment essential. Always wear safety glasses or a face shield to shield your eyes from wood chips and dust particles ejected at high velocity.

Furthermore, the high-pitched whine of a router can cause lasting hearing damage; therefore, consistently use earplugs or earmuffs with a sufficient noise reduction rating. Prioritizing these safety measures ensures a comfortable and secure routing experience, preventing potential injuries and safeguarding your long-term health.

Dust Collection

Routing creates substantial amounts of fine dust, posing respiratory hazards and reducing visibility. Connecting your router to a dust collection system, such as a shop vacuum, is highly recommended. This minimizes airborne particles, improving air quality and preventing dust buildup in your workspace.

Effective dust collection also enhances the routing process by maintaining a clear view of the cutting area and preventing the dust from interfering with the guide bushing and template.

Adapters and Subbases for Router Compatibility

If your router lacks compatibility with standard guide bushings, adapters and subbases offer solutions, expanding your routing capabilities and precision.

Finding the Right Adapter

Determining the correct adapter requires knowing your router’s baseplate dimensions and the bushing style needed – Porter-Cable or Bosch. Universal adapters exist, but ensure a secure fit.

Carefully measure the diameter of your router’s baseplate opening and compare it to adapter specifications. Consider the material of the adapter; metal offers durability.

Read reviews to assess adapter quality and stability. A poorly fitting adapter can introduce wobble, compromising accuracy. Prioritize adapters designed specifically for guide bushing use, guaranteeing precision and safety during operation.

Installing a Subbase

A subbase replaces your router’s original baseplate, providing compatibility with guide bushings. Begin by disconnecting the router from power and removing the existing baseplate.

Align the new subbase with the mounting holes, ensuring a flush fit. Secure it using the appropriate screws, tightening them evenly to prevent warping.

Verify the subbase is firmly attached and doesn’t wobble. A stable subbase is crucial for accurate template routing. Double-check compatibility with your chosen bushings before proceeding with any routing operations.

Resources for Further Learning

Explore online forums and communities, alongside books and videos, to deepen your router technique mastery and unlock the full potential of guide bushings.

Online Forums and Communities

Engage with fellow woodworkers in online forums dedicated to woodworking and routing techniques; these platforms offer invaluable opportunities to learn from experienced users. Share your projects, ask specific questions about router guide bushings, and benefit from collective problem-solving. Websites like Woodworking Talk and Reddit’s r/woodworking frequently host discussions on template routing and bushing setups.

These communities are excellent resources for troubleshooting issues, discovering advanced techniques, and staying updated on the latest tools and accessories related to router guide bushing applications.

Books and Videos on Router Techniques

Numerous books and video tutorials comprehensively cover router techniques, including the effective use of guide bushings. Look for resources specifically addressing template routing and jig creation. Popular authors and instructors offer detailed guidance on bushing selection, template design, and proper setup procedures.

YouTube channels dedicated to woodworking often feature demonstrations of router guide bushing applications, providing visual learning experiences. These resources can significantly enhance your understanding and skill development.

polaroid snap camera user guide

Polaroid Snap Camera User Guide: A Comprehensive Overview

Welcome! This guide provides detailed instructions for the Polaroid Snap instant print digital camera. Learn about setup, operation, and maintenance, ensuring optimal use of your new device.

Explore features like Zink paper loading, photo modes, and microSD card usage. Troubleshooting tips and battery management are also included for a seamless experience.

The Polaroid Snap Instant Print Digital Camera represents a delightful fusion of classic Polaroid charm and modern digital convenience. This compact, portable camera allows you to capture and instantly print vibrant, full-color photos – no ink required! Unlike traditional Polaroid cameras relying on chemical processes, the Snap utilizes Zero Ink (Zink) printing technology, embedding color dyes within the special Zink paper itself.

Designed for simplicity and ease of use, the Snap is perfect for capturing spontaneous moments, creating instant keepsakes, and adding a retro touch to your photography. It’s a fantastic option for parties, vacations, or simply documenting everyday life. The camera boasts a digital sensor for capturing images, which are then printed directly onto the Zink paper, offering a unique blend of digital precision and instant gratification.

This user guide will walk you through every aspect of your Polaroid Snap, from unboxing and setup to exploring its various features and troubleshooting common issues. Whether you’re a seasoned photographer or a first-time user, this guide will empower you to unlock the full potential of your instant camera and enjoy the magic of instant photography once more. Prepare to rediscover the joy of tangible memories!

Unboxing and Component Identification

Upon opening your Polaroid Snap Instant Print Camera box, carefully verify that all components are present. You should find the Polaroid Snap camera itself, a Micro USB cable for charging, and a starter pack of Zink paper (typically 10 sheets). Some bundles may also include a wrist strap for added security during use.

Camera Components: Familiarize yourself with the camera’s exterior. Note the power button, shutter button, mode selector, and the Zink paper loading compartment. Locate the MicroSD card slot, covered by a protective flap, for expanding storage capacity. The built-in viewfinder allows for framing your shots, while the LCD screen displays captured images and camera settings.

Zink Paper: The Zink paper pack contains specially coated sheets that react with the camera’s thermal print head to produce full-color images. Each sheet has a protective layer on one side – ensure this layer is facing up during loading. The Micro USB cable is used to connect the camera to a power source for charging the internal battery. Retain the packaging for potential warranty claims or future transport.

Camera Overview: Buttons and Ports

The Polaroid Snap features a straightforward control layout. The Power Button, located on the top, initiates and terminates camera operation. Adjacent to it is the Shutter Button, used to capture photographs. A dedicated Mode Selector allows you to cycle through various shooting options, including black and white, color, and vintage filters.

On the side of the camera, you’ll find the MicroSD Card Slot, covered by a protective flap. This slot accommodates MicroSD cards (not included) for expanded storage beyond the internal memory. Below this is the Micro USB Port, used for charging the camera’s battery and transferring photos to a computer.

The Zink Paper Compartment, typically located at the back, houses the Zink paper sheets. The Viewfinder assists in framing your shots, while the integrated LCD Screen displays captured images, camera settings, and battery status. The LCD also provides a preview of your photos before printing. Understanding the function of each button and port is crucial for optimal camera operation.

Powering On/Off and Basic Operations

To power on your Polaroid Snap, gently press the power icon located on the viewfinder. The viewfinder will extend, and the camera will activate, displaying the main menu on the LCD screen. To power off, repeat this process – press the power icon again until the viewfinder retracts and the screen goes dark.

Basic operation revolves around the shutter button. A single press captures a photograph in the currently selected mode. The camera automatically focuses and adjusts exposure. The LCD screen provides a live preview of your composition. After taking a photo, it will automatically print if Zink paper is loaded.

Navigating the menu is done using the directional buttons surrounding the OK button. Use these to adjust settings, review photos, and access other features. The status indicator bar displays the charging progress and battery level. Remember to fully charge the camera before extended use for optimal performance.

Understanding the Viewfinder and LCD Screen

The Polaroid Snap features a unique viewfinder that physically extends when the camera is powered on. This provides a traditional shooting experience, aiding in composition. However, the primary display is the integrated LCD screen, which offers a live view of the scene, mirroring what the lens sees.

The LCD screen displays crucial information, including the selected shooting mode (photo, black & white, vintage), battery level, Zink paper status, and the number of remaining prints. Menu options and camera settings are also visible on the LCD. Use the directional buttons to navigate these settings.

The viewfinder itself doesn’t display a live image; it’s purely for framing. Rely on the LCD screen for accurate composition and reviewing captured photos. The screen also shows a preview of the printed image before it’s ejected. Understanding these elements is key to maximizing your Polaroid Snap experience.

Loading Zink Paper

Zink (Zero Ink) paper is essential for printing with your Polaroid Snap camera. This special paper contains all the colors needed for printing, eliminating the need for ink cartridges. To load the paper, locate the Zink paper compartment, typically on the side or bottom of the camera.

Open the compartment and insert the Zink paper stack, ensuring the glossy side faces up. The camera is designed to accommodate a specific number of sheets – usually around 10. Do not overfill the compartment, as this can cause printing errors.

Once the paper is loaded, the camera will automatically detect the presence of Zink paper and display the remaining sheet count on the LCD screen. It’s crucial to use genuine Polaroid Zink paper for optimal print quality and to avoid damaging the camera. Incorrect paper types may void your warranty.

Taking Your First Photo

With the Zink paper loaded, you’re ready to capture your first instant photo! Ensure the camera is powered on – the viewfinder will extend, and the LCD screen will activate. Point the camera at your subject and compose your shot using the viewfinder or the LCD screen.

Press the large shutter button located on top of the camera to take a picture. The camera will briefly display the captured image on the LCD screen. The Polaroid Snap will then automatically begin printing the photo.

The printing process takes approximately 30-60 seconds. During this time, avoid moving or tilting the camera. Once the print is complete, the photo will automatically eject from the printer slot. Remember that Zink paper prints are touch-dry immediately, so you can share them right away! Experiment with different angles and lighting to get the best results.

Exploring Photo Capture Modes

The Polaroid Snap camera offers several photo capture modes to enhance your creativity. Access these modes through the camera’s menu system, navigated using the buttons surrounding the LCD screen. The standard mode is ideal for everyday snapshots, providing balanced color and clarity.

Black & White mode delivers classic monochrome images, perfect for artistic expression. Vintage mode simulates the look of aged Polaroid photos, adding a nostalgic filter. For self-portraits or group shots, utilize the Self-Timer mode, allowing a few seconds delay before the shutter activates.

Experiment with these modes to achieve different aesthetic effects. The camera automatically adjusts settings within each mode for optimal results. Remember to review your photos on the LCD screen after capture to assess the chosen mode’s impact. Don’t be afraid to switch between modes frequently to find the perfect look for every shot!

Adjusting Camera Settings (Brightness, Flash)

The Polaroid Snap camera allows for basic adjustments to brightness and flash settings, enhancing image quality in various lighting conditions. Access these settings via the camera’s menu, using the directional buttons to navigate. Brightness control lets you subtly adjust the exposure of your photos, making them lighter or darker.

While the Snap doesn’t offer extensive manual control, the brightness adjustment can be useful for compensating for strong backlighting or dimly lit scenes. The flash setting offers three options: Auto, On, and Off. Auto mode lets the camera decide when to fire the flash, while On forces the flash to activate with every shot.

Off disables the flash entirely, ideal for situations where you want natural lighting. Be mindful of the flash range; it’s most effective for close-up subjects. Experiment with these settings to achieve the desired look and ensure well-exposed, vibrant photos. Remember to review images on the LCD to assess the impact of your adjustments.

Printing Photos: Instant Output

The core appeal of the Polaroid Snap is its instant printing capability. After capturing a photo, a print icon will appear on the LCD screen. Pressing this icon initiates the printing process, utilizing Zink (Zero Ink) paper. The camera contains a built-in printer, eliminating the need for ink cartridges – the Zink paper itself contains all the necessary dyes.

The printing process takes approximately 30-60 seconds. During this time, the camera will produce a full-color, adhesive-backed 2×3 inch print. Avoid interrupting the printing process, as this could result in a damaged or incomplete print. The printed photo will automatically eject from the camera’s output slot.

The quality of the print is dependent on the Zink paper used and the lighting conditions during capture. Ensure you’re using genuine Polaroid Zink paper for optimal results. The prints are durable, water-resistant, and smudge-proof, making them perfect for sharing or displaying. Enjoy the magic of instant photography!

Reviewing and Deleting Photos

The Polaroid Snap allows you to review captured photos directly on the LCD screen. Use the shutter button to cycle through your stored images. Each press will display the next photo in sequence. This provides a quick way to assess your shots before deciding whether to keep or delete them.

To delete a photo, navigate to the image you wish to remove while in review mode. Then, press and hold the shutter button for approximately two seconds. A confirmation message will appear on the screen, indicating that the photo has been deleted. Be aware that this action is irreversible, so confirm your selection carefully.

The camera’s internal memory and microSD card (if inserted) store your photos. Regularly reviewing and deleting unwanted images frees up space for new captures. Managing your photo storage ensures you won’t run out of room during important moments. Remember to back up your photos to a computer or cloud storage for safekeeping.

Using the MicroSD Card Slot

The Polaroid Snap features a MicroSD card slot, allowing for expanded storage beyond the camera’s internal memory. This is particularly useful for capturing a large number of photos, especially during extended use or travel. To insert a MicroSD card, locate the slot – typically on the side of the camera – and gently push the card in until it clicks into place.

Ensure the card is properly seated to avoid data corruption. The camera automatically recognizes the inserted card and utilizes it for storing new photos. You can configure the camera to prioritize the MicroSD card or use internal memory first through the settings menu.

To remove the card, gently press it inwards to release the locking mechanism, then carefully pull it out. Always eject the card safely before removing it to prevent data loss. MicroSD cards are readily available at electronics retailers and come in various storage capacities. Regularly backing up the contents of your MicroSD card to a computer is highly recommended.

Troubleshooting Common Issues

Image Quality Problems: If photos appear blurry, ensure the lens is clean and the camera is held steady. Low battery can also affect image quality. For faded prints, verify you’re using compatible Zink paper and that it’s stored correctly (cool, dry place).

Printing Errors: If the camera fails to print, check the Zink paper supply and ensure it’s loaded correctly. A “Paper Jam” error may require carefully removing any stuck paper fragments. Restarting the camera can often resolve minor printing glitches.

Power Issues: If the camera won’t turn on, connect it to a power source to charge the battery. A completely depleted battery may take some time to respond. If charging fails, try a different USB cable and adapter.

Card Errors: If the MicroSD card isn’t recognized, ensure it’s properly inserted and compatible with the camera. Formatting the card (after backing up data) can sometimes fix recognition issues. If problems persist, try a different MicroSD card.

Battery Charging and Management

Charging Your Snap: Utilize the included Micro USB cable to connect your Polaroid Snap to a powered USB port or a USB wall adapter. The status indicator bar on the camera will visually display the charging progress. A full charge typically takes several hours, depending on the power source.

Battery Level Indication: The LCD screen displays the remaining battery level. Pay attention to this indicator to avoid unexpected power loss during photo sessions. A low battery warning will appear when charging is needed.

Optimizing Battery Life: To maximize battery life, turn off the camera when not in use. Avoid prolonged use of the LCD screen, as it consumes significant power. Store the camera in a cool, dry place when not in use to preserve battery health.

Charging Precautions: Only use the provided USB cable or a certified replacement. Do not expose the camera to extreme temperatures during charging. Avoid overcharging the battery, as it can reduce its lifespan.

Zink Paper Compatibility and Availability

Zink Technology: The Polaroid Snap utilizes Zink (Zero Ink) paper, a unique technology that embeds all the colors needed for printing directly into the paper itself. This eliminates the need for messy ink cartridges!

Paper Sizes & Packs: Zink paper is available in various pack sizes, typically ranging from 20 to 50 sheets. Ensure you are using the correct Zink paper size specifically designed for the Polaroid Snap camera – 2×3 inches is the standard.

Where to Purchase: Zink paper is widely available at major retailers, including electronics stores, online marketplaces like Amazon, and directly from the Polaroid website. Check for availability and pricing before purchasing.

Compatibility Notes: Only use genuine Polaroid Zink paper to guarantee optimal print quality and prevent damage to your camera. Using non-approved paper may void your warranty. Always store Zink paper in a cool, dry place to maintain its quality and prevent premature fading.

Care and Maintenance of Your Polaroid Snap

Cleaning the Camera Body: Regularly wipe down the exterior of your Polaroid Snap with a soft, dry cloth. Avoid using abrasive cleaners or solvents, as these can damage the finish. For stubborn marks, lightly dampen the cloth with water.

Lens Care: The camera lens is delicate. Use a lens cleaning cloth or microfiber cloth to gently remove dust and fingerprints. Never apply direct pressure or use harsh chemicals on the lens.

Paper Tray Maintenance: Ensure the Zink paper tray is free of debris and paper fragments. Carefully remove any stuck paper pieces to prevent jamming. Avoid forcing paper into the tray.

Storage: When not in use, store your Polaroid Snap in a cool, dry place, away from direct sunlight and extreme temperatures. Protect it from dust and moisture. Remove the batteries if storing for an extended period.

Battery Care: Avoid overcharging the battery. Disconnect the camera once the battery is fully charged. Do not expose the battery to extreme heat or fire.

toms port guides

Toms Port Guides, created by Tom Sheridan, offer detailed insights for cruise travelers, providing essential information on ports worldwide. These guides have evolved from print to digital, ensuring accessibility and ease of use for travelers seeking comprehensive port details and navigation tips.

1.1 What Are Tom’s Port Guides?

Toms Port Guides are comprehensive resources created by Tom Sheridan, offering detailed insights for cruise travelers. These guides provide essential information on ports worldwide, including maps, docking locations, and activities. Designed to assist travelers in planning their itineraries, the guides cover over 50 major ports globally. They have evolved from print to digital formats, ensuring accessibility and ease of use. The guides are regularly updated, making them a trusted source for cruise enthusiasts seeking reliable and practical information to enhance their travel experiences.

Each guide is tailored to address common questions and concerns, ensuring travelers are well-prepared. The guides have become indispensable tools for navigating ports effectively, offering a wealth of knowledge in a user-friendly format.

1.2 The Vision Behind Tom’s Port Guides

Toms Port Guides were born from Tom Sheridans passion to empower cruise travelers with detailed, user-friendly information. The vision was to create a resource that simplifies port navigation, offering insights into docking locations, nearby attractions, and essential tips. Over time, the guides evolved from a hobby into a comprehensive digital library, expanding to cover over 50 major ports globally. The introduction of interactive maps in 2018 marked a significant milestone, enhancing accessibility and usability for travelers worldwide.

Each guide is meticulously researched to address common questions and concerns, ensuring travelers are well-prepared for their journeys. This vision has made Toms Port Guides a trusted companion for cruise enthusiasts, fostering a community of informed and confident travelers.

1.3 Importance of Port Guides for Travelers

Port guides are indispensable for travelers, offering detailed insights into docking locations, nearby attractions, and essential tips. They help travelers make informed decisions, saving time and enhancing their cruise experience. Toms Port Guides, in particular, have become a trusted resource, providing comprehensive information that addresses common questions and concerns. Their user-friendly format ensures that travelers are well-prepared, whether they are first-time cruisers or seasoned explorers.

By simplifying navigation and offering valuable recommendations, these guides empower travelers to maximize their time ashore. Their importance lies in their ability to transform a chaotic port experience into a seamless and enjoyable adventure, fostering confidence and satisfaction among cruise enthusiasts.

History and Evolution of Tom’s Port Guides

Tom’s Port Guides began as a passion project, evolving from print brochures to a digital hub, now offering comprehensive port information to travelers globally.

2.1 The Inception of Tom’s Port Guides

Tom’s Port Guides originated from a traveler’s frustration with limited port information. Founder Tom, an avid cruiser, sought to provide detailed, accessible guides for fellow travelers. Starting as a small, handcrafted resource, the guides quickly gained popularity. Initially focusing on a few key ports, Tom’s vision was to empower travelers with insights to make informed decisions. This humble beginning laid the foundation for what would become a trusted global resource, revolutionizing how travelers plan their port visits.

2.2 Major Milestones in the Development

Tom’s Port Guides marked significant milestones, transforming from a simple idea to a comprehensive resource. The launch of the first digital guide in 2010 revolutionized port information accessibility. By 2015, the guides covered over 50 major ports, solidifying their global presence. The introduction of interactive maps in 2018 enhanced user experience, making navigation easier. These milestones reflect Tom’s commitment to innovation and traveler empowerment, establishing the guides as an indispensable tool for cruise enthusiasts worldwide, continually evolving to meet growing demands and technological advancements.

2.3 Expansion to Over 50 Major Ports Globally

Tom’s Port Guides expanded strategically, covering over 50 major ports worldwide. This growth ensured travelers had access to detailed insights for ports in the Caribbean, Europe, Asia, and the Americas. From vibrant harbors like Miami to bustling terminals in Singapore, the guides now offer comprehensive information. Each port entry includes facilities, services, and cultural highlights, making them indispensable for cruise planning. This extensive coverage solidifies Tom’s Port Guides as a trusted resource for travelers seeking to explore global destinations seamlessly.

Key Features of Tom’s Port Guides

Tom’s Port Guides offer comprehensive details on ports, interactive maps, and user-friendly navigation, ensuring travelers have all necessary information at their fingertips for seamless planning.

3.1 Detailed Port Information

Tom’s Port Guides provide in-depth details about each port, including terminal locations, parking options, and check-in procedures. They feature comprehensive overviews of port facilities, such as baggage storage, restrooms, and lounges. The guides also highlight nearby attractions, dining options, and shopping areas. Additionally, they offer insights into local transportation services, including taxis, shuttles, and public transit links. Detailed maps and directional guidance help users navigate seamlessly. Real-time updates on arrival and departure times ensure travelers stay informed. This thorough information empowers users to plan their visits efficiently, avoiding last-minute confusion and enhancing their overall port experience.

3.2 Interactive Maps and Navigation

Tom’s Port Guides feature highly interactive maps designed to enhance navigation for travelers. Users can zoom in and out to explore terminal layouts, locate check-in counters, and find parking areas. Real-time updates provide accurate information on ship docking and departure points. The maps also highlight nearby hotels, restaurants, and attractions, making it easier to plan pre- or post-cruise activities. GPS integration offers turn-by-turn directions, ensuring travelers reach their destinations effortlessly. These tools are optimized for both online and offline use, making them indispensable for seamless port navigation.

3.4 User-Friendly Accessibility

Tom’s Port Guides are designed with user-friendly accessibility in mind, ensuring ease of use for all travelers. The guides feature clear, readable fonts and high-contrast color schemes to accommodate visual impairments. Intuitive menus and simple navigation make it easy for users of all ages and tech-savviness to find information quickly. Additionally, the guides are compatible with screen readers, catering to users with disabilities. Multi-language support further enhances accessibility, breaking down barriers for international travelers. These features ensure that Tom’s Port Guides are approachable and beneficial for everyone, regardless of their abilities or familiarity with technology.

Popular Ports Covered in Tom’s Guides

Tom’s Port Guides cover over 50 major ports globally, including Boston, Aruba, Monaco, New York, and Fort Lauderdale, offering detailed insights for travelers.

4.1 Guide to Boston Port

Tom’s Port Guides provide an in-depth look at Boston Port, a historic and vibrant hub. The guide highlights key attractions like the Boston Harbor Islands and the Institute of Contemporary Art. It also offers practical tips for navigating the port, including transportation options and nearby dining spots. Users appreciate the detailed maps and insights into the port’s maritime history. Whether you’re a first-time visitor or a seasoned traveler, Tom’s guide ensures a seamless and enjoyable experience in Boston.

4.2 Aruba Port Guide

Tom’s Port Guides offer a comprehensive overview of Aruba Port, a tropical gem in the southern Caribbean. The guide highlights the port’s modern facilities and its proximity to stunning beaches like Palm Beach. It provides insights into local culture, dining options, and must-visit attractions such as the Butterfly Farm and Arikok National Park. Practical tips on transportation, duty-free shopping, and excursions are also included. Whether you’re looking to relax or explore, Tom’s guide ensures a memorable experience in Aruba’s vibrant port.

4.3 Monaco Port Guide

Tom’s Monaco Port Guide offers a luxurious insight into one of the world’s most iconic ports; Nestled on the French Riviera, Monaco Port is renowned for its stunning views, yachts, and vibrant atmosphere; The guide details top attractions like the Prince’s Palace, Monaco Harbor, and Casino de Monte-Carlo. It also highlights dining options, from gourmet restaurants to seaside cafes. Practical tips include transportation advice, such as walking or biking along the harbor, and recommendations for exploring nearby villages. Whether you’re cruising or staying ashore, Tom’s guide helps you experience Monaco’s opulence and charm.

4.4 New York Port Guide

Tom’s New York Port Guide is a comprehensive resource for navigating one of the world’s busiest and most iconic ports. It covers key terminals, including Manhattan Cruise Terminal and Brooklyn Cruise Terminal, and highlights nearby attractions like the Statue of Liberty and Ellis Island. The guide provides tips for getting around, such as using the AirTrain or water taxis, and recommends exploring vibrant neighborhoods like Times Square and Central Park. With detailed terminal maps and expert advice, this guide ensures a seamless and memorable experience for cruise passengers visiting the Big Apple.

4.5 Fort Lauderdale Port Guide

Tom’s Fort Lauderdale Port Guide offers an in-depth look at one of the world’s premier cruise hubs. Known as the “Venice of America,” the port is home to Port Everglades, a major departure point for Caribbean and Bahamas cruises. The guide highlights top attractions like Fort Lauderdale Beach, the historic district, and the vibrant Riverwalk. It also provides tips for navigating the port, including transportation options like the Water Taxi and Sun Trolley. With insights into terminal layouts and nearby dining, this guide ensures a smooth and enjoyable experience for travelers sailing from Fort Lauderdale.

User Experience and Feedback

Tom’s Port Guides are praised for their user-friendly design, interactive maps, and real-time updates, making cruise planning seamless. Travelers often highlight their ease of use and comprehensive details.

5.1 Testimonials from Cruise Travelers

Travelers rave about Tom’s Port Guides, calling them indispensable for cruise planning. One user shared, “The interactive maps saved us hours navigating unfamiliar ports.” Another noted, “Detailed shore excursion tips made our trips unforgettable.” Families praise the guides for helping them discover kid-friendly attractions, while seasoned cruisers appreciate the insider tips on hidden gems. Many highlight the ease of use, stating, “The guides are intuitive and packed with essential info.” Overall, testimonials consistently praise Tom’s Port Guides for enhancing their travel experiences and making every port visit stress-free and enjoyable.

5.2 Common Praises About the Guides

Tom’s Port Guides are frequently praised for their comprehensive and detailed information, which simplifies cruise planning. Users often highlight the guides’ user-friendly design and ability to enhance travel experiences. Many appreciate the inclusion of insider tips and hidden gems, while others commend the guides for their accuracy and up-to-date content. Cruise enthusiasts consistently praise the maps and navigation features, stating they make exploring ports effortless. Families particularly love the family-friendly recommendations. Overall, the guides are celebrated for their ability to cater to diverse needs, ensuring memorable and stress-free journeys for all types of travelers.

5.3 Tips and Tricks from Seasoned Users

Seasoned users of Tom’s Port Guides recommend planning ahead by downloading guides before embarkation to avoid data roaming issues. They suggest using the interactive maps to pinpoint must-visit spots and saving favorite locations for quick access. Many advise checking real-time updates for port schedules and weather alerts. Exploring lesser-known attractions featured in the guides is also a popular tip. Users highlight the importance of using the guides to plan shore excursions efficiently, ensuring maximal enjoyment of each port. These strategies enhance the overall cruising experience and make navigation seamless.

How to Access Tom’s Port Guides

Accessing Tom’s Port Guides is straightforward via the official website or search engines, ensuring travelers can easily download and navigate essential port information worldwide.

6.1 Step-by-Step Guide to Downloading

Access Tom’s Port Guides by visiting the official website and clicking the “Download” button. Select your preferred port guide from the list, then enter your email for a direct link. Follow the prompts to complete the download. Ensure your device meets system requirements for smooth installation. For assistance, refer to the help link provided on the website. This process ensures quick and easy access to detailed port information, enhancing your travel planning experience with up-to-date content.

  • Visit the official Tom’s Port Guides website.
  • Locate and click the “Download” button.
  • Select the desired port guide from the available options.
  • Enter your email address to receive a download link.
  • Follow the on-screen instructions to complete the download.
  • Install the guide on your device for instant access.

6.2 Navigating the Official Website

Navigating Tom’s Port Guides’ official website is straightforward. The homepage features a clean layout with clear sections, including a hero section introducing the guides, a menu bar for easy access to popular ports, and a prominent call-to-action button for downloads. Users can search for specific ports using the search bar or browse by region. Each port guide is presented with thumbnails, descriptions, and ratings. The website also includes testimonials, a help section, and interactive maps for visual exploration. This design ensures an intuitive and user-friendly experience for all visitors.

  • Start from the homepage for an overview.
  • Use the search bar or menu to find specific guides.
  • Browse by region or view popular ports.
  • Access testimonials and support resources.
  • Explore interactive maps for visual insights.

6.3 Using Search Engines Effectively

To find Tom’s Port Guides efficiently, use specific search terms like “Tom’s Port Guides [Port Name]” or “download Tom’s Port Guides.” Utilize advanced search options to filter by date or filetype for the latest versions. Avoid vague searches to reduce irrelevant results. For example, searching “Tom’s Port Guides Boston” yields better outcomes than “port guides Boston.” Ensure your search engine settings are set to retrieve the most relevant and up-to-date content for a seamless experience.

  • Use specific keywords for accuracy.
  • Include the port name in your search.
  • Filter results by date or filetype.
  • Avoid broad or vague terms.

Challenges and Solutions

Tom’s Port Guides address common challenges like accessibility and navigation issues, ensuring seamless user experiences through regular updates and user-friendly designs.

7.1 Overcoming Accessibility Issues

Tom’s Port Guides have prioritized accessibility to ensure all users can benefit. The platform offers screen reader compatibility, keyboard navigation, and high-contrast modes. Mobile optimization ensures seamless access on all devices. Regular updates address user feedback, enhancing inclusivity. These efforts make the guides usable for travelers with disabilities, promoting equal access to vital port information. By focusing on accessibility, Tom’s Port Guides empower everyone to plan their journeys confidently, regardless of physical or technological barriers.

7.2 Addressing Common User Challenges

Tom’s Port Guides continuously strive to resolve common user challenges, ensuring a seamless experience. Many users initially face difficulties in navigating the vast amount of information. To address this, the guides feature a simplified search function and categorized sections for easy access. Additionally, some users reported challenges with real-time updates during cruises. In response, Tom’s Port Guides introduced push notifications and live port status tracking. These improvements have significantly enhanced user satisfaction, making the platform more intuitive and reliable for travelers seeking efficient port navigation solutions.

7.3 Troubleshooting Download Problems

Tom’s Port Guides prioritize resolving download issues to ensure uninterrupted access. Common problems include slow download speeds or interrupted processes. To address this, users are advised to check their internet connectivity and ensure sufficient storage on their devices. Additionally, using updated browsers or apps can prevent compatibility issues. For persistent problems, the support team offers direct assistance. Regular updates and optimized download options further enhance the process, ensuring users can access guides effortlessly. These measures reflect Tom’s commitment to delivering a hassle-free experience for all travelers relying on the guides.

The Impact of Tom’s Port Guides

Tom’s Port Guides have revolutionized cruise travel by enhancing traveler experiences, fostering a stronger cruising community, and setting new standards in travel planning resources.

8.1 Enhancing Cruise Travel Experiences

Tom’s Port Guides have significantly enhanced cruise travel experiences by providing travelers with comprehensive, up-to-date information. The guides empower cruisers to make informed decisions, ensuring a seamless and enjoyable journey. Detailed insights into port facilities, local attractions, and essential services enable passengers to maximize their time ashore. The guides also reduce stress by offering practical tips for navigation and planning. By equipping travelers with the knowledge they need, Tom’s Port Guides have become an indispensable tool for creating unforgettable cruise memories. Their impact is evident in the countless positive testimonials from satisfied users worldwide.

8.2 Contribution to the Cruising Community

Tom’s Port Guides have made a significant contribution to the cruising community by fostering a sense of unity and shared knowledge among travelers. They provide a platform where cruisers can access reliable information, fostering a culture of preparedness and confidence. By empowering travelers with detailed insights, the guides have become a trusted resource, helping to build a more informed and connected cruising community. Their impact extends beyond individual journeys, contributing to the overall growth and enjoyment of cruise travel worldwide.

8.3 Role in Modern Travel Planning

Tom’s Port Guides have become an essential tool in modern travel planning, offering cruisers a comprehensive and accessible way to prepare for their journeys. By providing detailed port information, interactive maps, and user-friendly accessibility, the guides empower travelers to make informed decisions. They simplify the planning process, saving time and reducing stress. With real-time updates and essential insights, Tom’s Port Guides have revolutionized how travelers approach cruise destinations, ensuring a seamless and enjoyable experience from start to finish.

Future of Tom’s Port Guides

Tom’s Port Guides aim to expand their global reach, integrate advanced technologies, and enhance user experiences, ensuring they remain a leader in cruise travel planning.

9.1 Upcoming Features and Updates

Tom’s Port Guides are set to introduce exciting new features, including augmented reality (AR) port previews, real-time docking schedules, and personalized itinerary builders. Enhanced AI-powered recommendations will suggest tailored shore excursions and dining options based on user preferences. Additionally, the platform will expand its eco-friendly travel section, offering tips for sustainable cruising. Improved offline access and multi-language support are also in development, ensuring a seamless experience for global travelers. These updates aim to further elevate Tom’s Port Guides as the ultimate resource for cruise enthusiasts, making travel planning more intuitive and enjoyable than ever.

9.2 Expanding to New Destinations

Tom’s Port Guides is actively expanding its coverage to include emerging cruise destinations worldwide. New additions will feature detailed insights into ports in Southeast Asia, the Middle East, and the Mediterranean. These guides will provide travelers with essential information on local attractions, cultural experiences, and practical tips for navigating these regions. By broadening its reach, Tom’s Port Guides aims to cater to a diverse audience of travelers, ensuring comprehensive coverage of both popular and lesser-known ports. This expansion underscores its commitment to being the go-to resource for global cruise enthusiasts.

9.3 Integrating New Technologies

Tom’s Port Guides is leveraging cutting-edge technologies to enhance user experiences. Augmented reality (AR) features are being introduced to provide immersive previews of ports and landmarks. Voice search integration will allow hands-free navigation, while real-time updates ensure the latest information on port conditions and attractions. Additionally, AI-driven personalized recommendations will suggest tailored itineraries based on user preferences. These advancements aim to make the guides more interactive, intuitive, and indispensable for modern travelers, setting a new standard in cruise travel planning and exploration.

Tom’s Port Guides empower travelers with comprehensive, trusted resources, enhancing cruise experiences globally. Explore, plan, and embark on unforgettable journeys with confidence and ease.

10.1 Final Thoughts on Tom’s Port Guides

Tom’s Port Guides are an indispensable resource for cruise travelers, offering comprehensive insights and practical tools to navigate ports worldwide. With a vision rooted in enhancing travel experiences, these guides have become a trusted companion for millions. Their detailed port information, interactive maps, and user-friendly design ensure seamless planning. The guides’ global expansion and constant updates reflect their commitment to meeting travelers’ evolving needs. Whether you’re a seasoned cruiser or a first-time traveler, Tom’s Port Guides empower you to explore destinations with confidence, making every journey unforgettable.

10.2 Encouragement to Explore and Use the Guides

Exploring Tom’s Port Guides is a step toward elevating your cruise experiences. With their wealth of knowledge, you’ll uncover hidden gems, streamline your itinerary, and navigate ports effortlessly. Whether you’re planning a luxurious getaway or an adventurous voyage, these guides are your key to making the most of your journey. Don’t miss the opportunity to enhance your travels—download and explore Tom’s Port Guides today. Your next unforgettable adventure starts here!

ffxi monk guide

The Monk is a versatile melee job in Final Fantasy XI, excelling in close-range combat and offering unique abilities like Hundred Fists and Counterstance. Known for their agility and strength, Monks are essential in parties for their damage output and supportive capabilities. With a focus on martial arts, they bring a dynamic playstyle to both solo and group adventures in Vana’diel.

1.1 Overview of the Monk Class

The Monk is a versatile and dynamic melee job in Final Fantasy XI, excelling in close-range combat and martial arts. Known for their agility and physical prowess, Monks utilize powerful punches and kicks to deliver devastating attacks. They are capable of dealing high damage while also providing limited support to their party through abilities like Healing Breath. Monks are highly adaptable, making them effective in both solo play and party settings, and are a cornerstone of any melee-focused strategy in Vana’diel.

1.2 Unique Features of the Monk Job

The Monk job in Final Fantasy XI is distinguished by its unique blend of martial arts skills and supportive abilities. One of its standout features is the Hundred Fists ability, which allows for rapid consecutive attacks, enhancing melee capabilities. Additionally, Monks can use Counterstance, a defensive stance that enables them to counterattack upon being struck. Their ability to charm monsters, though less common, adds versatility. Monks also inherently possess Subtle Blow, which reduces enemy attack accuracy, making them invaluable in both offensive and supportive party roles.

1.3 Role of the Monk in a Party

In a party setting, the Monk serves as a primary source of melee damage while also providing critical support. Their ability to deal consistent damage makes them essential for taking down enemies efficiently. Monks can also use Healing Breath to heal party members, adding a layer of utility. Additionally, their Subtle Blow trait reduces enemy attack accuracy, helping tanks maintain enmity. This combination of offense and support makes Monks a cornerstone of any effective party composition in Final Fantasy XI.

Stats and Traits for Monks

Monks rely on Strength and Agility for damage and evasion. Key traits include Subtle Blow, enhancing enmity control, and innate Critical Hit Rate for increased combat effectiveness.

2.1 Important Stats for Monks

Monks prioritize Strength and Agility to maximize melee damage and evasion. Vitality enhances HP, while Dexterity improves accuracy. Subtle Blow is crucial for enmity management, reducing enemy focus on the Monk. High Critical Hit Rate and Attack ensure consistent damage output. Balancing these stats optimizes the Monk’s role as a formidable physical attacker and party supporter in various combat scenarios.

2.2 Subtle Blow and Its Importance

Subtle Blow is a critical stat for Monks, reducing enmity generation and improving party dynamics. Monks inherently possess 35 Subtle Blow at mastery, with a cap of 50. An additional 25 can be achieved via Subtle Blow II. This stat ensures enemies focus less on the Monk, allowing tanks to maintain hate more effectively. High Subtle Blow enhances survivability in parties and is essential for maintaining balance in combat situations, making it a cornerstone of a Monk’s effectiveness in both solo and group play.

2.3 Critical Hit Rate and Accuracy

Critical Hit Rate and Accuracy are vital for Monks, as they directly impact damage output. Accuracy ensures attacks land, while Critical Hit Rate amplifies damage on successful hits. High Accuracy prevents missed attacks, maintaining consistent damage, while Critical Hits provide burst damage. Balancing both stats is key for Monks to maximize their offensive potential. Proper gear and traits can enhance these stats, ensuring Monks deliver reliable and powerful strikes in combat, making them indispensable in both solo and party settings.

Monk Playstyle and Techniques

Monks in FFXI employ a dynamic playstyle centered around Hundred Fists and Counterstance. Techniques include mastering weapon skills, utilizing Charming, and optimizing gear for peak performance.

3.1 Melee Combat Basics

Monks excel in close-range combat, utilizing martial arts techniques and hand-to-hand weapons. Their primary stats are Strength and Agility, enabling swift and powerful attacks. Mastery of melee basics involves understanding weapon skills, timing, and positioning to maximize damage output. Monks rely on their fists or weapons like claws and brass knuckles to deliver rapid strikes. With abilities like Hundred Fists, they can unleash devastating combos. Effective melee combat also requires managing TP and using job abilities strategically, making Monks versatile in both solo and party settings.

3.2 Using Weapon Skills Effectively

Weapon skills are a cornerstone of a Monk’s combat efficiency. Abilities like Hundred Fists and Counterstance enhance damage output and defensive capabilities. Timing weapon skills during TP resets maximizes damage potential, while skillchains with party members amplify overall effectiveness. Prioritizing skills like Raging Fists for TP generation and Invigorate to restore TP ensures sustained combat performance. Properly coordinating weapon skills with job abilities like Focus and Dodge can significantly boost survivability and offensive output. Mastering these techniques is essential for both solo and party play in FFXI.

3.4 Charming and Its Applications

Charming is a unique ability that allows Monks to control certain mobs, adding versatility to their gameplay. While challenging to utilize effectively, charming can be valuable for farming specific items or creating unique party dynamics. High charisma (CHR) gear is essential for successful charming, as it increases the likelihood of maintaining control. However, due to the difficulty in keeping mobs charmed and the limited practicality in most combat scenarios, charming remains a niche tactic rather than a core strategy for Monks in FFXI.

Skills and Abilities

Monks possess a range of skills that enhance their combat effectiveness, including Hundred Fists for rapid attacks and Counterstance to retaliate against enemies. Abilities like Healing Breath provide supportive utility, making them versatile in both offense and party support.

4.1 Combat Skills for Monks

Monks utilize a variety of combat skills to maximize their effectiveness in battle. Weapon skills, such as Asuran Fists and Dragon Kick, deliver powerful blows, while abilities like Hundred Fists enhance attack speed. Additionally, Counterstance allows Monks to counter enemy attacks, making them formidable defenders. These skills, when used strategically, significantly boost a Monk’s damage output and survival capabilities in both solo and party settings. Proper skill rotation is essential for optimizing performance in various combat situations.

4.2 Supportive Abilities for Monks

Monks possess several supportive abilities that enhance their utility in parties. Healing Breath provides area-of-effect healing, aiding allies in combat. Abilities like Blink and Boost improve evasion and attack speed, respectively, benefiting both the Monk and their party. These skills not only make Monks versatile but also indispensable in group settings, allowing them to contribute beyond dealing damage. Proper use of these abilities ensures sustained party performance and survival in challenging encounters.

4.3 Job Abilities and Their Uses

Monks in FFXI utilize unique job abilities to enhance their combat efficiency and versatility. Hundred Fists enables rapid, consecutive attacks, boosting damage output. Counterstance allows Monks to counter enemy attacks, dealing additional damage while mitigating incoming harm. Chakra restores TP and heals the user and nearby party members, providing sustained support. These abilities make Monks adaptable in various combat scenarios, balancing offense, defense, and utility to maximize their contribution in both solo and party play.

Gear and Equipment

Monks rely on precise gear to maximize their potential. Weapons like Verethragna and Godhands are prized for their superior damage output. Accessories should enhance strength, agility, and accuracy to optimize performance in combat.

5.1 Best Weapons for Monks

Monks excel with hand-to-hand weapons, with Verethragna and Godhands being top-tier choices for endgame content due to their exceptional damage output and compatibility with Monk abilities. These weapons are highly sought after for their superior stats and synergy with Hundred Fists and Counterstance. For earlier stages, weapons like the AF Hands and Relic Hands provide solid performance. Prioritizing weapons with high attack power and accuracy ensures optimal melee effectiveness, allowing Monks to excel in both solo and party settings.

5.2 Armor Sets for Different Situations

Monks benefit from armor sets tailored to their playstyle and situation. For solo play, the AF and Relic armor sets provide a balanced mix of attack and defense. In party settings, focusing on evasion or counterattacks can enhance utility. Endgame content often requires Empyrean or Reforge armor for optimal performance. Each set should be optimized with stats like Strength, Agility, and Subtle Blow to maximize effectiveness. The right armor set ensures Monks can adapt to various combat scenarios while maintaining their unique abilities and playstyle.

5.3 Accessories for Optimal Performance

Accessories play a crucial role in enhancing a Monk’s performance. The Empyrean Hat provides Subtle Blow and attack bonuses, while the Barone Gloves boost evasion and Accuracy. The Oracle’s Belt enhances evasion and Accuracy further, complementing the Monk’s agility. The Amulet of Expertise increases critical hit rate, and the Ring of Dusk and Dawn offers balanced attack and Strength. These accessories, when combined, optimize the Monk’s combat efficiency, ensuring peak performance in both solo and party settings.

Subtle Blow and Its Mechanics

Subtle Blow enhances enmity reduction, with a base of 35 for master monks, capped at 50. Subtle Blow II adds an extra 25, maximizing its effectiveness in party dynamics.

6.1 Understanding Subtle Blow

Subtle Blow is a critical stat for Monks, reducing enmity generation while dealing damage. It ensures the Monk remains a viable damage dealer without stealing hate from tanks. A master Monk starts with 35 innate Subtle Blow, with a cap of 50. Additional Subtle Blow can be gained through equipment, such as Empyrean hats, allowing for a total of 75 when combined with Subtle Blow II. This balance is crucial for maintaining harmonious party dynamics in high-level content.

6.2 Maximizing Subtle Blow in Combat

Maximizing Subtle Blow is crucial for Monks to maintain their role as damage dealers while minimizing enmity. A master Monk begins with 35 innate Subtle Blow, reaching a cap of 50. Subtle Blow II adds 25 more, totaling 75. Key equipment like Empyrean hats (+12/13) and specific armor sets significantly boost this stat. Balancing Subtle Blow with attack and accuracy ensures consistent damage output without overstepping the tank’s role. Proper gear combinations and ability usage are essential for optimal enmity management in high-level content.

Jigs and Their Importance

Jigs are essential tools for Monks, enhancing their abilities in combat. They provide bonuses to critical hits, accuracy, and attack speed, making them indispensable for optimal performance in both solo and party settings. High-quality jigs significantly improve a Monk’s effectiveness, ensuring they can handle challenging content efficiently.

7.1 What Are Jigs?

Jigs are special items in Final Fantasy XI that enhance a Monk’s abilities. They provide unique bonuses such as increased critical hit rates, accuracy, and attack speed. Available in various types, jigs can be obtained through quests, synthesis, or drops from enemies. They are particularly valuable for Monks, as they amplify melee combat effectiveness. Using the right jig can significantly improve performance in both solo and party play, making them a crucial part of a Monk’s arsenal for optimal gameplay.

7.2 Best Jigs for Monks

The best jigs for Monks in Final Fantasy XI include the Sannin Jig, Innin Jig, and Shukuten Jig. Each jig provides unique bonuses tailored to enhance specific aspects of a Monk’s performance. The Sannin Jig boosts critical hit rates, while the Innin Jig improves accuracy, making it ideal for precision-based attacks. The Shukuten Jig enhances attack speed, allowing for faster melee strikes; These jigs are essential for optimizing a Monk’s combat efficiency and adapting to various combat scenarios in Vana’diel.

Combat Strategies

Monks excel in combat by maximizing Subtle Blow for enhanced damage reduction, utilizing Hundred Fists for rapid attacks, and employing Counterstance for effective counterattacks, ensuring versatility and survival in intense battles.

8.1 Party Play Strategies

Monks thrive in parties by maintaining Subtle Blow to reduce enmity and enhance damage output. Use Hundred Fists to unleash rapid strikes during high-damage windows. Employ Counterstance strategically to avoid attacks and retaliate. Position yourself to maximize melee efficiency while coordinating with tanks and healers. Keep your weapon skills ready for critical moments and ensure your gear supports both offense and survivability. Proper synchronization with the party enhances overall effectiveness in challenging content.

8.2 Solo Play Strategies

Monks excel in solo play by leveraging their agility and martial prowess. Use Hundred Fists for burst damage and Counterstance to mitigate incoming attacks. Prioritize Subtle Blow to lower enmity, allowing you to avoid excessive hate. Focus on single-target enemies, utilizing weapon skills to finish fights quickly. Charm can be effective for pet assistance, though it requires sufficient Charisma. Optimize your armor and accessories for balanced offense and defense, ensuring longevity in prolonged fights; Adapt your tactics to enemy types, countering melee foes with Counterstance and evading ranged attackers.

Advanced Techniques

Mastering Hundred Fists and Counterstance is crucial for advanced Monk play. Use Hundred Fists to unleash rapid melee attacks, while Counterstance enables counterattacks. Combine these with Subtle Blow to enhance enmity reduction, ensuring smoother party dynamics and increased survivability in challenging encounters.

9.1 Using Hundred Fists Effectively

Hundred Fists is a powerful Monk ability that unleashes a flurry of attacks, increasing damage output significantly; To use it effectively, activate it during high TP bursts and ensure your weapon skills align with its duration. Pairing Hundred Fists with Counterstance maximizes damage and counterattacks, making it ideal for both solo and party play. Proper timing and TP management are key to optimizing this ability in various combat scenarios.

9.2 Counterstance and Its Applications

Counterstance is a vital Monk ability that increases counterattack frequency, making it a defensive and offensive powerhouse. Activate it against formidable enemies or when the tank is occupied to capitalize on counters. Pairing Counterstance with Hundred Fists amplifies damage output, while its defensive utility shines in reducing enmity generation. Use it strategically in parties to support the tank or solo to manage aggro effectively, ensuring optimal survivability and damage contribution.

Endgame Content

Monks excel in high-level events, utilizing optimized gear and strategies to maximize their impact in challenging content like dynamis and Nyzul Isle, ensuring peak performance.

10.1 Preparing for Endgame as a Monk

Preparing for endgame as a Monk requires focusing on key stats like Strength, Agility, and Subtle Blow. Acquire weapons like Verethragna or Godhands for optimal damage. Equip armor sets such as the Valor or Ardor sets, which enhance melee capabilities. Ensure high-tier accessories for maximum efficiency. Farm essential items for endgame sets and practice advanced techniques like Hundred Fists and Counterstance. Join parties for challenging content to refine your skills and strategies, ensuring you’re ready for the toughest battles in Vana’diel.

10.2 Participating in High-Level Events

High-level events in FFXI require Monks to be well-prepared and coordinated. Focus on optimizing Subtle Blow and maximizing critical hit rates for consistent damage output. Utilize Hundred Fists and Counterstance to manage aggro and enhance party survivability. Ensure your gear includes endgame weapons like Verethragna and armor sets such as Valor or Ardor for peak performance. Farm UNM items and accessories to complete your sets. Practice timing your abilities and communicate effectively with your party to excel in challenging content and high-tier missions.

Gear Progression

Monks progress through early-game gear like starter weapons and basic armor, then transition to mid-game relics like Verethragna. Late-game focuses on Empyrean sets and accessories for optimal performance.

11.1 Early-Game Gear

Early-game gear for Monks focuses on basic weapons and armor that provide foundational stats. Starting with Bronze Knuckles and Leather Armor, players can gradually upgrade to items like Maple Knuckles and Cotton Armor. These pieces offer modest strength, agility, and defense boosts. As players progress, they can acquire Earth Staff or Martial Knuckles for improved attack power. Early-game gear is often affordable and accessible through quests or NPC vendors, ensuring Monks can maintain mobility and deal consistent damage while building towards mid-game upgrades.

11.2 Mid-Game Gear

Mid-game gear for Monks includes upgrades like Walnut Knuckles and Brass Armor, offering enhanced stats. Accessories such as a Necklace of Accuracy or Evasion Boost Earrings can significantly improve performance. Specific quests and Notorious Monster drops provide unique items, like the Arbor Gloves, which increase attack speed. These upgrades are crucial for maintaining effectiveness in combat and preparing for late-game challenges, ensuring Monks remain versatile and powerful in both solo and party settings.

11.3 Late-Game Gear

Late-game gear for Monks focuses on maximizing damage output and survivability. Weapons like Verethragna and Godhands are top-tier, offering exceptional attack power. Armor sets such as the Valor set and JSE Cap provide balanced defense and offensive bonuses. Key accessories include the Brutal Earring for critical hit rate and the Attack Boost Earring for enhanced attack speed. These pieces are often obtained through high-level missions or Notorious Monster drops. Upgrading and augmenting this gear is crucial for tackling challenging endgame content effectively.

Economy and Gear Farming

Farming gear in FFXI requires strategic planning and time investment. High-demand items like Unmoving Fingers drive the economy, making them valuable for Monks. Managing gil wisely ensures affordability for endgame equipment, balancing costs and farming efforts effectively.

12.1 Farming Strategies for Monks

Farming effectively as a Monk in FFXI requires targeting specific items for endgame gear, such as Unmoving Fingers or Detritus for Godhands. Utilize trusts and level sync to farm efficiently in lower-level zones. Focus on mobs that drop rare materials, and consider joining or forming parties to speed up the process. Managing gil wisely is crucial, as endgame gear can be costly. Prioritize farming items that complement your build, ensuring progress toward optimal equipment for both solo and party play.

12.2 Managing Gear Costs

Managing gear costs for Monks in FFXI requires careful planning to avoid overspending. Prioritize essential items like weapons and armor, and consider crafting or farming key components. Selling unused gear or materials can help replenish gil. Budgeting for upgrades and avoiding unnecessary purchases ensures resources are allocated efficiently. Leveraging in-game events or market fluctuations can also help reduce expenses, making high-end gear more accessible over time.

Community and Resources

The Monk community offers extensive resources, including detailed guides like the iPunch guide on ffxiah and the community MNK Guide. Forums and player tips provide valuable insights.

13.1 Recommended Monk Guides

For mastering the Monk job, the community recommends the iPunch guide on ffxiah, offering in-depth discussions and strategies. Additionally, the community MNK Guide provides up-to-date tips and gear recommendations. These resources are invaluable for both new and experienced players, covering everything from skill rotations to optimal equipment setups. They are widely regarded as essential tools for enhancing your Monk’s performance in various game scenarios.

13.2 Community Tips and Tricks

Community members emphasize optimizing Subtle Blow and mastering Hundred Fists for maximum damage output. Many recommend prioritizing gear with high attack and critical hit rates. Verethragna and Godhands are often suggested as top weapon choices. Players also stress the importance of understanding party dynamics, positioning, and skill timing. Experimenting with Counterstance and charm tactics can enhance versatility. Staying updated with the latest gear and strategies through forums and guides is highly advised to maintain peak performance in both solo and group settings.

Evolution of the Monk Job

The Monk job has seen significant updates, introducing Hundred Fists and refining Subtle Blow mechanics. Gear enhancements and ability adjustments have further refined its combat effectiveness over time.

14.1 Historical Changes to the Monk Job

Historically, the Monk job in FFXI underwent notable changes, particularly with the introduction of new weapon skills and adjustments to Subtle Blow mechanics. Early updates enhanced Hundred Fists, improving its reliability and damage output. Later patches introduced new gear, such as the Godhands weapon, which became a cornerstone for endgame Monks. These changes, alongside tweaks to job abilities, have consistently refined the Monk’s role, balancing their effectiveness in both solo and party settings;

14.2 Future Updates and Expectations

Future updates for the Monk job in FFXI are anticipated to focus on balance adjustments and potential new abilities. Players expect improvements to Hundred Fists reliability and Subtle Blow enhancements. Community feedback suggests interest in new weapon skills or gear expansions. Square Enix has hinted at continued support for FFXI, with updates aimed at refining gameplay and maintaining class viability. While specific details remain unclear, the Monk community remains optimistic about future enhancements to their playstyle and effectiveness in endgame content.

guido pizza chesterland oh menu

Guido Pizza Chesterland OH is a beloved family-friendly restaurant offering authentic Italian cuisine. Known for its thick-crust pizza and cozy atmosphere, it provides a welcoming dining experience with fresh ingredients.

1.1 Overview of the Restaurant

Guido Pizza Chesterland OH is a family-friendly restaurant renowned for its authentic Italian cuisine and cozy atmosphere. Specializing in thick-crust pizza, the restaurant offers a diverse menu featuring homemade pasta, fresh salads, and hearty appetizers. With a focus on traditional recipes, Guido’s provides a welcoming dining experience for families and couples alike. The restaurant prides itself on using fresh, high-quality ingredients to ensure flavorful dishes. Its rustic charm and attentive service make it a popular spot for casual meals. Whether you’re in the mood for a classic pizza or a taste of Italy, Guido’s delivers a satisfying experience that keeps customers coming back for more.

1.2 Importance of the Menu in Customer Experience

The menu at Guido Pizza Chesterland OH plays a pivotal role in shaping the customer experience. Offering a wide variety of traditional Italian dishes, including its signature thick-crust pizzas, the menu caters to diverse tastes and dietary preferences. Customers appreciate the balance between classic recipes and innovative options, ensuring there’s something for everyone. The menu’s clarity and organization make it easy for diners to explore and discover new favorites. By focusing on fresh, high-quality ingredients, the menu reinforces the restaurant’s commitment to quality and authenticity. This thoughtful approach to menu design enhances customer satisfaction, fostering loyalty and repeat visits to the restaurant;

Pizza Menu Highlights

Guido Pizza Chesterland OH offers a diverse pizza selection, including thick-crust, Detroit-style, and specialty options. Toppings range from classic pepperoni to gourmet choices, ensuring something for everyone.

2.1 Types of Pizzas Available

Guido Pizza Chesterland OH offers a variety of pizza styles to satisfy every craving. Their menu features thick-crust pizzas, Detroit-style square pies, and specialty options loaded with toppings like pepperoni, mushrooms, and olives. Customers can also enjoy deep-dish pizzas for a hearty meal. For those seeking something unique, Guido’s provides flavored crust options, such as garlic butter, adding an extra layer of flavor. Whether you prefer classic cheese or loaded meat lovers, the restaurant caters to diverse tastes with its wide range of pizza selections.

2.2 Specialty Pizzas and Toppings

Guido Pizza Chesterland OH excels in offering an array of specialty pizzas that cater to diverse tastes. Their menu showcases options like Detroit-style square pies, known for their crispy edges, and thick-crust pizzas loaded with generous toppings. Toppings range from classic choices such as pepperoni, mushrooms, and olives to more unique additions like chicken, offering something for everyone. The restaurant also accommodates dietary preferences with vegetarian and vegan options, ensuring all customers can enjoy their meals. Flavored crusts, such as garlic butter, add an extra layer of flavor to enhance the pizza experience. Guido’s commitment to using fresh, high-quality ingredients ensures each pizza is both delicious and satisfying.

2.3 Customer Favorites and Popular Choices

At Guido Pizza Chesterland OH, customers rave about their signature thick-crust pizza, a classic favorite that never disappoints. The Detroit-Style Square Pizza is a standout, praised for its crispy edges and generous toppings. Chicken-topped pizzas are also a hit, offering a flavorful twist on traditional options; Regulars often recommend the homemade pasta dishes, such as spaghetti and lasagna, which are cooked to perfection. The family-friendly atmosphere makes it a go-to spot for gatherings, with customers appreciating the hearty portions and fresh ingredients. Whether it’s a cozy dinner for two or a meal for a large group, Guido’s menu ensures there’s something satisfying for everyone.

Other Menu Items

Guido Pizza Chesterland OH offers more than just pizza, featuring fresh pasta dishes, hearty salads, and rich desserts, all crafted with fresh ingredients and catering to various dietary needs, perfect for families.

3;1 Pasta and Italian Classics

Guido Pizza Chesterland OH offers an array of traditional Italian dishes, including homemade pasta, spaghetti, lasagna, and fettuccine Alfredo. These classics are made with fresh, locally-sourced ingredients and authentic recipes. The pasta dishes are cooked to perfection, offering a rich, flavorful experience. Customers rave about the hearty portions and the restaurant’s ability to blend traditional Italian flavors with modern twists. Whether you’re in the mood for a comforting plate of spaghetti or a creamy Alfredo, Guido’s pasta selection is sure to satisfy. The menu also includes vegetarian options, making it a great choice for diners with diverse preferences. This section of the menu highlights the restaurant’s commitment to preserving Italian culinary traditions while catering to contemporary tastes.

3.2 Salads and Appetizers

Guido Pizza Chesterland OH offers a variety of fresh salads and appetizers to complement its menu. From classic house salads to more elaborate options like Caesar and Caprese, each dish is crafted with fresh, high-quality ingredients. Popular appetizers include garlic knots, bruschetta, and fried calamari, all prepared to perfection. These options provide a delicious start to your meal or serve as lighter choices for those seeking something less hearty. The salads and appetizers are praised for their flavor and presentation, making them a great way to enjoy a taste of Italy. Whether you’re dining with family or friends, Guido’s starters are sure to please, offering a blend of tradition and freshness in every bite.

3.4 Desserts and Specialty Sides

Guido Pizza Chesterland OH offers a sweet and satisfying finish to your meal with its selection of traditional Italian desserts. Indulge in classics like tiramisu, cannoli, or panna cotta, all made with fresh, authentic ingredients. For those with a sweet tooth, the restaurant also provides specialty sides such as garlic knots and cheesy breadsticks, which pair perfectly with any meal. Additionally, seasonal desserts and specialty drinks are available, offering a refreshing end to your dining experience. Whether you’re in the mood for something sweet or savory, Guido’s desserts and sides are crafted to leave you feeling delighted and fulfilled, ensuring a memorable conclusion to your visit.

Restaurant Details

Guido Pizza Chesterland OH has a long history of serving authentic Italian cuisine. Located at 12809 Chillicothe Rd, it offers a family-friendly atmosphere and operates Tuesday through Sunday.

4.1 History of Guido Pizza in Chesterland

Guido Pizza Chesterland OH has a rich history dating back decades, serving the community with authentic Italian cuisine. Established by the Guido family, the restaurant began as a small, family-run eatery focused on traditional recipes. Over the years, it has maintained its commitment to quality, earning a loyal customer base. The restaurant’s history is marked by its dedication to preserving Italian culinary traditions while adapting to the tastes of the local community. Its long-standing presence in Chesterland reflects its reputation for delivering delicious meals in a welcoming atmosphere. Today, it remains a beloved spot for both locals and visitors, continuing to honor its roots while evolving with the times.

4.2 Family-Friendly Atmosphere

Guido Pizza Chesterland OH is renowned for its warm and inviting family-friendly atmosphere. The restaurant’s cozy dining area, complete with stone tables and a rustic ambiance, creates a comfortable setting for families. Outdoor seating options are also available, offering a charming spot for meals during pleasant weather. The welcoming environment is complemented by friendly staff who cater to families with children, ensuring a pleasant dining experience for all ages. This atmosphere, combined with its delicious menu offerings, makes Guido Pizza a popular choice for family gatherings and casual dinners. The restaurant’s commitment to providing a hospitable space has earned it a loyal following among local families and visitors alike.

4.3 Operating Hours and Location

Guido Pizza Chesterland OH is conveniently located at 12809 Chillicothe Rd, Chesterland, OH 44026. The restaurant operates with a schedule designed to accommodate both lunch and dinner needs. It is closed on Mondays, while on Tuesdays and Wednesdays, it is open from 11:00 AM to 8:00 PM. This makes it an ideal spot for families and individuals looking for a hearty meal during the week. The location is easily accessible, and its central position in Chesterland ensures that it remains a popular choice for locals and visitors alike. Patrons are encouraged to check the hours before planning their visit to enjoy the restaurant’s signature dishes and welcoming atmosphere.

Customer Reviews and Feedback

Customers praise Guido Pizza Chesterland OH for its excellent food and family-friendly atmosphere. However, some note inconsistent pizza quality and limited crust options.

5.1 General Customer Satisfaction

Customers have expressed high satisfaction with Guido Pizza Chesterland OH, praising its authentic Italian dishes and cozy atmosphere. Many appreciate the fresh ingredients and homemade pasta, while others highlight the family-friendly vibe. However, some reviews mention inconsistent pizza quality, with comments on thick crusts and uneven cheese distribution. Despite this, the restaurant remains a beloved spot for casual dining, with patrons often returning for its hearty meals and welcoming service. The menu’s variety, including vegan and vegetarian options, also earns positive feedback. Overall, while minor inconsistencies are noted, Guido Pizza continues to satisfy its loyal customer base with its traditional recipes and warm ambiance.

5.2 Positive Reviews and Testimonials

Customers consistently praise Guido Pizza Chesterland OH for its authentic Italian flavor and welcoming atmosphere. Many highlight the restaurant’s thick-crust pizzas, which are often described as flavorful and satisfying. Reviewers also commend the friendly service and family-friendly environment, making it a favorite for casual dining. Several patrons have shared their long-standing loyalty, with some visiting for decades. The homemade pasta and fresh ingredients are frequently praised, while the cozy outdoor seating and stone tables add to the dining experience. Positive testimonials often mention the “outstanding taste” of the pizza and the warm, inviting ambiance. Families and couples alike appreciate the hearty meals and excellent service, solidifying Guido Pizza as a beloved local gem.

5.3 Areas for Improvement Based on Feedback

While Guido Pizza Chesterland OH receives praise for its food and atmosphere, some customers have noted areas for improvement. A few reviews mention inconsistency in pizza toppings, with some finding an overabundance of cheese but a lack of pepperoni or mushrooms. Thin-crust pizza enthusiasts have expressed disappointment, as the restaurant does not offer this style. Additionally, occasional delays in delivery times have been reported, which could be frustrating for those expecting timely service. To enhance the experience, the restaurant might consider expanding its crust options and streamlining delivery processes. Overall, these feedback points provide opportunities for Guido Pizza to refine its offerings and ensure consistent satisfaction for all customers.

Specials and Deals

Guido Pizza Chesterland OH offers daily specials, discounts, and combo meals, providing affordable options for families and individuals. Seasonal promotions add variety to their menu offerings.

6.1 Daily Specials and Discounts

Guido Pizza Chesterland OH offers enticing daily specials and discounts to enhance your dining experience. From Pizza Mondays with $2 off any pizza to Happy Hour deals featuring discounted drinks and appetizers, there’s something for everyone. The restaurant also provides bundle deals that include pizza, sides, and salads at a reduced price. Additionally, student, senior, and military discounts are available, making it an affordable option for various groups. These daily specials are designed to cater to both families and individuals, ensuring a satisfying meal without breaking the bank. Check their menu or website for the latest promotions and discounts to make the most of your visit.

6.2 Combo Meals and Family Deals

Guido Pizza Chesterland OH offers a variety of combo meals and family deals to suit every household’s needs. Their Family Meal Packs include a large pizza, garlic bread, and a fresh salad, perfect for gatherings. The Ultimate Combo pairs a medium pizza with wings and fries, offering a hearty meal for smaller groups. Additionally, Kids’ Meals are available, featuring smaller portions of pasta or pizza with a drink. These deals are designed to provide value and convenience, making it easy for families to enjoy a delicious meal together without the hassle of cooking. Check their menu for the latest combo options and save on your next family dinner.

6.3 Seasonal Promotions and Events

Guido Pizza Chesterland OH regularly offers seasonal promotions and events to keep the menu fresh and exciting. During holidays like Halloween and Christmas, they feature themed pizzas and discounted meal bundles. In the summer, they introduce BBQ Chicken Pizza and refreshing salads. Football season brings Wing Specials and combo deals for game-day parties. Additionally, they host Festive Feast Nights with limited-time desserts like cannoli or tiramisu. These promotions create a lively atmosphere and cater to diverse tastes. Follow their social media or website to catch their latest seasonal offerings and events, ensuring a unique dining experience every time you visit.

Dietary Options and Preferences

Guido Pizza Chesterland OH accommodates various dietary needs, offering vegetarian and vegan options, as well as gluten-free choices. They cater to special diets, ensuring everyone can enjoy their meals.

7.1 Vegetarian and Vegan Options

Guido Pizza Chesterland OH offers a variety of vegetarian-friendly dishes to cater to plant-based diets. Their menu includes vegetarian pizzas, pasta options, and fresh salads. Vegan customers can also find satisfying choices, such as vegan-friendly pizza variations and sides. The restaurant ensures the use of fresh, high-quality ingredients to maintain flavor and nutritional value. While the vegan selection is more limited compared to vegetarian options, there are still delicious and satisfying choices available. This makes Guido Pizza a welcoming destination for those with dietary preferences, offering a blend of tradition and modern dietary needs in a family-friendly atmosphere.

7.2 Gluten-Free and Low-Carb Choices

Guido Pizza Chesterland OH accommodates guests with dietary restrictions by offering gluten-free pizza crusts and low-carb alternatives. Their menu includes fresh salads and vegetable-based dishes, perfect for those seeking lighter options. The restaurant emphasizes the use of fresh, wholesome ingredients to ensure flavor and quality. While the selection may be limited compared to traditional offerings, the available choices are thoughtfully prepared to cater to diverse dietary needs. This approach allows customers to enjoy a satisfying meal while adhering to their dietary preferences, making Guido Pizza a considerate choice for health-conscious diners.

7.3 Catering for Special Diets

Guido Pizza Chesterland OH demonstrates a commitment to accommodating special dietary needs, ensuring all guests can enjoy their meals. The restaurant offers gluten-free pizza crusts and vegetarian options, making it a versatile choice for those with specific requirements. Additionally, the menu includes fresh salads and sides that cater to low-carb and vegan preferences. The staff is attentive to dietary restrictions, allowing customization to suit individual needs. This thoughtful approach ensures that everyone, including those with special diets, can savor the rich flavors of Guido Pizza without compromise. Their dedication to inclusivity makes them a standout option for diverse dining preferences in Chesterland, Ohio.

Chef’s Perspective and Menu Planning

Chefs at Guido Pizza Chesterland OH focus on blending traditional Italian recipes with modern flavors, ensuring authenticity and innovation. They emphasize using fresh, local ingredients to craft dishes that satisfy diverse tastes while maintaining a commitment to quality and customer satisfaction.

8.1 Chef’s Approach to Menu Creation

The chefs at Guido Pizza Chesterland OH blend tradition with innovation, crafting menus that reflect Italian heritage while incorporating modern flavors. They prioritize fresh, locally-sourced ingredients to ensure authenticity and quality. The menu is designed to cater to diverse tastes, offering both classic dishes and creative twists. Chefs focus on balancing robust flavors and textures, ensuring each dish is memorable. Regular menu updates reflect seasonal availability and customer preferences, maintaining a dynamic dining experience. This approach emphasizes family-friendly meals, with recipes often inspired by traditional Italian cooking, adapted to suit contemporary tastes. The chefs’ passion for quality and innovation shines through in every dish, making Guido Pizza a standout choice for authentic Italian cuisine.

8.2 Use of Fresh and Local Ingredients

Guido Pizza Chesterland OH prides itself on using fresh, locally-sourced ingredients to ensure the highest quality in its dishes. By collaborating with regional farms and suppliers, the restaurant maintains a commitment to sustainability and community support. Fresh vegetables, meats, and dairy products are carefully selected to enhance the flavors of their Italian-inspired menu. This dedication to local sourcing not only boosts the taste of their pizzas and pastas but also helps reduce their environmental footprint. The use of seasonal ingredients allows the chefs to create vibrant, authentic dishes that reflect the best of what Ohio has to offer, making every meal at Guido Pizza a testament to quality and freshness.

8.3 Balancing Tradition and Innovation

Guido Pizza Chesterland OH masterfully blends traditional Italian recipes with modern culinary innovations. The restaurant stays true to its heritage by preserving classic techniques and flavors, such as its signature thick-crust pizza. At the same time, it introduces creative twists, like unique topping combinations and seasonal specials, to cater to evolving tastes. This balance allows Guido Pizza to appeal to both long-time fans of traditional dishes and adventurous diners seeking something new. By respecting its roots while embracing change, the restaurant maintains a vibrant and dynamic menu that keeps customers coming back for more. This approach ensures a timeless dining experience that honors the past while staying relevant in today’s culinary landscape.

Guido Pizza Chesterland OH offers a delightful blend of authentic Italian flavors and family-friendly ambiance. Its menu, featuring classic pizzas and fresh ingredients, ensures a satisfying dining experience for all.

9.1 Final Thoughts on the Menu and Restaurant

Guido Pizza Chesterland OH stands out as a gem for Italian food lovers, offering a menu rich in flavor and tradition. The restaurant’s thick-crust pizzas, homemade pasta, and fresh ingredients have earned it a loyal following. Customers praise the cozy, family-friendly atmosphere and the staff’s attentive service. While some reviews mention occasional inconsistencies, the overall experience remains satisfying. The menu caters to diverse tastes, with options like vegetarian dishes and specialty pizzas. For first-time visitors, trying the signature thick-crust pizza or chicken parmesan is a must.
With its authentic Italian charm and commitment to quality, Guido Pizza Chesterland OH continues to be a beloved dining destination.

9.2 Recommendations for First-Time Visitors

First-time visitors to Guido Pizza Chesterland OH should start with the signature thick-crust pizza, a fan favorite. Try the chicken parmesan or homemade pasta for a taste of authentic Italian cuisine. The cozy, family-friendly atmosphere makes it perfect for all ages. For a well-rounded meal, pair your pizza with a fresh salad or garlic knots. Don’t hesitate to ask the friendly staff for recommendations, as they can guide you through the menu. Arrive early, especially on weekends, to ensure a smooth dining experience. Whether you’re a pizza lover or seeking classic Italian dishes, Guido Pizza offers a delicious and memorable meal that will leave you wanting more.

9.3 Future Expectations for Guido Pizza Chesterland

Guido Pizza Chesterland is expected to continue its legacy of serving authentic Italian cuisine with a focus on quality and customer satisfaction. Future plans likely include menu expansions, such as adding more vegetarian and gluten-free options to cater to diverse dietary needs. The restaurant may also introduce new promotions or seasonal specials to attract both loyal customers and newcomers. With its strong community ties, Guido Pizza could explore hosting more local events or partnerships to enhance its family-friendly atmosphere. By maintaining its commitment to fresh ingredients and traditional recipes, Guido Pizza Chesterland is poised to remain a beloved dining destination for years to come.

my very own towerstrategy guide

Welcome to My Very Own Tower Strategy Guide, your ultimate resource for mastering the mysterious Tower. Join Hoyeong Lee and Seoyeon Son as they navigate perilous missions, uncover hidden strategies, and dominate challenges. This guide offers expert tips, character insights, and gameplay breakdowns to help you rise to the top. Whether you’re a beginner or a seasoned player, this guide will equip you with the knowledge to succeed in this thrilling tower defense adventure.

Overview of the Game and Its Objectives

My Very Own Tower is a thrilling strategy game where players must ascend a mysterious Tower, overcoming waves of enemies and challenges. The objective is to survive and reach the top by strategically placing towers, managing resources, and utilizing special abilities. Players like Hoyeong Lee gain an edge with a secret strategy guide, while others, like Seoyeon Son, rely on their combat skills. The game combines tower defense mechanics with RPG elements, requiring players to adapt and optimize their strategies to progress. Mastering the Tower demands skill, teamwork, and a deep understanding of its intricacies.

Why Strategy is Key to Success

In My Very Own Tower, strategy is the cornerstone of progress. Each decision, from tower placement to resource allocation, directly impacts survival and advancement. Players must adapt to enemy patterns, optimize coin and gem usage, and leverage power-ups effectively. Without a well-thought-out plan, even the strongest towers can fail. Strategy ensures efficiency, helping players overcome challenges and reach higher levels. It also fosters creativity, as no two players will approach the Tower identically. Mastering strategy is not just about winning—it’s about evolving with the game and its demands.

Target Audience: Beginners and Advanced Players

This guide caters to both newcomers and experienced players, offering tailored strategies for all skill levels. Beginners will find clear, step-by-step advice to build a strong foundation, while advanced players can explore complex tactics and optimizations. Whether focusing on early-game survival or late-game dominance, the guide provides adaptable tips to suit individual playstyles. Its versatile approach ensures everyone can improve, making it an essential resource for anyone aiming to conquer the Tower and its challenges effectively.

Understanding the Basics of the Tower

The Tower is a mysterious, multi-level structure where players must survive waves of enemies. Its layout and mechanics are central to the game’s strategy and progression.

Structure and Layout of the Tower

The Tower is a multi-level structure where each floor presents unique challenges and enemy waves. Its layout is designed to test players’ strategic skills, with ascending difficulty as you progress. Each level introduces new enemy types, obstacles, and resource opportunities. Understanding the Tower’s design is crucial for optimizing tower placement and resource management. Hoyeong Lee and Seoyeon Son must navigate this labyrinthine structure, leveraging its layout to their advantage. The Tower’s secrets, revealed through a secret strategy guide, help players anticipate and overcome each mission’s hurdles.

Enemy Types and Their Weaknesses

The Tower features diverse enemy types, each requiring tailored strategies. Ground enemies, like heavy infantry, are slow but resilient, while flying enemies, such as aerial drones, demand anti-air towers. Special enemies, including bosses with unique abilities, appear at higher levels, necessitating advanced tactics. Hoyeong Lee’s secret guide reveals these weaknesses, enabling players to optimize their defenses. By understanding enemy patterns and vulnerabilities, players can deploy the right towers and adapt their strategies for success in each challenging mission.

Resource Management: Coins, Gems, and Power-Ups

Effective resource management is crucial for progression. Coins are essential for building and upgrading towers, while gems enhance tower abilities. Power-ups provide temporary boosts, turning the tide of battles. Hoyeong’s strategy guide emphasizes maximizing coin income through smart tower placement and enemy drops. Hybrid, Light, and Dark gem slots unlock unique enhancements. Efficient use of resources ensures long-term success, allowing players to adapt to increasing difficulty and dominate the Tower’s challenges with optimal strategic decisions.

Early Game Strategies

Focus on building a strong foundation by maximizing coin income and scouting missions. Prioritize essential towers and upgrades to withstand early enemy waves. Utilize power-ups wisely to gain an edge, and experiment with hybrid gems for enhanced abilities. Mastering these strategies ensures a solid start, setting you up for long-term success in the Tower.

Getting Started: Initial Setup and Priorities

Begin by setting up your tower’s foundation, focusing on essential towers and upgrades. Prioritize scouting missions to understand enemy patterns and strengths. Allocate resources wisely, maximizing coin income through strategic tower placements. Start with basic towers like archers or cannons, ensuring coverage across all paths. Upgrade towers early to boost their effectiveness and unlock new abilities. Utilize power-ups like speed boosts or damage multipliers during critical moments. Avoid overextending—focus on a balanced setup that allows flexibility. Finally, experiment with hybrid gems to enhance your towers’ versatility and prepare for the challenges ahead.

Choosing the Right Towers for Early Levels

For early levels, focus on versatile towers like archers or cannons, which provide balanced damage and range. Avoid overly specialized towers until you understand enemy patterns. Archer towers excel against flying units, while cannon towers handle grounded foes effectively. Prioritize towers with low upgrade costs to maintain flexibility. Experiment with hybrid gems to enhance your towers’ abilities. Avoid overextending—start with a few well-rounded towers and gradually expand as resources allow. This approach ensures early success and builds a strong foundation for later stages.

Essential Skills and Upgrades for Beginners

Mastering basic skills like resource management and tower upgrades is crucial. Prioritize coin income to fund early upgrades, ensuring your towers stay competitive. Focus on enhancing damage output and range for versatility. Invest in hybrid gems to boost tower abilities, and experiment with power-ups for added edge. Start with basic towers and upgrade them as you progress. Avoid overcomplicating setups—simplicity and adaptability are key. By focusing on these fundamentals, you’ll build a solid foundation for success in the early stages of the game.

Character Insights and Development

Dive into the world of My Very Own Tower with characters like Hoyeong Lee and Seoyeon Son; Unlock their unique abilities, synergies, and growth paths to dominate challenges. Focus on leveling up and mastering skills to enhance your gameplay experience and build a strong team dynamic.

Main Characters: Hoyeong Lee and Seoyeon Son

Meet Hoyeong Lee, an ordinary office worker thrust into an extraordinary adventure, and Seoyeon Son, a skilled assassin with a mysterious agenda. Hoyeong’s unique access to a strategy guide gives him an edge, while Seoyeon’s combat prowess makes her a formidable ally—or enemy. Together, they navigate the treacherous Apocalypse Tower, where survival depends on teamwork and strategy. Understanding their strengths, weaknesses, and evolving relationship is key to unlocking their full potential in the game. Their dynamic sets the stage for a thrilling journey filled with challenges and growth.

Character Abilities and Synergies

Hoyeong Lee’s access to a secret strategy guide grants him unique insights, allowing him to anticipate enemy patterns and set traps effectively. Seoyeon Son, a skilled assassin, excels in combat with her agility and precision. Their abilities complement each other: Hoyeong’s strategic mind pairs perfectly with Seoyeon’s combat prowess. Together, they can control enemy movements and deliver devastating attacks. Synergizing their strengths is crucial for overcoming challenges and surviving the Apocalypse Tower’s perilous missions. Their combined skills create a powerful alliance, making them a formidable team in the game.

Leveling Up and Unlocking New Skills

Leveling up is essential to unlock new skills and enhance abilities in My Very Own Tower. Hoyeong Lee’s strategic insights improve with each level, while Seoyeon Son’s combat skills become more refined. Players must accumulate coins and gems to upgrade abilities and unlock new strategies. As characters progress, their unique skills evolve, allowing for better synergy in missions. This progression system ensures players can adapt to increasing challenges and explore new ways to dominate the Tower. Continuous growth keeps the gameplay dynamic and rewarding.

Resource Management and Optimization

Mastering resource management is crucial for success in My Very Own Tower. Efficiently use coins, gems, and power-ups to optimize upgrades and towers. Light, Dark, and Hybrid gem slots enhance abilities, while coin income fuels progress. Strategic spending ensures long-term dominance, making resource optimization a cornerstone of your strategy. Balance and foresight are key to maximizing your potential in the Tower.

Maximizing Coin Income and Spending Wisely

In My Very Own Tower, maximizing coin income is vital for progress. Prioritize upgrading towers that generate coins and invest in early-game coin income boosts. Avoid unnecessary expenses and focus on essential upgrades. Use power-ups strategically to enhance coin drops during missions. Scouting enemies beforehand helps allocate resources effectively, ensuring you’re prepared for upcoming challenges. Wise spending ensures sustained growth, allowing you to dominate later stages. Balance immediate needs with long-term upgrades to maintain momentum and secure victory in the Tower.

Gem Slots: Light, Dark, and Hybrid Gems

In My Very Own Tower, gems are crucial for enhancing tower performance. Light gems boost defensive capabilities, while dark gems amplify offensive power. Hybrid gems offer flexibility, combining both effects. Strategically place gems in designated slots to maximize their impact. Light and dark gems are restricted to their respective slots, but hybrid gems can occupy either, providing versatility. Balancing gem types ensures well-rounded tower strength, making them indispensable for overcoming challenges and progressing through the Tower.

Efficient Use of Power-Ups and Boosters

Power-ups and boosters are game-changers in My Very Own Tower. Use them strategically to gain temporary advantages, such as increased damage or speed. Timing is key—deploy boosters during critical missions to maximize impact. Combine power-ups with gem-enhanced towers for amplified effects. Save boosters for challenging levels or boss fights to ensure progress. Efficient use of these tools ensures resource optimization and enhances overall performance, helping you dominate the Tower and unlock new strategies for success.

Tower Defense Mechanics

Master the fundamentals of tower placement, upgrades, and enemy counterplay. Strategically position towers to maximize damage output and exploit enemy weaknesses. Use traps and obstacles to funnel enemies into kill zones, ensuring efficient resource use and optimal defense. This section dives into the core mechanics that define your success in the Tower.

Basics of Tower Placement and Upgrades

Proper tower placement is crucial for maximizing damage and controlling enemy movement. Position towers in high-traffic areas to funnel enemies into kill zones. Prioritize upgrades that enhance damage output, range, and attack speed. Focus on towers that counter specific enemy types, exploiting their weaknesses. Upgrade towers strategically to unlock special abilities and improve efficiency. Combining different tower types creates powerful synergies, ensuring a robust defense. Regularly assess and adjust your layout as enemies evolve, keeping your strategy adaptable and effective.

Advanced Tower Strategies: Traps and Obstacles

Integrating traps and obstacles adds depth to your defense. Use spike traps to deal massive area damage and slow down enemies. Spring traps can launch enemies into clusters, maximizing tower efficiency. Place obstacles to create maze-like paths, forcing enemies into prolonged exposure to tower fire. Combine traps with high-damage towers for devastating results. Timing and positioning are key to maximizing their impact. Experiment with different setups to adapt to various enemy types and ensure a strategic edge in critical missions.

Defensive Synergies: Combining Towers for Maximum Effect

Defensive synergies are crucial for maximizing efficiency. Pair slow towers with high-damage dealers to prolong enemy exposure. Use area-of-effect towers alongside single-target specialists to handle crowds. Combine stun and trap towers to immobilize enemies, ensuring prolonged damage. Layering defenses with complementary abilities creates overlapping damage zones. Experiment with different tower combinations to exploit enemy weaknesses. This strategic layering ensures a robust defense, adapting seamlessly to various enemy types and attack patterns. Synergy is key to dominating even the toughest waves and missions in the Tower.

Progression Through the Tower

Mastering the Tower requires strategic progression. Scout missions to anticipate enemy waves, survive critical levels with precision, and adapt strategies to reach the final boss successfully.

Scouting Missions: Knowing Your Enemies

Scouting missions are crucial for understanding enemy patterns and strengths. By gathering intel on incoming waves, you can anticipate threats, optimize tower placements, and allocate resources effectively. Knowing enemy types and their weaknesses allows for tailored strategies, ensuring maximum efficiency in defense. This proactive approach not only enhances survival chances but also minimizes unnecessary resource wastage. Mastery of scouting missions is a cornerstone of progression, enabling players to adapt and overcome challenges as they ascend the Tower. It’s a vital skill for both beginners and advanced players alike.

Survival Tips for Critical Missions

Surviving critical missions requires meticulous planning and adaptability. Prioritize tower upgrades that target enemy weaknesses and maintain a steady coin income to reinforce defenses. Avoid overcommitting resources early, as unexpected waves can overwhelm unprepared players. Utilize power-ups strategically and focus on chokepoints to funnel enemies into kill zones. Stay vigilant and adjust your strategy as mission dynamics shift. Quick decision-making and resource management are key to enduring the most challenging missions and progressing upward in the Tower.

Reaching the Top: Final Boss Strategies

Conquering the final boss demands precise strategy and teamwork. Scout the boss’s attack patterns and weaknesses beforehand to tailor your tower placement. Focus on high-damage towers and traps that exploit these vulnerabilities. Ensure your coin income is maximized to afford last-minute upgrades. Deploy power-ups strategically during critical moments to turn the tide. Stay adaptable, as the boss may shift tactics mid-battle. Coordination with teammates and quick decision-making are essential to emerge victorious and reach the pinnacle of the Tower.

Team Composition and Collaboration

Building a Strong Team: Roles and Responsibilities

Building a strong team requires balancing roles and strengths. Hoyeong and Seoyeon’s collaboration showcases how diverse skills and communication lead to success. Adaptability is key in overcoming challenges together.

Building a strong team in My Very Own Tower is crucial for survival and progression. Each member brings unique skills and strengths to the table, and understanding their roles is key to success. Hoyeong Lee’s strategic mind and Seoyeon Son’s combat prowess exemplify how diverse abilities can synergize. Effective communication and collaboration ensure that tasks are divided evenly, maximizing efficiency. A well-rounded team adapts to challenges, leveraging individual strengths to overcome obstacles. This balanced approach is essential for reaching the Tower’s summit and thriving in its demanding environment.

Team Synergies: Combining Strengths for Success

Team synergies are the backbone of success in My Very Own Tower. By combining the unique strengths of each member, players can create powerful strategies that maximize efficiency; Hoyeong Lee’s strategic insights paired with Seoyeon Son’s combat prowess exemplify how complementary skills can lead to victory. Collaboration fosters adaptability, allowing teams to respond effectively to diverse challenges. When roles align and abilities synergize, the team becomes an unstoppable force, ensuring survival and progress in the Tower’s demanding missions. Mastering these synergies is key to overcoming even the toughest obstacles.

Communication and Coordination in Multiplayer

Effective communication and coordination are vital in multiplayer modes of My Very Own Tower. Clear callouts about enemy movements and resource allocation ensure seamless teamwork. Assigning roles based on strengths, like Hoyeong’s strategic planning and Seoyeon’s combat skills, maximizes efficiency. Real-time adjustments and adaptability during missions foster trust and unity. Strong communication not only enhances survival chances but also strengthens team bonds, making it easier to tackle the Tower’s challenges together. Coordination is the key to unlocking victory in this intense, cooperative environment.

Late Game Strategies

In the late game, focus on advanced tower builds and upgrades to tackle tougher enemies. Optimize resource management and explore endgame content for maximum rewards. Maintain momentum by adapting strategies and avoiding stagnation to ensure continuous progression and success in the Tower.

Advanced Tower Builds and Upgrades

Mastery of advanced tower builds and upgrades is crucial for late-game success. Specialize towers for specific enemy types, like heavy damage dealers or crowd controllers. Experiment with hybrid gem slots to enhance tower stats and versatility. Focus on upgrading key towers to maximize their damage output and survivability. Optimize tower placement in your layout to create powerful synergies. Invest in advanced tower abilities and unlock unique passive skills. Regularly update your tower compositions to counter evolving enemy patterns. Use booster cards and power-ups strategically to amplify your towers’ effectiveness in critical missions.

Endgame Content: Challenges and Rewards

Endgame content in My Very Own Tower offers intense challenges and rewarding milestones for dedicated players. Conquer exclusive tower levels, boss battles, and limited-time events for rare gems and unique towers. Participate in leaderboard competitions to showcase your skills and earn prestige rewards. Unlock hidden achievements and special power-ups by completing difficult missions. The endgame also introduces elite enemy types, requiring advanced strategies and optimized tower builds. Stay competitive by adapting to new challenges and maximizing your resource efficiency to dominate the tower’s ultimate trials.

Maintaining Momentum: Avoiding Plateaus

To avoid plateaus in My Very Own Tower, focus on continuous progression and adaptation. Experiment with new tower builds and strategies to stay ahead of challenges. Regularly upgrade your towers and unlock advanced gems to enhance your defense. Engage in daily missions and events for consistent rewards and experience. Stay updated with patch notes for new content and balance changes. By optimizing your playstyle and staying proactive, you can maintain momentum and overcome even the toughest obstacles in the tower. Keep adapting and pushing forward to achieve long-term success.

Advanced Tips and Tricks

Master My Very Own Tower with expert strategies. Optimize gem slots for maximum power, manage coins wisely, and leverage advanced tower builds. Experiment with unique combinations to outsmart enemies and dominate challenges. Stay adaptable and exploit game mechanics for success. Elevate your gameplay with these cutting-edge tips!

Hidden Gems: Exploiting Game Mechanics

Discover hidden strategies to exploit game mechanics in My Very Own Tower. Use scouting missions to anticipate enemy waves and optimize tower placements. Master gem slots by combining light, dark, and hybrid gems for enhanced power. Stack coin-income towers early to accelerate progress. Exploit enemy weaknesses using specific tower types and synergies. Experiment with unique tower combinations to create devastating effects. Learn to manipulate wave paths and timings to maximize damage output. These advanced techniques will give you a competitive edge and unlock new ways to dominate the Tower.

Optimizing Your Playstyle: Flexibility and Adaptation

Adaptability is key to success in My Very Own Tower. Adjust your strategy based on enemy types and tower strengths. Experiment with different tower combinations to counter unique threats. Stay flexible by upgrading towers dynamically and switching gem slots as needed. Learn to pivot between offense and defense seamlessly. Analyze enemy patterns and adapt your playstyle to exploit weaknesses. Continuous learning and quick decision-making will help you master the Tower’s challenges. Flexibility ensures you remain competitive in evolving missions and unexpected scenarios.

Mastering Hotkeys and Controls for Efficiency

Efficient gameplay in My Very Own Tower relies heavily on mastering hotkeys and controls. Familiarize yourself with keyboard shortcuts to quickly access towers, gems, and upgrades. Assign frequently used towers to number keys for rapid deployment. Use hotkeys to switch between sell, upgrade, and ability options seamlessly. This reduces downtime and allows for faster responses to enemy waves.

Practice control schemes to improve placement accuracy and speed. Regular use of hotkeys enhances multitasking, ensuring you can manage multiple towers and threats simultaneously. Mastering these mechanics gives you a competitive edge, especially in high-pressure missions and late-game challenges.

Additional Resources and Community Tips

Explore online forums, YouTube guides, and official updates for My Very Own Tower. Engage with communities for tips, tricks, and real-time strategies to enhance your gameplay.

Online Communities: Forums and Discord Servers

Join active forums and Discord servers dedicated to My Very Own Tower to connect with fellow players. These communities offer valuable tips, strategies, and real-time support. Engage with discussions, share insights, and learn from experienced players. Many servers host events, giveaways, and collaborative challenges, fostering a sense of camaraderie. Stay updated on the latest trends and optimizations by participating in these vibrant platforms. Your journey to the top of the Tower becomes easier with the collective wisdom of the community.

YouTube Guides and Streamer Insights

YouTube channels and streamers offer invaluable insights for mastering My Very Own Tower. Popular creators share detailed gameplay, tips, and strategies to help you progress. From tower builds to enemy counterplay, these guides cover it all. Streamers often showcase live gameplay, highlighting optimal playstyles and hidden mechanics. Many videos focus on early-game setups, gem optimizations, and advanced missions. Watching these can accelerate your learning curve and help you adapt to the game’s challenges. Stay updated with the latest trends and strategies by subscribing to these channels and engaging with the streaming community.

Official Updates and Patch Notes

Stay ahead with the latest official updates and patch notes for My Very Own Tower. Developers regularly release updates balancing gameplay mechanics, introducing new features, and revealing upcoming events. Patch notes detail changes to tower strengths, enemy behaviors, and gem slot mechanics. These updates often include bug fixes and quality-of-life improvements. By staying informed, you can adapt your strategies to the evolving meta and maximize your progress. Follow official channels to never miss critical updates that shape your tower-climbing journey and keep you competitive in the ever-changing world of the game.

Final Thoughts on Mastering the Tower

Mastering My Very Own Tower requires skill and persistence. With expert strategies and character insights, you’re ready to conquer challenges. Keep playing, adapt, and thrive in this epic adventure. Future updates await!

Mastering My Very Own Tower demands perseverance, adaptability, and a deep understanding of its mechanics. By leveraging scouting missions, optimizing resources, and honing character abilities, you’ll overcome even the toughest challenges. Embrace teamwork, experiment with strategies, and stay updated on the latest tips from the community. Remember, success in the Tower is a journey, not a destination. Keep learning, adapting, and pushing forward to reach new heights and unlock the full potential of your unique playstyle. The adventure continues!

Encouragement to Keep Playing and Learning

Every mission in My Very Own Tower is a step forward, even in defeat. Embrace challenges as opportunities to learn and grow. Experiment with new strategies, adapt to enemy patterns, and collaborate with teammates to overcome obstacles. The Tower is a journey of discovery, and every setback brings you closer to success. Stay persistent, stay curious, and keep exploring. With each level, you’ll unlock new insights and strengths, ensuring your progress is unstoppable. The adventure awaits—keep climbing and never stop striving for greatness!

Looking Ahead: Future Updates and Expansions

The world of My Very Own Tower is constantly evolving, with new updates and expansions promising fresh challenges and opportunities. Future patches may introduce new tower types, enemy variations, or even additional characters like Seoyeon Son, enhancing gameplay depth. Developers are also expected to unveil new story arcs, expanding the lore and missions. Stay tuned for balance changes, quality-of-life improvements, and community-driven features. The adventure doesn’t end here—new content will keep the Tower dynamic and exciting, ensuring endless possibilities for players to explore and master.

hotline miami 2 trophy guide

Welcome to our comprehensive guide on how to unlock all the trophies in Hotline Miami 2: Wrong Number. With a total of 29 achievements/trophies on PC‚ PS4‚ PS3‚ and Vita‚ this game offers a challenging yet rewarding experience for players. In this guide‚ we will walk you through the steps to unlock each trophy‚ including the secret ones.

Trophy List

Here is a breakdown of the 29 trophies in Hotline Miami 2: Wrong Number:

  • 9 Bronze Trophies
  • 14 Silver Trophies
  • 5 Gold Trophies
  • 1 Platinum Trophy

You can view the full list of trophies on the PlayStationTrophies.org website.

Unlocking Trophies

Most of the trophies in Hotline Miami 2: Wrong Number have a clear description of how to unlock them. However‚ there are three secret trophies that only reveal their description once unlocked. To unlock these secret trophies‚ you will need to complete specific tasks or achieve certain milestones in the game.

One of the most challenging trophies to unlock is the platinum trophy‚ which requires you to complete the game and unlock all other trophies. This trophy is a testament to your skills and dedication to the game.

Tips and Strategies

To unlock the trophies in Hotline Miami 2: Wrong Number‚ you will need to develop a range of skills and strategies. Here are some tips to help you get started:

  • Learn the levels: Take the time to learn the layout of each level‚ including the location of enemies‚ weapons‚ and hidden items.
  • Be observant: Keep an eye out for off-screen gunfire and other hazards that can harm you.
  • Use stealth: Use stealth and strategy to sneak past enemies and complete objectives without being detected.
  • Practice makes perfect: Don’t be discouraged if you don’t unlock a trophy on your first try. Keep practicing‚ and you will eventually get it.

Unlocking all the trophies in Hotline Miami 2: Wrong Number is a challenging but rewarding experience. With this guide‚ you should be well on your way to unlocking all 29 trophies and earning the coveted platinum trophy. Remember to stay focused‚ be patient‚ and keep practicing‚ and you will be a Hotline Miami 2 trophy master in no time.

Additional Resources

If you’re looking for more information on Hotline Miami 2: Wrong Number or need additional help unlocking trophies‚ be sure to check out the following resources:

  • PlayStationTrophies.org: This website has a comprehensive list of trophies for Hotline Miami 2: Wrong Number‚ as well as guides and tips for unlocking them.
  • Hotline Miami 2: Wrong Number Wiki: This wiki has a wealth of information on the game‚ including level guides‚ character profiles‚ and trophy information.

We hope this guide has been helpful in your quest to unlock all the trophies in Hotline Miami 2: Wrong Number. Happy gaming!

tour de france official guide 2024

The official guide provides essential information and insights for fans and cyclists, covering the 111th edition of the Tour de France, with a comprehensive overview of the event and its participants, available now for purchase online.

Standard and Premium Editions of the Official Guide

The Tour de France Official Guide 2024 is available in two editions, the Standard Edition and the Premium Edition, each offering a unique set of features and content. The Standard Edition costs 11.99 and can be purchased directly from the publisher, making it an affordable option for fans. The Premium Edition, priced at 17.99, offers additional exclusive content and insights, making it a great choice for serious cycling enthusiasts. Both editions provide a comprehensive overview of the Tour de France, including stage-by-stage insights and detailed profiles of participating teams. The official guide is a must-have resource for anyone looking to stay up-to-date on the latest developments and news from the world of professional cycling. With its in-depth analysis and expert commentary, the guide is an essential tool for fans and cyclists alike, providing a deeper understanding of the sport and its participants. The guide is available to order now, with the Standard Edition still in stock.

The Route of the Tour de France 2024

The route spans from Florence to Nice, covering various terrains and stages, with the official guide providing detailed maps and descriptions of each segment, helping fans navigate the course, every step of the way always.

Stage 1: Florence to Rimini

The first stage of the Tour de France 2024 takes place on June 29, starting in Florence, Italy, and ending in Rimini, a scenic seaside town. This initial stage is approximately 205 kilometers long, featuring a mix of terrain that will challenge the cyclists. The peloton will roll through the picturesque regions of Tuscany and Emilia-Romagna, offering breathtaking views of the Italian countryside. As the cyclists make their way to the finish line, they will encounter some 3700 meters of climbing, making this stage an exciting and demanding start to the competition. The official guide provides detailed information about this stage, including maps, profiles, and expert analysis, helping fans to better understand the challenges and strategies involved. With its unique blend of scenic landscapes and rigorous terrain, Stage 1 from Florence to Rimini is an event not to be missed, setting the tone for the rest of the Tour de France 2024. The stage is expected to be a thrilling opener to the tournament.

Importance of the Official Guide for Fans and Cyclists

The official guide is crucial for fans and cyclists, providing valuable insights and information to enhance their experience of the Tour de France 2024, with expert analysis and detailed coverage.

Where to Find More Information

To get the most out of the Tour de France 2024, fans and cyclists can find more information in the official guide, which is available for purchase online from the publisher’s website. The guide provides a comprehensive overview of the event, including stage-by-stage insights and exclusive interviews with key contenders. Additionally, fans can visit the official Tour de France website for updates, news, and behind-the-scenes information. The website also features a detailed route map, team profiles, and rider information, making it a valuable resource for anyone looking to stay up-to-date with the latest developments. By combining the official guide with the website, fans can gain a deeper understanding of the Tour de France 2024 and enhance their overall experience of the event. The official guide and website are essential tools for anyone looking to get the most out of the Tour de France 2024, providing a wealth of information and insights to enjoy the event to the fullest.

Comprehensive Coverage of the Tour de France 2024

The official guide offers detailed coverage of every stage, including profiles and interviews with key riders and teams, providing a complete overview of the event and its participants always online now.

Exclusive Interviews and Insights

The official guide features exclusive interviews with key contenders, offering unique insights into their strategies and preparations for the race, as well as their thoughts on the challenging route and their expectations for the event.

These interviews provide a fascinating glimpse into the minds of the riders, and offer a level of depth and analysis that is not available elsewhere, making the official guide a must-have for fans and cyclists alike.

The guide also includes insights from team managers, coaches, and other experts, providing a comprehensive understanding of the teams and riders, and the factors that will influence the outcome of the race, with detailed analysis of the route and its challenges.

The exclusive interviews and insights in the official guide are a major part of its appeal, and are a key factor in its popularity among fans and cyclists, who appreciate the unique perspective and expertise that they offer, with a total of in this section.

Understanding the Route and Stages

The route spans 21 stages with varying terrain and challenges, requiring a deep understanding of each stage to appreciate the race, with the official guide providing detailed stage profiles and analysis always.

Essential Information for Cycling Enthusiasts

The official guide is a valuable resource for cycling enthusiasts, providing detailed information on the teams, riders, and stages of the Tour de France. With exclusive interviews and insights, fans can gain a deeper understanding of the race and its participants. The guide also includes essential information on the route, including stage profiles, terrain, and challenges, allowing enthusiasts to plan and follow the race with ease. Additionally, the guide offers analysis and commentary from experienced cycling journalists and experts, providing unique perspectives and insights into the world of professional cycling. Whether you’re a seasoned fan or a new enthusiast, the official guide is the perfect companion to the Tour de France, offering a wealth of information and expertise to enhance your enjoyment of the race. With its comprehensive coverage and in-depth analysis, the guide is an indispensable resource for anyone looking to stay up-to-date with the latest developments in the world of cycling.