Costco Deep Dish Pizza: A Comprehensive Guide
Navigating the delicious world of Costco’s deep dish pizza requires understanding optimal cooking methods for a truly satisfying experience.
This guide details instructions, ensuring a perfectly baked pizza every time, from preheating to achieving a crispy crust.
Costco’s deep dish pizza, a collaboration with Motor City Pizza Co., has quickly become a fan favorite, offering a taste of Detroit-style pizza to a wider audience. This isn’t your average pizza; it’s a substantial, thick-crust delight designed for sharing – or enjoying solo over multiple meals!
The appeal lies in its generous toppings, particularly the Double Pepperoni variety, and a uniquely crispy, buttery crust. However, achieving that perfect bake requires a bit more attention than a standard pizza. Understanding the specific cooking instructions is key to unlocking its full potential.

This guide will walk you through everything you need to know, from preheating your oven to troubleshooting common issues, ensuring a consistently delicious experience with every Costco deep dish pizza purchase.
Understanding the Motor City Pizza Co. Brand
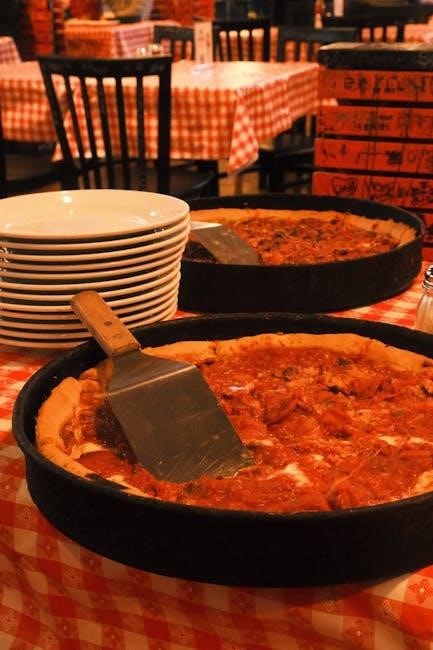
Motor City Pizza Co. embodies the spirit of Detroit-style pizza, renowned for its square shape, thick, airy crust, and generous cheese application. This style, born in Detroit, utilizes a steel pan to create a uniquely crispy and caramelized edge. Costco’s partnership brings this authentic experience to its members, offering a convenient way to enjoy a regional specialty.
The key to Motor City’s success lies in the dough’s high hydration and extended fermentation, resulting in a light and flavorful base. Their pizzas are characterized by the sauce being applied after the bake, preserving its fresh tomato flavor.
Knowing this background helps appreciate why specific cooking instructions are crucial – replicating the Detroit-style experience requires attention to detail, even when baking from frozen at home.
Costco Availability and Delivery Options
Costco’s Motor City Pizza Co. deep dish pizza is primarily available in select warehouses, though availability can vary. Checking your local Costco’s inventory online or via the Costco app is recommended before making a trip. Beyond in-store purchases, Costco offers grocery delivery, but with limitations.
Delivery options include a 2-Day Delivery service for non-perishable items, incurring a $3 surcharge per item. However, frozen pizzas like the deep dish may not always qualify for this service due to temperature requirements. Costco grocery delivery is restricted to one address per order and requires a valid Costco membership.
For immediate access, visiting a warehouse remains the most reliable option.
Grocery Delivery Limitations

Costco’s grocery delivery service, while convenient, presents specific limitations regarding frozen items like the deep dish pizza. Availability is restricted to select markets and necessitates an active Costco membership for ordering. The 2-Day Delivery option, applicable to non-perishable goods, adds a $3 surcharge per item, but often excludes frozen pizzas due to temperature control challenges during transit.
Furthermore, delivery is capped at one address per order, potentially impacting bulk purchases. If your membership has lapsed, renewal is possible online within 90 days of expiration, or in-person/via phone at any time.
Ultimately, relying on in-warehouse shopping offers the most consistent access to this popular pizza.
Membership Requirements for Ordering
Accessing Costco’s Motor City Pizza Co. deep dish pizza, whether in-store or through delivery, fundamentally requires a valid Costco membership. This applies to all purchase methods, ensuring member-exclusive pricing and benefits. Without an active membership, obtaining the pizza directly from Costco is impossible.
If your membership has expired, convenient renewal options exist. You can renew online within a 90-day grace period post-expiration, or instantly at any Costco warehouse checkout register. Phone renewal is also available.
For immediate access, renewing at the register during a shopping trip is the quickest solution, unlocking the ability to enjoy this popular pizza.
Costco Deep Dish Pizza: Varieties Available
Currently, Costco primarily offers the Motor City Pizza Co. Deep Dish Pizza, specifically the Double Pepperoni variety. This Detroit-style pizza comes in a convenient two-pack, providing ample servings for families or gatherings. While Costco’s pizza selection rotates, the Double Pepperoni deep dish remains a consistent favorite.
The pizza is characterized by its thick, crispy crust and generous toppings. It’s designed for a satisfying, hearty meal. Although other flavors haven’t been consistently available, Costco occasionally introduces limited-edition deep dish options, so checking your local warehouse is worthwhile.
Focus remains on delivering a high-quality, flavorful deep dish experience with the core Double Pepperoni offering.
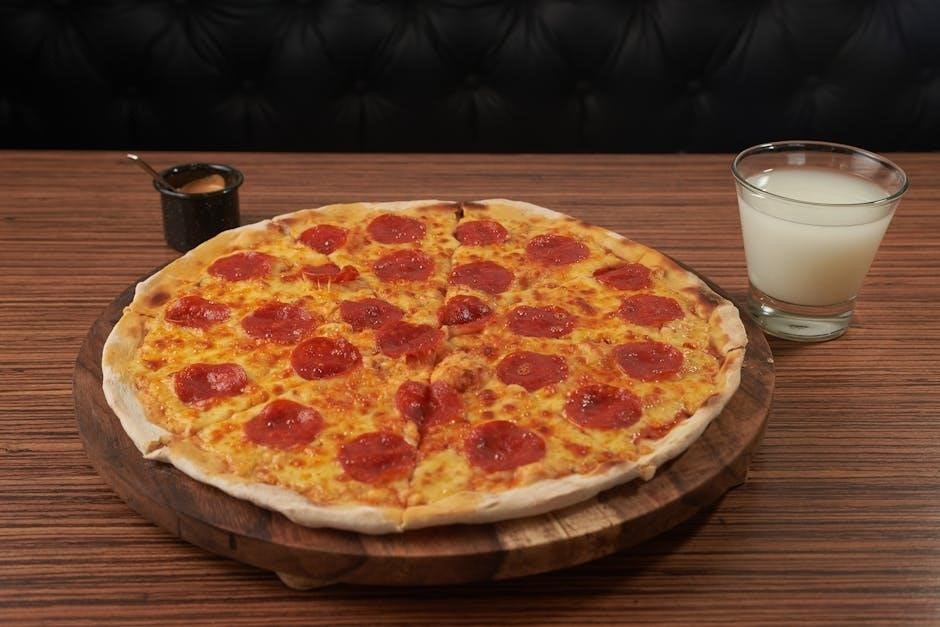
Double Pepperoni Deep Dish Pizza
The Costco Motor City Pizza Co. Double Pepperoni Deep Dish Pizza is a standout offering, boasting a thick, buttery crust and abundant pepperoni slices. This Detroit-style pizza features a generous layer of cheese, extending to the edges for a delightful, caramelized finish. The two-pack provides substantial value, perfect for sharing or enjoying over multiple meals.
Reviewers note the increased cheese thickness requires slightly longer cooking times to achieve optimal browning. The pizza is delivered with a tray designed for a crispy crust, but direct baking on a sheet enhances bottom crispness.
Expect a rich, garlicky flavor profile alongside the savory pepperoni, creating a truly indulgent pizza experience.
Detailed Cooking Instructions
Achieving pizza perfection with Costco’s deep dish requires following a few key steps. Begin by removing the pizza from its plastic wrapper, but crucially, keep it in the provided tray. This tray is specifically designed to promote a crispy crust during baking. Place the pizza on the center rack of your oven – avoid using the broil function throughout the cooking process.
For those desiring an even crispier bottom, a modification is recommended: transfer the pizza directly onto a baking sheet during the final 23 minutes of baking.
Always monitor doneness a few minutes early, as oven variations exist.
Preheating the Oven
The foundation of a perfectly cooked Costco deep dish pizza lies in proper oven preheating. Before even considering unwrapping the pizza, ensure your oven is fully preheated to 425 degrees Fahrenheit. This precise temperature is critical for achieving the desired balance of a cooked-through center and a delightfully crispy crust.
Allow sufficient time for the oven to reach the set temperature – typically around 15-20 minutes. A properly preheated oven guarantees even heat distribution, preventing undercooked spots or a soggy base.
Confirm the oven has reached 425°F before proceeding to the next step in the cooking process.
Initial Baking Phase (with Tray)
Begin the baking process by leaving the Costco deep dish pizza in its included tray. Remove the plastic wrapper, but crucially, keep the pizza nestled within the tray for the initial phase of cooking. Place the trayed pizza on the center rack of your preheated 425°F oven.
Avoid using the broiler during this stage; consistent, even heat is key. This initial bake, typically lasting around 23-25 minutes, allows the cheese to melt beautifully and the toppings to begin setting. The tray helps contain the generous toppings and contributes to a more even cooking experience.
Monitor closely, but resist the urge to open the oven frequently.
Optimizing for a Crispier Crust
For those desiring a truly crispy crust, a simple adjustment to the baking method yields fantastic results. After the initial 23-25 minutes of baking with the tray, carefully remove the pizza from the tray. Transfer it directly onto a baking sheet – this is the crucial step!
Continue baking for an additional 2-3 minutes. This direct contact with the hot baking sheet allows the bottom crust to crisp up beautifully, achieving that desirable, slightly browned texture. Always check for doneness a couple of minutes early, as oven variations exist.

This method delivers a buttery, garlicky, deep-dish crunch throughout the entire pizza.
Directly on Baking Sheet Method
To achieve maximum crispiness, employing the “directly on baking sheet” method is highly recommended. After the initial baking phase – approximately 23-25 minutes with the included tray – carefully remove the pizza from its original container.
Transfer the pizza directly onto a preheated baking sheet. This eliminates the insulating effect of the tray, allowing for direct heat transfer to the crust. Continue baking for the final 2-3 minutes, closely monitoring for desired browning and crispness.
This technique ensures a delightfully crunchy bottom crust, complementing the thick, cheesy interior. Remember to check doneness early, as oven temperatures can vary.
Monitoring Doneness
Accurately assessing doneness is crucial for a perfectly cooked Costco deep dish pizza. Begin checking the pizza a few minutes before the recommended baking time concludes, as oven variations exist.
Look for a golden-brown and bubbly cheese layer, indicating thorough heating. The crust should be firm to the touch and exhibit a pleasing golden-brown color. Gently lift a corner to inspect the underside – it should be crisp and not doughy.
If the cheese isn’t fully melted or the crust lacks color, continue baking in 2-3 minute increments, checking each time. Avoid overbaking, which can lead to a dry or burnt pizza.
Recommended Baking Time & Temperature
For optimal results, preheat your oven to 425°F (218°C) before beginning the baking process. This ensures even cooking and a delightfully crispy crust. Costco’s Motor City Pizza Co. deep dish pizza benefits from a consistent temperature throughout baking.

The standard baking time is approximately 25-28 minutes when utilizing the included tray. However, this is a guideline; always monitor doneness as described previously. If opting for the directly-on-baking-sheet method for increased crispness, reduce the final baking time by a few minutes.
Remember to place the pizza on the center rack and avoid broiling, as this can burn the cheese before the crust is fully cooked.
Standard Baking Time (425°F)
When baking Costco’s Motor City Pizza Co. deep dish pizza at the recommended 425°F (218°C), a baking time of 25 to 28 minutes generally yields excellent results. This timeframe applies when the pizza remains in the provided tray throughout the entire cooking process.
Initially, ensure the oven is fully preheated to guarantee consistent heat distribution. Place the pizza on the center rack, avoiding any contact with the oven walls. Do not broil, as this can lead to uneven cooking and a potentially burnt top layer before the base is adequately heated.
Monitor the pizza closely during the final few minutes, checking for a golden-brown crust and bubbling cheese.
Troubleshooting Common Issues
Encountering issues while baking Costco’s deep dish pizza is common, but easily addressed. Unevenly cooked pizza often stems from inconsistent oven temperatures; ensure proper preheating and avoid opening the oven door frequently during baking. If the center remains pale, consider rotating the pizza halfway through;
Soggy crust prevention is crucial. Utilizing the provided tray helps, but for extra crispness, transfer the pizza directly onto a baking sheet during the last 23 minutes of cooking. Always check for doneness a couple of minutes early, as oven variations exist.
Remember, thorough cooking is key – trust the process and allow sufficient baking time!
Unevenly Cooked Pizza
Addressing an unevenly cooked Costco deep dish pizza requires a focused approach to heat distribution. The most frequent cause is an inconsistent oven temperature, so verifying accurate preheating to 425°F is paramount. Avoid repeatedly opening the oven door during the baking process, as this disrupts the internal heat.
If the center appears undercooked while the edges are browned, rotating the pizza halfway through the baking time can significantly improve results. This ensures all sections receive equal exposure to the oven’s heat.
Careful monitoring and slight adjustments can transform a patchy bake into a perfectly cooked pizza!
Soggy Crust Prevention
Preventing a soggy crust with Costco’s Motor City Pizza Co. deep dish is achievable with a few key techniques. Utilizing the included tray initially is crucial, as it promotes airflow and helps crisp the bottom. However, for enhanced crispness, consider a direct-to-baking-sheet method during the final 2-3 minutes of baking.
Removing the pizza from the plastic wrapper while keeping it in the tray before baking is essential. Avoid adding extra toppings that release moisture. Ensuring thorough cooking, especially in the center, prevents a doughy, soggy base.
A well-baked crust is the foundation of a great deep-dish experience!

Costco App & Store Hours Information
Locating your nearest Costco warehouse and checking its specific operating hours is easily done through the official Costco app. Available for free download on both iTunes and Google Play app stores, the app provides convenient access to store details, including addresses and contact information.
Executive members may enjoy exclusive early shopping hours at select locations as of June 30, 2025. Always verify these hours within the app, as availability varies by warehouse. The app also streamlines membership management and renewal processes, ensuring uninterrupted access to Costco’s offerings, including the popular deep dish pizza!
Plan your pizza run accordingly!
Locating Costco Warehouses
Finding a Costco warehouse to purchase the Motor City Pizza Co. deep dish pizza is straightforward. The most convenient method is utilizing the official Costco app, available on both the iTunes and Google Play app stores. This app features a store locator function, pinpointing the nearest warehouses based on your location.
Alternatively, Costco’s website offers a comprehensive warehouse directory. Simply enter your zip code to generate a list of nearby locations, complete with addresses and phone numbers. Remember to check store hours before heading out, as they can vary. Planning your trip ensures you don’t miss out on grabbing this popular pizza!
Don’t forget to check for availability!
Executive Member Early Shopping Hours
Costco Executive members often enjoy exclusive benefits, including potential early shopping hours at select warehouse locations. As of June 30, 2025, these earlier access times may be available, offering a prime opportunity to secure the coveted Motor City Pizza Co. deep dish pizza before it sells out.
However, it’s crucial to verify if your local Costco participates in this program. The availability of early hours varies by warehouse, so checking store details directly is essential. You can find this information within the Costco app or on the Costco website’s store locator; Taking advantage of these hours guarantees first dibs!
Don’t miss out on this perk!
Costco Pizza Renewal & Membership Details
Maintaining an active Costco membership is essential for enjoying the Motor City Pizza Co. deep dish pizza and other warehouse benefits. If your membership has lapsed, renewal is straightforward, ensuring uninterrupted access to your favorite pizza. You can renew online within 90 days of expiration, or conveniently in person at any Costco warehouse register during checkout.
Alternatively, membership renewal is also available via phone. Don’t let an expired card prevent you from indulging! Renewing at the register while purchasing the deep dish pizza is the quickest solution. A valid membership unlocks access to exclusive items and savings, making every pizza purchase even more rewarding.
Keep your membership current!
Renewing Expired Memberships

Don’t let an expired Costco membership stand between you and a delicious Motor City Pizza Co. deep dish pizza! Fortunately, Costco offers flexible renewal options to quickly restore your access. You have a 90-day grace period after your expiration date to renew online, allowing continued enjoyment of warehouse benefits and pizza purchases.
For immediate access, the most convenient method is renewing in person at the register while checking out. This allows you to grab a pizza and reinstate your membership simultaneously. Phone renewal is also available for those preferring a direct approach.
Ensure uninterrupted pizza enjoyment – renew today!